Month: October 2016

How To Quickly Boost Your Savings

quickly boost your savings

If you’re like me then you just love seeing your savings account and retirement accounts grow.  It is such a great feeling to watch it increase month after month.  I love the peace of mind a happy savings account gives me.  After our little one was born he was put into the NICU for a few days since he was losing too much weight.  Then afterwards we had to do physical therapy every week for 3 months.  I wasn’t that nervous to see our insurance bills come in.  We have insurance, but we knew we still had to pay any deductibles and co-pays.  Now, it was still a lot of money to payout.  But it could have been a lot worse if we didn’t have our savings built up.  

I’m not going to lie, it took some time to get the account back to where it needed to be, but I’m happy to say we’re there.  J and I buckled down to boost our savings.  There’s a few reasons you want to build your savings:

Prepare for the unexpected.

Peace of mind.

Tool to help cut your spending.

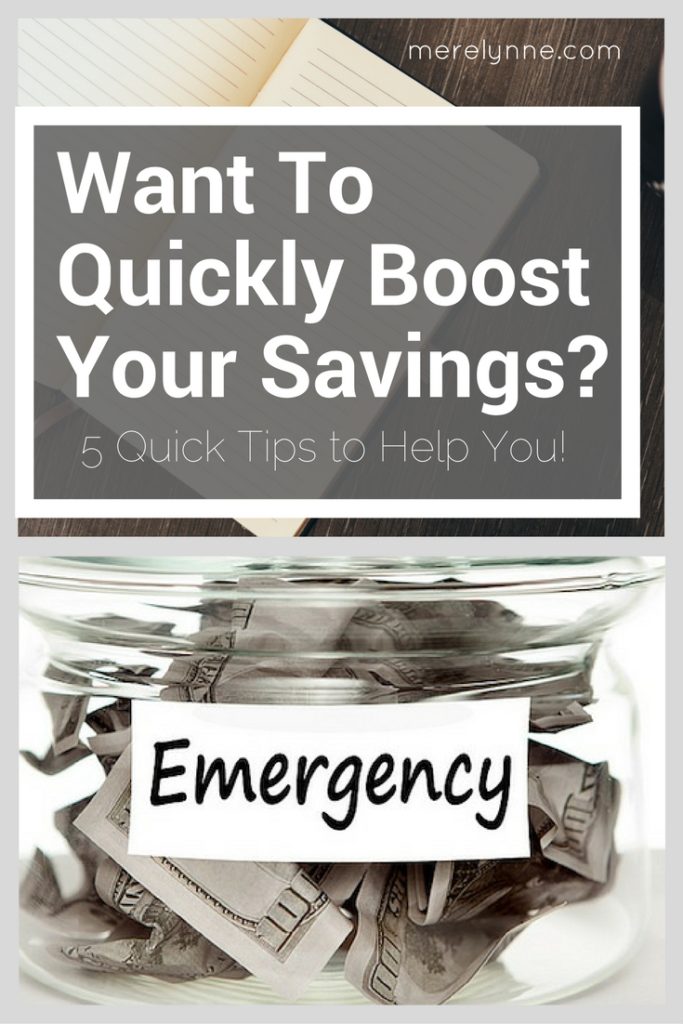
I’m sharing a few ways to quickly boost your savings account balance.

When you think about starting a savings account or working on getting to a certain threshold (I recommend starting with $1,000) then it can get overwhelming.  I find that when people get overwhelmed they tend to shut down. If you shut down then you will probably procrastinate and never actually start saving. I like to break bigger goals down into smaller, more manageable ones.

I’ve come up with some quick ways to start building your savings account.

They don’t take but a few minutes to set up and can really make a different in your money goals.

Establish an automatic transfer.

Okay, this seems like an easy answer, but so many people don’t utilize it.  Most banks (like almost all of them) allow you to setup an automatic, recurring transfer between accounts.  So, go in and set one up.  Create it to happen on your actual payday so as soon as money goes in, it goes right back out.  I recommend the minimum amount to be 10% of your take home pay; however, you should really push yourself to do more until you reach that $1,000 balance.  

See if your employer can split your paycheck.

If you would prefer to never have the money hit your account, then see what your employer can do.  A lot of employers are opting for automatic deposits on payday.  Which makes it so much easier for you!  The last few employers I had allowed me to split my paycheck between two accounts.  I could specify either a dollar amount or percentage split between the two accounts.  This way that money will never, ever hit your checking account.  

Put back 10% of each paycheck.

A great way to save more money is budget for at least 10% of each paycheck goes into your savings account.  Even if you don’t have a way to do automatic transfer, you should still be putting back 10%.  Now if you want an extra boost to your savings account, then increase that amount.

Treat it like an expense.

Putting money away for a rainy day should be treated like an expense on your budget.  I’ve talked about this before, but you should pay yourself first.   That means to put money back in your savings.  Treat savings as an expense that must be taken care of ASAP each and every month.

Break it up into weekly payments.

To make it seem less like a burden, you should break your monthly savings amount into weekly chunks.  It helps take the pressure of a large transfer and makes the amounts much more manageable. 

If you have any other quick ways to boost your savings, please feel free to share them below. I’m always looking for handy money tips.

Quick Tips to Avoid Holiday Stress

tips to avoid holiday stress

It’s hard to imagine how it’s already the middle of October.  I feel like it was just yesterday I was putting away my jackets and pulling out my shorts for summer weather.  Now here I am pulling them back out.

Funny story about yours truly.  I had misplaced my house key months ago.  I had tore apart my house, looked through purses, cleaned out drawers, even searched my in-laws home thinking I had left it during a visit.  I seriously could not find it anywhere.  Which wasn’t a huge deal because our house has an electronic keypad through our garage so I didn’t really need it.  But it was driving me crazy because I never lose anything.  Sure, I may misplace something for a short time, but I never actually lose anything.

Fast forward to last weekend and it was a bit chilly in the morning.  I pulled out my jacket and tossed it on.  About an hour later I reached my hand in the pocket and you know what I found? Yep! My house key!  I couldn’t believe it.  After months of searching I had found it.  It never occurred to me to look in my jacket pocket.

I placed my jacket up about the time our little guy was born so I guess between the commotion of having a newborn I forgot.  I hate to lose things and feeling stressed about things, that’s why I am such a planner.  

I love saving time, which also means saving money.  Because if you can plan way ahead then you’re sure to find good deals and save up the money you need.

It might seem pretty early to start thinking about the holidays, the reality is that most of us are too busy and it will be here before we know it.

Now, I’m not the local hobby store and I’m not recommending pulling out those decorations just yet.  But I have created a few quick tips on how to avoid holiday stress.  If you do these now then it will really save you later on when the holiday season is in full swing.  These tips will only take an hour or two at most and it will be well worth it!

Prioritize Your Yes

Sit down with your spouse and get on the same page about holidays.  If you plan now and know what’s important to you and your family then you will avoid holiday burnout.  Now is the time to know what Thanksgiving or Christmas will look like, who’s house are you going to be at, etc.  That way when invitations start rolling in then you and your spouse will know if it’s a “yes” or a “sorry we can’t.”

Establish Your Budget

Sit down and write out every event, gift, and upcoming expense you’re going to have that is out of the ordinary.  I create a spreadsheet in Google Sheets to help narrow down who, what, and how much.  That way I can keep an eye out for sales.  Plus, having a budget really helps keep you accountable.  You can check out my process on how I do Christmas on budget.

Make Your Gift List

This goes with the budget section up above.  By creating your gift list now then you can have more time to buy what you need.  I created my list last week and it has been a life saver.  J and I sat down decided a good idea of what we wanted to get everyone then I created my budget from my list.  

Plan Your Holiday Menu

I’m not saying it’s time to make the pie or Christmas cookies, yet.  Most grocery stores will advertise items at ridiculously low prices to get you to come in. So if you have an idea of what you need to get for November and December then you can add it to your normal grocery shopping.  By breaking down your holiday grocery shopping way in advance then you’ll be able to save money and not have a huge bill later down the road.

What do you think?  What else would you add to avoid holiday stress?  

Freezer Lemon Pepper Chicken for the Slow Cooker

*Affiliate Disclosure: Please note that when you click links and purchase items, in most (not all) cases I will receive a referral commission. You will not pay more when buying a product through my link.

slow cooker lemon pepper chicken, freezer meal, freezer friendly

I’m not sure about your family, but we get in a dinner rut a lot around here. I feel like I make the same 5 dishes over and over again Sometimes it’s with chicken, hamburger or turkey meat, but overall it’s the same meal. I know why I always tend to make them too…

They’re easy to prepare.
They don’t require a ton of different ingredients.

I wanted to break out of our shell. Try something new for a change, but it had to fit my criteria for an easy dinner.

On Wednesdays we drive 30 minutes one-way to go bowling every week. We have to leave the house no later than 5:45 to make it there on time. So I prefer a slow cooker meal those nights. I pop the ingredients in the crock pot in the morning and then J can finish up when he gets home a little before 5. That way when I walk in the door I’m not rushing around making dinner.

I hate feeling rushed!

I always get flustered and end of forgetting something.

With a little prep time I pulled together an easy slow cooker meal for this week. On Sunday I prepped a freezer bag full of chicken and a few ingredients, popped it in the freezer then the night before I pulled it out to place in the fridge. That’s all it took for a freezer lemon pepper chicken meal. Simple.

Remember my criteria for a good weeknight dinner?  This one fits them all!

It’s easy to prepare.

It doesn’t require a lot of ingredients.

I also love my slow cooker.  I got as a gift a few years ago and it has earned every penny it costs!  I love that it has a timer, so I can set it to low for 6 hours and then it automatically switched to the keep warm setting.  No more burnt or overcooked dinners!  Here is a Hamilton Beach slow cooker similar to the one I have.  This one is great because it has a strap to seal the lid when traveling.   

freezer lemon pepper chicken slow cooker

[yumprint-recipe id=’3′] 

Newborn Must Haves We Love

*Affiliate Disclosure: Please note that when you click links and purchase items, in most (not all) cases I will receive a referral commission. You will not pay more when buying a product through my link.

newborn must haves on a budget

 Our little Baby is going to be 6 months old tomorrow (what?!?!).  I know he is no longer considered a newborn (cue the tears!), but having a baby doesn’t necessarily mean you’re always going to be on time with things now.  Hence this post being so late!  

He’s our first, so we had a lot of learning to do those first three months.  It’s no lie we developed a serious crush on some of his stuff and wanted to share our newborn must haves. I wanted to share what we loved and what didn’t work out too great for us.

I tried to keep these newborn must haves within our budget so these are budget friendly items. The ones that seem a bit high are well worth the investment. I would recommend registering for most of these (if not all) for your baby shower.

For Sleep

Fisher Price Rock N Play – He loves to sleep in this during the day while I’m working around the house. He isn’t crazy about the rocking being turned on yet, but he does like the vibrations. I think the elevation is really nice and what he likes so much about it. Plus it’s light, so we can travel with it easily. I like to take it with me when I shower so I can peer out to make sure he’s okay.

dockatot

DockATot – this purchase has been a lifesaver for us!  He loves it, which means he’s sleeping great at night.  We love it because he’s sleeping great, but also because we feel safe with him being in the bed with us.  Plus, when we travel we just take the DockATot with us.  He’s familiar with the DockATot so he goes right to sleep no matter where we are.

Tummy Time

Boppy Pillow – we use this for tummy time, feedings, and sitting up. It works great for tummy time since he’s cushioned all around. I love that case comes off and is machine washable. I like to wash it a few times a week just to keep it nice and clean since he puts his face on it.

Fisher Price Play Gym – we received this play mat during one of my showers. It’s great. With three dogs running around we aren’t crazy about Baby being on the bare floor, so we put this down. It’s cushioned and has a play gym over it for when we lay him on his back.

Mommy Saver Lite App – it flashes shapes and designs that are mostly black and white, but they do throw in some colors.  It also plays a pretty soothing tune while turned on.  He is in awe of it during tummy time and it’s a great motivator for him.

Feeding and Soothing

Dr. Brown’s Bottles– I could go on and on about these bottles! I planned on breastfeeding so I didn’t do much research on bottles. But when that planned failed, we had to resort to using bottles with formula. After the first few days I just knew his little tummy was really hurting. We received some bottles during our showers, but I wasn’t sure if any were made to help relieve gas. I found these Dr. Brown bottles from other mommy bloggers and decided to give them a try. Luckily we received one from J’s aunt. It helped tremendously! Then I ordered more from Walmart and picked up in the store.

JollyPop Pacifiers – We were introduced to these while in the NICU. It really helped keep him calm during all of the poking and prodding. I talked to the NICU nurse and she recommended these due to their shape. She said it really helped soothe them, but wouldn’t cause any problems with how his little mouth formed around the pacifier. She gave us a few to take home and he really loved them compared to our other ones.  Now I’m not going to lie after about the second month, he stopped taking a pacifier on a regular basis.  We tried several other brands, shapes, and so on, but he didn’t like any of them.  I still carry one that we got from the NICU in my diaper bag just in case.  

Travel

Carseat Cover – This carseat cover is perfect for when we’re out and about. Not only does it protect him from the elements – rain, wind, sun and such, but it protects him from germ-filled people. Before I purchased this cover, people always were stopping to look at him. No one tried to touch him, but I knew it was inevitable. After the NICU I didn’t want any sick people getting too close to our precious boy. Now they can’t see him so out-of-sight, out-of-mind.

CuddleBug Wrap Carrier – I came across this wrap online and ordered one. It wasn’t as expensive as some other wraps I saw, which was a nice bonus. I like to wear this even around the house. If he’s a bit fussy then I all wrap him up and carry him while I work around the house. I can do laundry, dishes, cook dinner and clean all while he sleeps. It’s a bit heavier fabric then some other wraps on the market, so I’m not sure how it would go as the only means to carry him on a hot summer day.

newborn must haves

Infantino Fusion Carrier – This carrier is great! It’s a bit lighter so during the hot summer days when we’re outside, I like to use this one.  I took our little guy with me to work for the first 5 months (hello! waiting lists!) so I was able to wear him while I worked.  It was such a blessing!  Now that he’s getting older and bigger, it will transition to other positions.  Since he has good neck control these days, he loves to be facing outward to see everything.

The So-So Newborn Must Haves

Little Me Swaddles – when we first came home from the hospital and NICU this guy saved us. He loved it how snuggled it made him feel.  As he grew the more he hated having his legs bound.  So we stopped using it after he turned 2 weeks old.  He sleeps great without it, but I still take one with me when we travel just to be on the safe side.

newborn must haves, newborn products

Delta Children Sweet Beginnings Bassinet – We let him sleep in a bassinet when we first got home, but realized he never got very much sleep in there.  So that’s when we upgraded to the DockATot.  We purchased this one from Wal-Mart and I used it in the family room or when I took a shower.  It’s on wheels and I can just roll him around the house, which is nice to have!  

Adventures in Baby Food Making – Peas and Butternut Squash

homemade baby food, peas baby food, butternut squash baby food, baby food making

I’m back with another Baby Food Making Adventure. I have to admit something….

This is a lot easier and more fun than I thought.

Seriously!

I never thought I would be a Mom who did homemade baby food.  Not that I thought there was anything wrong with making baby food.  I just thought it was a lot harder than it is.  So I assumed that I wouldn’t be able to make time for it, be able to understand it or that I would second guess myself on all of my choices. 

But I was so wrong!

Making homemade baby food is probably the easiest part of motherhood.  I even created a downloadable baby food schedule to follow.  Now I am not even going to say that I will be feeling like this when it comes to meats.  I will end up buying those I have a feeling.  I’ve been able to provide our little guy with healthy whole foods that I have made, which means I know how it was made.  

There is something about watching your son eat the baby food you made and him actually enjoying it.  It’s a pretty great feeling!

This time I made peas and butternut squash.  So far I’ve made carrots and apples, pears, and organic sweet potatoes.  He loved the apples, pears and sweet potatoes.  Now the carrots were a different story.  As long as I mixed the carrots with the apples or pears then he was fine and would eat them.  But if I tried to sneak a spoonful of just carrots… well let’s just say we ended up with carrots everywhere!

I was excited to try peas and butternut squash next.  His reactions are priceless!

These were super easy to make again.  You can use fresh, from the produce section or frozen.  I went with the frozen option because it was a lot less prep time, which I’m all about.  Especially on a Sunday afternoon.  The less time I spend in the kitchen means the more time I can spend with our little guy.

I created a quick video on my Youtube channel that goes through how to make homemade baby food for peas and butternut squash or you can follow the steps below.

Homemade Baby Food – Peas

1 cup frozen peas
1 pot boiling water

Cook the peas for about 10 minutes or until easily mashed.
Place in a blender or food processor.
Add about 1-3 T. water to puree easier (I used 3 T.)
Blend until smooth
Place in containers and seal

Homemade Baby Food – Organic Butternut Squash

1 – 10oz. package of frozen organic butternut squash
1 pot boiling water

Cook the butternut squash for about 8 minutes or until easily mashed.
Strain and place in a blender
Blend until smooth
Place in containers and seal

I got these containers at Amazon and I love them.  They can go from freezer to fridge to feeding.  I try not to overfill too much because the lid will not seal perfectly if you do.  

The food will last for several months in the freezer and about 3 days in the fridge.

Fall Bucket List {Fall Family Fun}

fall bucket list, things to do in the fall

It’s here. It’s here! My favorite season has finally arrived.

Now in Southeast Missouri we still have some warm days. I’m pretty sure today’s high will be in the 80s. But I don’t care. There has been a glimpse of Fall weather in the air and we went to the pumpkin patch last weekend, which means… Fall is here!

Now that our little guy is getting bigger, I want to be more active and do so much more with him. I know he won’t remember everything we’re doing right now, but he is so happy. Plus, I love a good excuse to take thousands of pictures.

Last Saturday was an absolute blast.  If you follow me on Instagram (which you totally should!) then you probably saw some of my posts.  We went to the pumpkin patch not too far away last weekend.  We went to our County Fair in the morning to see the parade and the dog show.  Our baby was so mesmerized by all of the lights and sirens on the police cars and fire trucks.  J was pretty happy with the candy they were throwing. HA!  Don’t worry we didn’t take any from little kids or anything!

fall bucket list, things to do in the fall

fall bucket list, things to do in the fall

fall bucket list, things to do in the fall

Afterwards we drove to the closest pumpkin patch with my parents.  We saw a petting zoo, went down a big tunnel slide and then go lost in the corn maze.  We somehow made our way out of the maze, but missed 2 of the meet-up points hidden inside.  Then of course J and my Dad had to pick out a ginormous pumpkin to carve.  We’re headed to my parents’ house tonight to eat chili and carve this monster.  

I put together a Fall Bucket List for J and I to do with our little guy. We’ve already crossed a few items off the list and I can’t wait to do the rest of the things on here.

Here’s our Fall Bucket List.

fall bucket list, things to do in the fall

I created it as a free download so you can join in on the Fall Fun too! Get your Fall Bucket List by clicking here.

What’s your favorite thing about Fall? Mine is the cooler weather for sure!

It only takes 21 Days to Make a Habit

21 days to make a habit, habit tracker, break a habit,

Did you know a habit can be made (or broken) in only three weeks?

I like to look at the positive side – let’s create a new habit. It’s not because I don’t have bad habits that need to be broken, but I want to encourage improvement and progress. Remember progress, not perfection.

It’s my motto.

What new habit am I going to work on creating? Simple. Being more active. My goal is to do something, anything that is active every day. I’ve been trying to take the little one and one of our dogs on a walk at least three times a week. Then I’ve added a workout DVD or program three times a week. You may be thinking… that’s only 6 days Meredith. You said every day. Well I did. And I am active. Every Wednesday night we have our bowling league. So I bowl 4 games and trust me, by the end of the night I’m exhausted.

I created a habit tracker to keep me motivated and to keep me accountable. I thought I should share it with you! Let’s be honest, we can all use a little motivation to create new habits or break bad ones.

You can get this tracker for free right now, but I may end up taking it down and offering it in my online store once I get it back up. So make sure you take advantage of it now, while it’s free.

Download your free make a habit tracker.

DIY Baby Sensory Bag

DIY Baby sensory bag

I’ve seen these sensory bags all over Facebook and decided it was about time our little guy had one. I of course didn’t want to spend a fortune and I didn’t want to take forever to make one.

I created a quick video tutorial or you can follow along below:

Supplies Needed for your DIY baby sensory bag:

Gallon freezer bag, make sure it’s the freezer one since they are thicker and more durable
Duck Tape
Hair Gel
Colorful Items – I used sequins, pom-poms and foam stickers
Scissors

create a baby sensory bag

All together I spent $5.00 on this project. I went to my local Dollar Tree for everything. I’m thinking the hair gel must be petty decent because I had to search for 2 bottles. They were completely out of stock.   I already had the freezer bag and duck tape, so that helped in my savings.

First, put the gel in the bag.

Then add the colorful pieces. You can as much or as little as you want. I did quite a bit to have different stuff to catch our little one’s eye.

Close the bag and then place your duck tape around all four edges. This just gives the bag some extra toughness to help prevent any leaking,

baby sensory bags

That’s it. You have a DIY baby sensory bag! Our guy loves it. I tried to pick it up to move him into the other room, he gave me a really mad look and held onto the bag with a death grip.