Category: Baby

Our Little Guy’s First Halloween

baby's first halloween, save money on a halloween costume

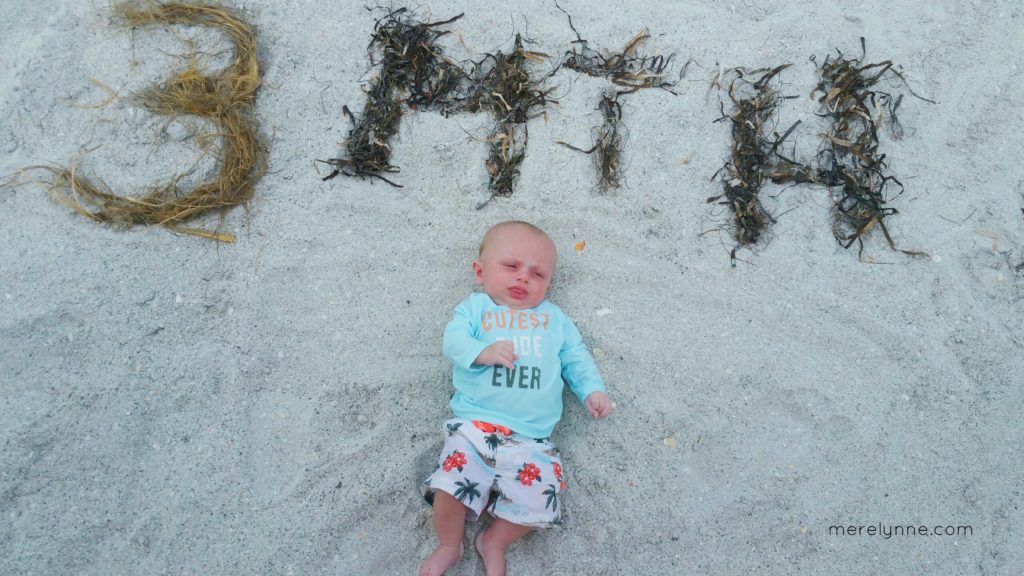
I know, I know.  I am over a month late on telling you about our little guy’s first Halloween.  It’s been crazy around here.  I talked about how my little blog took a back seat during all of the crazy the past few months.  I thought it was time to not only be back, but to make up for lost time.  I can’t believe our sweet guy is celebrated his first Halloween already. This past year Halloween fell on a Monday (boo!). Since J and I have been together we always go over to his family’s for Halloween, but this year we didn’t get to. We live too far away to make the drive and be work-ready the next day. So we opted to stay close this year.

first halloween, baby first halloween

We did go to my parents’ house to do a little trick-or-treating. Well I’m not sure how much you can do with a 6-month old, but hey! we tried.

Actually, my parents live out of town a bit so my Mom never got any trick-or-treaters besides my and my sister’s friends. It was kind of nice for her to have a trick-or-treater at her door.  Even if we showed up late and had to get him dressed while we were there.  Have I mentioned life is crazy?

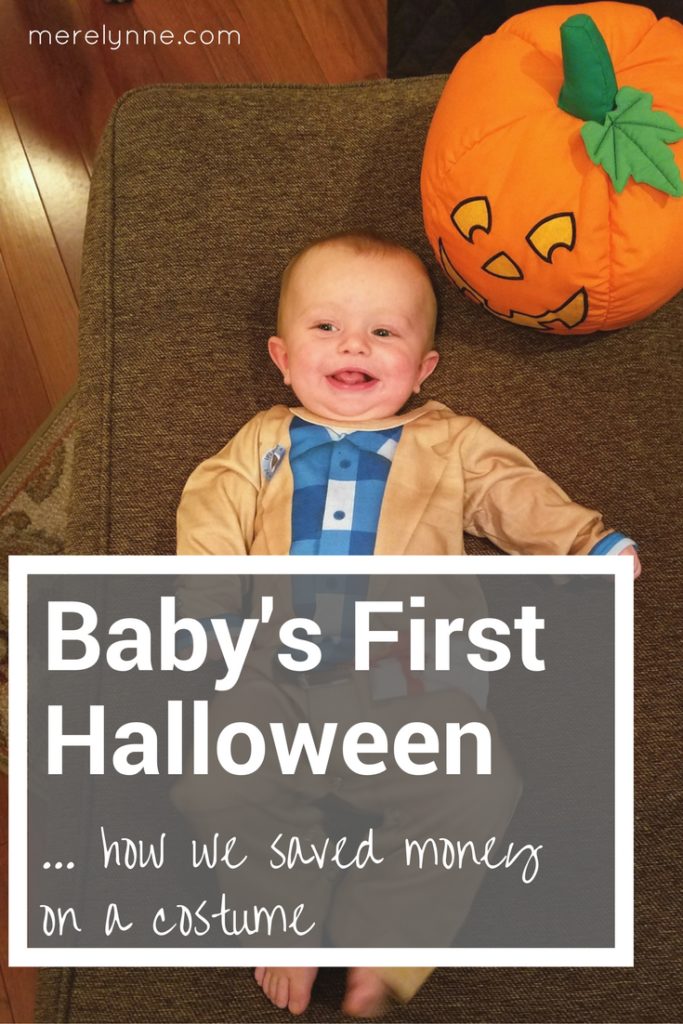
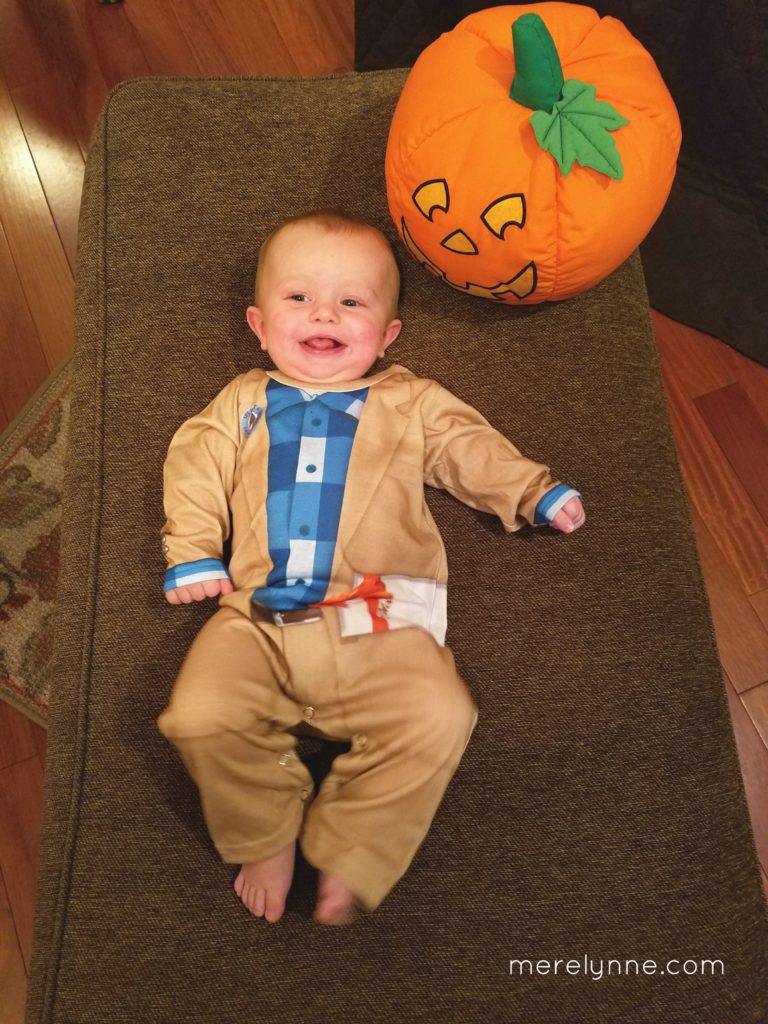
I never knew how hard it would be to decide on a costume for our little guy, too! So many choices and they are all so cute! I couldn’t get over it.  I wanted to keep it simple.  This budgeter wasn’t about to go spend a small fortune on a costume.  Instead we used what we had.  During vacation in Florida this past Summer, J had found a Forrest Gump costume.  It was on a clearance and way too big at that time.  Honestly, it was still too big on Halloween, but we made it work.
baby's first halloween

I was never a big fan of Halloween, even when I was little. I would go to my Grandparents’ house each year to help pass out candy. I never dressed up and pretty much avoided Halloween through college, too. Now that I have a child to take around, I totally get the excitement. I can’t wait for him to just keep getting bigger and bigger.  I’m thinking next year we might actually go trick-or-treating with him.

Newborn Must Haves We Love

*Affiliate Disclosure: Please note that when you click links and purchase items, in most (not all) cases I will receive a referral commission. You will not pay more when buying a product through my link.

newborn must haves on a budget

 Our little Baby is going to be 6 months old tomorrow (what?!?!).  I know he is no longer considered a newborn (cue the tears!), but having a baby doesn’t necessarily mean you’re always going to be on time with things now.  Hence this post being so late!  

He’s our first, so we had a lot of learning to do those first three months.  It’s no lie we developed a serious crush on some of his stuff and wanted to share our newborn must haves. I wanted to share what we loved and what didn’t work out too great for us.

I tried to keep these newborn must haves within our budget so these are budget friendly items. The ones that seem a bit high are well worth the investment. I would recommend registering for most of these (if not all) for your baby shower.

For Sleep

Fisher Price Rock N Play – He loves to sleep in this during the day while I’m working around the house. He isn’t crazy about the rocking being turned on yet, but he does like the vibrations. I think the elevation is really nice and what he likes so much about it. Plus it’s light, so we can travel with it easily. I like to take it with me when I shower so I can peer out to make sure he’s okay.

dockatot

DockATot – this purchase has been a lifesaver for us!  He loves it, which means he’s sleeping great at night.  We love it because he’s sleeping great, but also because we feel safe with him being in the bed with us.  Plus, when we travel we just take the DockATot with us.  He’s familiar with the DockATot so he goes right to sleep no matter where we are.

Tummy Time

Boppy Pillow – we use this for tummy time, feedings, and sitting up. It works great for tummy time since he’s cushioned all around. I love that case comes off and is machine washable. I like to wash it a few times a week just to keep it nice and clean since he puts his face on it.

Fisher Price Play Gym – we received this play mat during one of my showers. It’s great. With three dogs running around we aren’t crazy about Baby being on the bare floor, so we put this down. It’s cushioned and has a play gym over it for when we lay him on his back.

Mommy Saver Lite App – it flashes shapes and designs that are mostly black and white, but they do throw in some colors.  It also plays a pretty soothing tune while turned on.  He is in awe of it during tummy time and it’s a great motivator for him.

Feeding and Soothing

Dr. Brown’s Bottles– I could go on and on about these bottles! I planned on breastfeeding so I didn’t do much research on bottles. But when that planned failed, we had to resort to using bottles with formula. After the first few days I just knew his little tummy was really hurting. We received some bottles during our showers, but I wasn’t sure if any were made to help relieve gas. I found these Dr. Brown bottles from other mommy bloggers and decided to give them a try. Luckily we received one from J’s aunt. It helped tremendously! Then I ordered more from Walmart and picked up in the store.

JollyPop Pacifiers – We were introduced to these while in the NICU. It really helped keep him calm during all of the poking and prodding. I talked to the NICU nurse and she recommended these due to their shape. She said it really helped soothe them, but wouldn’t cause any problems with how his little mouth formed around the pacifier. She gave us a few to take home and he really loved them compared to our other ones.  Now I’m not going to lie after about the second month, he stopped taking a pacifier on a regular basis.  We tried several other brands, shapes, and so on, but he didn’t like any of them.  I still carry one that we got from the NICU in my diaper bag just in case.  

Travel

Carseat Cover – This carseat cover is perfect for when we’re out and about. Not only does it protect him from the elements – rain, wind, sun and such, but it protects him from germ-filled people. Before I purchased this cover, people always were stopping to look at him. No one tried to touch him, but I knew it was inevitable. After the NICU I didn’t want any sick people getting too close to our precious boy. Now they can’t see him so out-of-sight, out-of-mind.

CuddleBug Wrap Carrier – I came across this wrap online and ordered one. It wasn’t as expensive as some other wraps I saw, which was a nice bonus. I like to wear this even around the house. If he’s a bit fussy then I all wrap him up and carry him while I work around the house. I can do laundry, dishes, cook dinner and clean all while he sleeps. It’s a bit heavier fabric then some other wraps on the market, so I’m not sure how it would go as the only means to carry him on a hot summer day.

newborn must haves

Infantino Fusion Carrier – This carrier is great! It’s a bit lighter so during the hot summer days when we’re outside, I like to use this one.  I took our little guy with me to work for the first 5 months (hello! waiting lists!) so I was able to wear him while I worked.  It was such a blessing!  Now that he’s getting older and bigger, it will transition to other positions.  Since he has good neck control these days, he loves to be facing outward to see everything.

The So-So Newborn Must Haves

Little Me Swaddles – when we first came home from the hospital and NICU this guy saved us. He loved it how snuggled it made him feel.  As he grew the more he hated having his legs bound.  So we stopped using it after he turned 2 weeks old.  He sleeps great without it, but I still take one with me when we travel just to be on the safe side.

newborn must haves, newborn products

Delta Children Sweet Beginnings Bassinet – We let him sleep in a bassinet when we first got home, but realized he never got very much sleep in there.  So that’s when we upgraded to the DockATot.  We purchased this one from Wal-Mart and I used it in the family room or when I took a shower.  It’s on wheels and I can just roll him around the house, which is nice to have!  

Adventures in Baby Food Making – Peas and Butternut Squash

homemade baby food, peas baby food, butternut squash baby food, baby food making

I’m back with another Baby Food Making Adventure. I have to admit something….

This is a lot easier and more fun than I thought.

Seriously!

I never thought I would be a Mom who did homemade baby food.  Not that I thought there was anything wrong with making baby food.  I just thought it was a lot harder than it is.  So I assumed that I wouldn’t be able to make time for it, be able to understand it or that I would second guess myself on all of my choices. 

But I was so wrong!

Making homemade baby food is probably the easiest part of motherhood.  I even created a downloadable baby food schedule to follow.  Now I am not even going to say that I will be feeling like this when it comes to meats.  I will end up buying those I have a feeling.  I’ve been able to provide our little guy with healthy whole foods that I have made, which means I know how it was made.  

There is something about watching your son eat the baby food you made and him actually enjoying it.  It’s a pretty great feeling!

This time I made peas and butternut squash.  So far I’ve made carrots and apples, pears, and organic sweet potatoes.  He loved the apples, pears and sweet potatoes.  Now the carrots were a different story.  As long as I mixed the carrots with the apples or pears then he was fine and would eat them.  But if I tried to sneak a spoonful of just carrots… well let’s just say we ended up with carrots everywhere!

I was excited to try peas and butternut squash next.  His reactions are priceless!

These were super easy to make again.  You can use fresh, from the produce section or frozen.  I went with the frozen option because it was a lot less prep time, which I’m all about.  Especially on a Sunday afternoon.  The less time I spend in the kitchen means the more time I can spend with our little guy.

I created a quick video on my Youtube channel that goes through how to make homemade baby food for peas and butternut squash or you can follow the steps below.

Homemade Baby Food – Peas

1 cup frozen peas
1 pot boiling water

Cook the peas for about 10 minutes or until easily mashed.
Place in a blender or food processor.
Add about 1-3 T. water to puree easier (I used 3 T.)
Blend until smooth
Place in containers and seal

Homemade Baby Food – Organic Butternut Squash

1 – 10oz. package of frozen organic butternut squash
1 pot boiling water

Cook the butternut squash for about 8 minutes or until easily mashed.
Strain and place in a blender
Blend until smooth
Place in containers and seal

I got these containers at Amazon and I love them.  They can go from freezer to fridge to feeding.  I try not to overfill too much because the lid will not seal perfectly if you do.  

The food will last for several months in the freezer and about 3 days in the fridge.

DIY Baby Sensory Bag

DIY Baby sensory bag

I’ve seen these sensory bags all over Facebook and decided it was about time our little guy had one. I of course didn’t want to spend a fortune and I didn’t want to take forever to make one.

I created a quick video tutorial or you can follow along below:

Supplies Needed for your DIY baby sensory bag:

Gallon freezer bag, make sure it’s the freezer one since they are thicker and more durable
Duck Tape
Hair Gel
Colorful Items – I used sequins, pom-poms and foam stickers
Scissors

create a baby sensory bag

All together I spent $5.00 on this project. I went to my local Dollar Tree for everything. I’m thinking the hair gel must be petty decent because I had to search for 2 bottles. They were completely out of stock.   I already had the freezer bag and duck tape, so that helped in my savings.

First, put the gel in the bag.

Then add the colorful pieces. You can as much or as little as you want. I did quite a bit to have different stuff to catch our little one’s eye.

Close the bag and then place your duck tape around all four edges. This just gives the bag some extra toughness to help prevent any leaking,

baby sensory bags

That’s it. You have a DIY baby sensory bag! Our guy loves it. I tried to pick it up to move him into the other room, he gave me a really mad look and held onto the bag with a death grip.

How to Make Organic Sweet Potato Baby Food

sweet potato baby food

I’m back with another baby food making adventure. This time… sweet potatoes. I had heard from so many friends that their little ones loved sweet potatoes. After carrots weren’t a big hit, I decided to try it.

So far our little guy has had green beans, carrots, apples, pears and rice cereal. The fruit is his favorite for sure! I usually have to mix the cereal with his apples or pears for him to eat it. I was surprised when he liked the green beans on their own.

I’ve been making his baby food for a few different reasons. First, I can control what goes in and second, the cost. At almost $0.50 per ounce at the store, it’s expensive. So far I’ve kept everything under $0.20 per ounce by making his food.

I do like to keep things simple though. So if it is a food that I don’t feel comfortably making then I do plan on buying it, such as meat. I did purchase Organic Sweet Potatoes that were already peeled, cubed and frozen from Wal-Mart. It was a breeze to make! From the time I started to the time I finished it was less than 10 minutes.

how to make baby food

You’ll notice that I only filled two 2-ounce containers with this bag of sweet potatoes. It would have filled a few more, but …. funny story…. A few weeks ago I had asked J to boil some carrots and broccoli for dinner. The broccoli was in the freezer and the carrots were in the fridge. He saw the orange on the sweet potato bag and just grabbed it. I looked at the pot and was totally thrown as to how my carrots ended up soooo mushy and cubed perfectly. It was pretty funny!

Here’s a quick tutorial on how to make baby food for your little one.

Here’s what you need
Sweet Potatoes: washed, peeled and cubed (I purchased frozen bag from Wal-Mart)
Pot of boiling water
Blender
Water for puree
Baby food containers

Bring the water to a boil then add the cubed potatoes. Once boiling again, stir then turn the heat to medium. Cover and cook for 5 minutes.
Strain and put into blender, add extra water for mixing.
Once blended smooth, put into baby food containers.
You can freeze for a few months. It can be thawed in the fridge and will last for 3-4 days.

I placed one container in the fridge for the next few days and the other in the freezer for later in the week.

Introducing Baby Food Schedule

baby food schedule, which first foods should i try

I wanted to share with you the baby food schedule we created for our little guy’s first foods. I thought having a schedule would have been so nice when we first started out. Here’s what we did.

Now there is no need to follow this schedule exactly. You can mix it up, add different foods, etc. Our doctor told us that any foods are good to try first. The old rule of giving cereal at the beginning or vegetables first is outdated. She told me we could start with just about anything. We just needed to make sure it was pureed and cooked, at least at the beginning. I shared in one of my baby food making adventure videos that the reason you want to cook most of the fruits and vegetables (not bananas or avocados or some others that are out there) is that by cooking them you are helping break down the sugars. It makes it a lot easier for their little bodies to digest the foods that way. Once your little one gets bigger then you may not need to cook some of the foods you are giving them.

I went to my local Wal-Mart to find all of these foods. I bought what was on sale, prepared them and then froze them for later use. I thought by making more ahead of time then I would be able to just pull and thaw and not have to worry about coming home from a long day to make more.

Here’s the baby food schedule we followed:

Introducing Baby Food Schedule

You can click the image above or click for a Introducing Baby Food Schedule

I actually took this baby food schedule and printed out a monthly calendar since we started in the middle of August.  Then I hung it on our fridge.  That way we could take a quick look to see which food our guy would be having that day.  It was also nice because we went out of town a few weekends, so I was able to just pull the frozen containers that we needed, place them in a cooler while we traveled.  

Wait 3 days before introducing foods.

Again you don’t have to follow this schedule or any schedule perfectly.  Just don’t introduce too many new foods at once.  You want to give your little one a chance to get used to it and make sure they won’t have a reaction.  That’s why you’ll notice at least 3 days before any new foods are added.  If he does have a reaction then we’ll know which food caused it.

Also, just because you see 6 different foods for one day doesn’t mean that’s the food we will use.  We will use a combination of those foods for that given day.  

Baby’s First Food

Not too long ago we got the clear from our peditrician to start feeding our little man solids.  I was so excited – I couldn’t wait for him to try food.  But then the fear of what foods, how much, should I make my own or not make my own started setting in.  So of course I turned to Pinterest and found some really helpful tips.  Then I decided to go with my gut along with other mom’s advice.

I wanted to make sure I knew what was going into his food.  I knew the only way to really know was to make my own.  I created a list of foods to try, a sample schedule, and headed out to the store.  I was able to buy so much for so little.  I came home and started cooking right away.  First up was carrots, then apples, followed by pears.  I wanted to not overwhelm myself so I went with foods that I knew would be easy to prepare.  I purchased rice cereal and I plan on purchasing meats along with any vegetables and fruits I don’t feel comfortable with.  

I did my research too on the foods I prepared.  I wanted to make sure I cooked them long enough to break down any sugars and to make them easier to puree.  I wanted to make sure my puree was thin enough for his mouth and digestive system.  I also waned to try foods that would help him expand his tastes at an early age.  

We tried carrots first – my favorite!  J and I recorded him trying carrots for the first time.  I don’t think he enjoyed them as much as I wanted him to though.  Don’t mind the no sound during the video.  J and I were not impressed with us – only our little one.  So I edited out the sound so you could focus on the baby. 

We waited three days before introducing apples to make sure he wouldn’t have a reaction.  The apples went a lot smoother and now if we mix carrots with apples then he seems to not mind carrots so much.  After a few days of that combination I brought in the rice cereal.  Again, as long as there are apples with it then he seems happy.  Next up is pears that I made last weekend.  I decided to make the food then freeze what I can so I’m not having to scramble during the weeknights.  

I’m going to put together the baby food schedule we followed and are following.  I couldn’t find one that fit what I wanted and I really think it would have been super helpful starting out.  

Making Your Own Baby Food – Pears

easy baby food recipes

Today I wanted to keep going with our baby food making adventure.  I thought I would add pears to the mix.  This is the easiest recipe ever!  Technically you don’t even have to cook them since they are such a soft fruit.  However, by cooking the pears you can help break down the sugars.  It makes it a lot easier for your little one’s digestive system to break them down.  I’m all about making it easier on their little bodies, especially since this whole solid food thing is so new to him.

I created a video that walks through making your own baby food.

Or you can follow along below.  It’s super, super easy to make this puree.  I love it!

make your own baby food

Pureed Pears

3 pears, or more (any kind will work) – $1.77 pound
Pot of boiling water

Wash and peel your pears. Deseed and chop them.  Add to the pot of boiling water and let cook for about 5-8 minutes.  Strain.  Blend in a food processor or blender.  I use my Magic Bullet that I purchased about 3 years ago.  The younger your little one is the smoother your puree should be.

The best part about this whole recipe is that it takes less than 10 minutes!

It’s also not an expensive recipe to make, too.  In my last post, I talked about how much jarred baby foods cost.  I averaged it out and it came to be about $0.60 an ounce!  I knew I could beat that by making them on my own.  So far I’ve come out on top every single time.  This one is no different.


I love saving money!! Boom!

Once it was all said and done, I put my extra puree in my Fresh N Freeze Reusable Containers and the OXO Baby Food Tray.  For less than $15 I’m not able to make extra food, free them and then pop them into the fridge a few days before he’s ready to eat.

How To Make Your Own Baby Food for the Whole Month

easy baby food recipes

This past weekend I decided to jump feet first into making our own baby food for our little guy.  I didn’t want to go overboard just starting out and get in too deep.  Since our little guy is just starting solids, I knew he wouldn’t be eating a huge portion.  I made enough to last the next month and decided to freeze what he wouldn’t be eating within a three day period.  That way I didn’t waste any food.  

I used my Magic Bullet that I already owned to puree everything, too.  I didn’t think I needed to purchase anything special to make your own baby food.

To make sure I could freeze everything and keep it fresh tasting, I purchased a few containers on amazon.  I got this OXO baby food tray and Fresh N Freeze Reusable Containers.  All together they were less than $15, which I thought was a great price.  I really like the reusable containers because they stack into one another and the lids screw closed.  That way I know they are sealed tight.  

The containers hold 2 ounces while the tray’s slots hold 3/4 ounce.  I plan on using one container for three days, at least for now.  I wanted to start with carrots and then work my way into apples.  I talked with my pediatrician and she said that it didn’t matter, which food I started with – vegetables or fruit.  I love carrots and thought… hmm, let’s start him with my favorite!

I made enough for the month by being able to freeze the unneeded portion.  Then I will just pop it into the fridge a day or so before we’re ready to use it so it can thaw.  

It’s important to only introduce one food at a time.  That way if your little one has a reaction you will know which food caused it.  Here’s my schedule for introducing solids the first month.  You’ll notice I don’t have a ton of different foods in this schedule.  Mainly because I didn’t want to overwhelm myself since there is so much information out there.  Once we get these down and I feel comfortable making my own baby food, then I will introduce a larger variety next month.  

I created a video that walks through the whole process from start to finish, watch it here: 

Or keep following and I walkthrough the process.

There were 2 reasons I wanted to make my own baby food for our little guy.  I could control what was going into his food.  Also, price.  I looked at my local store and it was averaging about $0.60 an ounce.  I knew I could beat that!  So I took a challenge to see.  

how to make homemade baby food

Pureed Carrots

6 organic carrots @ 3.38 per package, used half so it was $1.69
6 Tbs. water
Filled Pot of Water

Wash and peel carrots.  Chop into bite-sized pieces.  Let cook in a pot of boiling water for about 10 minutes or until a fork can be easily pushed through the carrot.  Strain.  Put into food processor, blender, or baby bullet.  Add 1-2 Tablespoons of water, as needed.  Blend until smooth.

Note: Because of the nitrates.  You do not want to use the cooking water to blend with the carrots.  You do not want to put nitrates back into your little one’s food.

This recipe made about 10 ounces of carrots, so it came out to be $0.17 per ounce!

make your own baby food

Pureed Apples

5 apples (any kind will do) @ 1.77 per pound = 2.47
Pot of boiling water

Wash and peel apples. De-core them and make sure you have removed all of the seeds.  Roughly chop into bite-sized pieces.  Place in boiling water for about 5-8 minutes.  Strain.  Place in food processor or blender.  Blend until smooth.  

Note: You can use the cooking water this time around to blend the apples, but apples are a watery fruit so it should not be needed.  

This recipe made 16 ounces so it came out to be $0.15 per ounce!

how to make homemade baby food

I was totally able to beat the store price for baby food.  Plus I feel so good about what went into his first foods.  I do know my limits and do not plan on cooking anything above what I feel comfortable at.  So I will more than likely not be pureeing any meats anytime soon.

The younger your little one is the more smooth you want the puree to be.  It’s pretty easy to make your own homemade baby food.  These two recipes took less than an hour start to finish.  I have enough food for about a month for our little one.  Especially since he’s just being introduced to solids and isn’t eating a huge portion right now.  


Florida Vacation, Take Two

Well J and I have been super blessed this summer. Not only having we’ve been giving an amazing son, but we’ve been able to travel to Florida twice!

merelynne.com, meredith rines, baby on beach, beach hacks for babymerelynne.com, meredith rines, baby on beach, beach hacks for baby

We went with my family back in June and we just got home from a trip with his whole family. It was a blast! Lots of swimming, lots of hanging out and lots of laughing were part of this trip.  This trip we went a little further into Florida and stayed at Indian Shores Rock Beach.  I have to say the beach was amazing!  The sand was pretty, the water was warm and we were super close to the water from our condo.  We even had a spiral staircase that took us straight down to the pool.merelynne.com, meredith rines, baby on beach, beach hacks for baby merelynne.com, meredith rines, baby on beach, beach hacks for baby merelynne.com, meredith rines, baby on beach, beach hacks for baby merelynne.com, meredith rines, baby on beach, beach hacks for baby

The pool was in the shade most mornings, so we tried to stay at the pool before lunch then head to the beach afterwards.  I was a little worried about our guy getting too much sun, so we stayed in part of a few days while he napped to keep him out of the sun completely.  He did great though.  I really think he loves the water.  The ocean instantly calms him and he could just float around in our arms all day.  The water was pretty calm for most of the trip and even the days it was a bit rougher, it wasn’t really that bad.  

Our little boy is going to be a beach bum before we know it – too bad Missouri only has man-made beaches at the lake that aren’t not very good.

merelynne.com, meredith rines, baby on beach, beach hacks for baby

I used the laundry basket in our first trip to the beach and I can really tell how much our little guy has grown in comparison.  My mom got him these great sunglasses from amazon.  He didn’t mind them on at all and I think it helped him nap a few times because it blocked out more light.  We did have a canopy on the beach to help give us shade, too.

beach vacation, family photo

My sister-in-law is a photographer and she took some family photos of everyone.  My mother-in-law wanted each family in a bright color then when we call came together it would look really cool.  Of course Justin chose orange, which is his favorite color.  I’m still not crazy about my post-baby body still, but I decided to let my insecurities go and not hide my body in a huge, oversized dress.  I think our picture turned out amazing!

We took his 3 month pictures at the beach… they may have been a few days late, but I don’t think it matters too much when you can get a great picture.  I still can’t believe our baby is 3 months old.  Soon he’ll be four then five then six… and I might have to start crying over how big he is getting.  merelynne.com, meredith rines, baby on beach, beach hacks for baby 

I have a beach and pool baby hacks post coming your way soon.  I can’t way to show off what were lifesavers with our little guy.