Category: Crafts

Mini DIY Office Makeover [Photowall Review]

Photowall was kind enough to send me this wallpaper for my project in exchange for an honest review.  This review is 100% authentic and my full opinion.

photowall, wallpaper home office, diy office makeover, easy office makeover, affordable office makeover

My style is pretty simple and clean. I don’t love a mix of patterns or designs in any of my rooms, especially one where I have to concentrate and focus hard in.  I prefer clean lines, neutral colors, and classic styles.  So I knew exactly what I wanted to do when I decided a few months ago to do away with a separate playroom for our son and convert it (partially) into my home office.

I didn’t want anything oversized or cluttered.  It’s a small space and my home office is only taking up about 25% of the room – the rest is designated for my husband and I’s dressing room/closet and a few stray toys that didn’t fit in our son’s bedroom.  It needed to be professional, but not overwhelming.  I needed a place that I could focus in while getting a ton of work done and still have it zoom-call ready at all times.

Prior to make the transition, whenever I would schedule a call with a client I would have to scramble to hide things in the background, move pictures around so that it looked nicer and stash my papers on the floor so that I didn’t look to overwhelming and cluttered.  I hated it.  I wanted something that looked polished, professional and was ready at a moment’s notice.

I found an old desk at my office and decided it would work just fine.  It was the perfect size and it was free!  I also grabbed an old waiting room chair from the office.  It’s actually really comfortable and the style fits my personality.  I wouldn’t mind if the fabric was a different color, but only one project at a time for now.

I decided after bringing home the desk and chair that I need to start with the wall directly behind me.  I didn’t want to face the wall while I worked, but I didn’t have a big, beautiful window to face either.  So I picked a nice small corner where I could easily design a wall that worked for me.  I toyed with the idea of painting the wall, but honestly that seemed like a big job for such a small wall.  Then I thought about wallpaper and honestly, I had never hung wallpaper before.

I do remember being a little girl and my mom attempting to hang it on our home.  I don’t think it was a pleasant experience at all and then fast forward a few years when it was time for an update and I spent days taking that paper off our family room walls.  It was awful.  But I couldn’t get the idea of wallpaper out of my head.  It was such a small wall that I convinced myself it wouldn’t be that terrible to do.  Plus, I wasn’t looking for a crazy pattern so hard could it be to hang…?

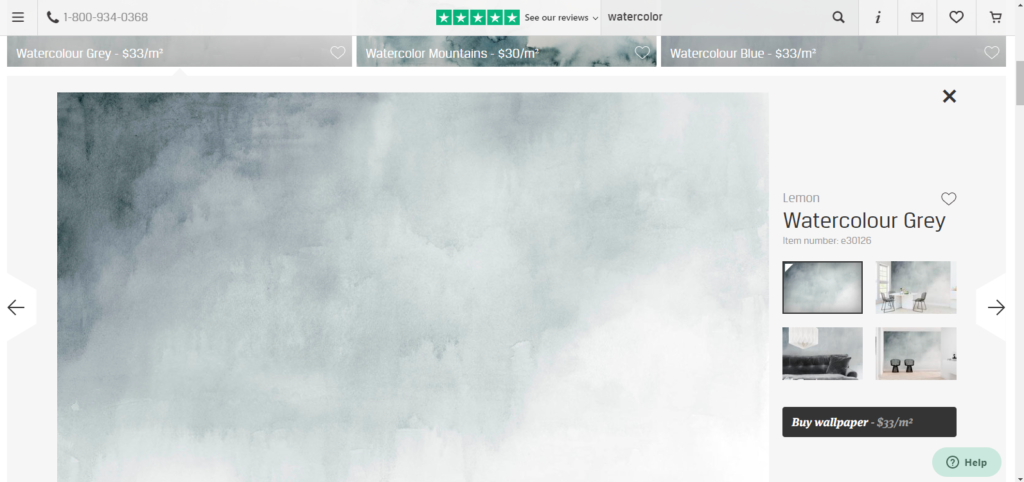
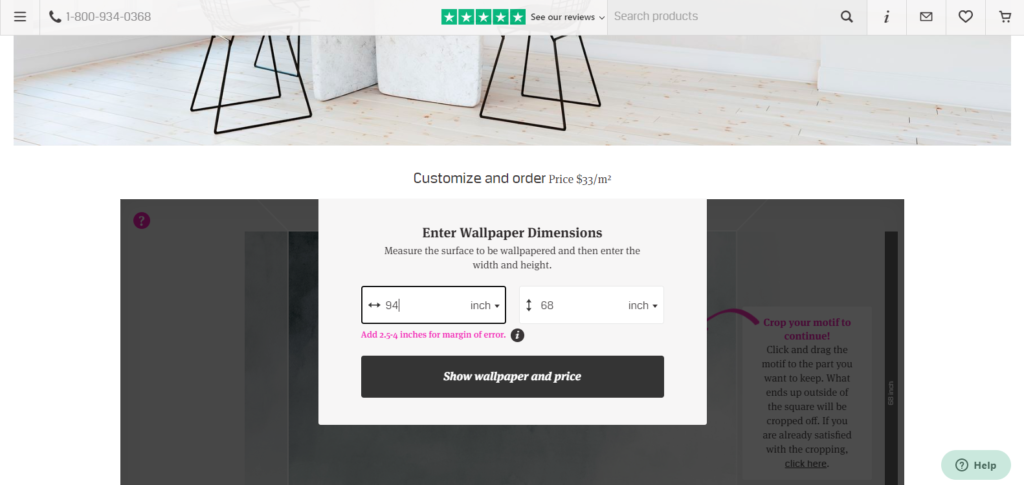
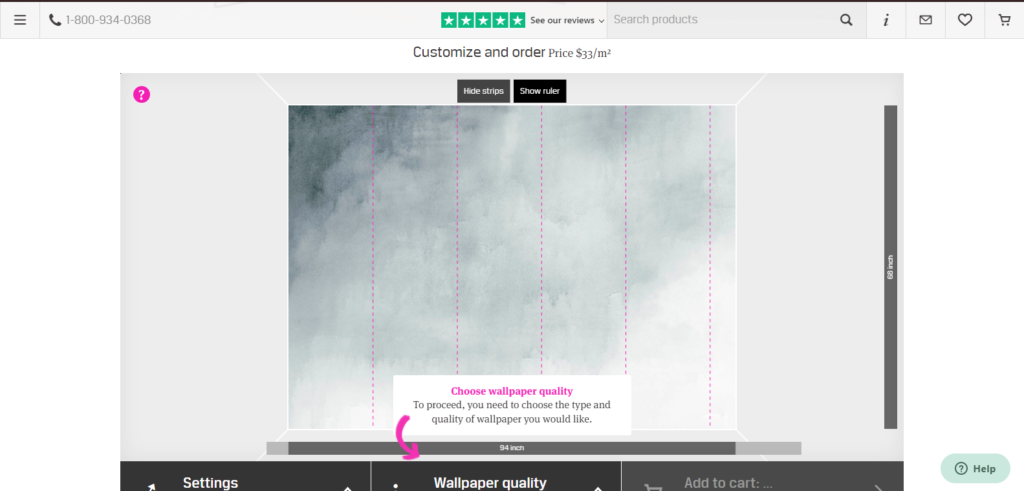
That’s where Photowall came into the picture.  They have so many different designs, prints, and even photos that you can choose from to create your space just as you want.  I knew I wanted to go with a neutral gray color, but wanted something a little more interesting than just a solid color.  So I went with a watercolor version.  The ordering process was so easy – I measured the wall in inches and then headed over to site to add them in.  From there it allowed me to select which portion of the piece I wanted. I chose one that was bit lighter in the middle.

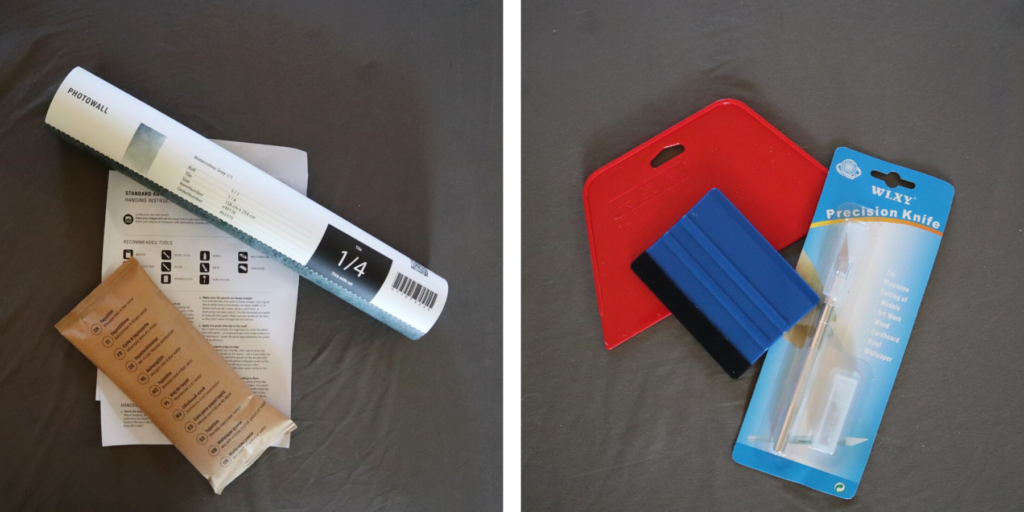
I ordered the design and within a few days the shipment arrived.  It was packaged perfectly in a long cardboard box with the glue, the pieces and directions perfectly inside.  I was shocked by how fast it came!

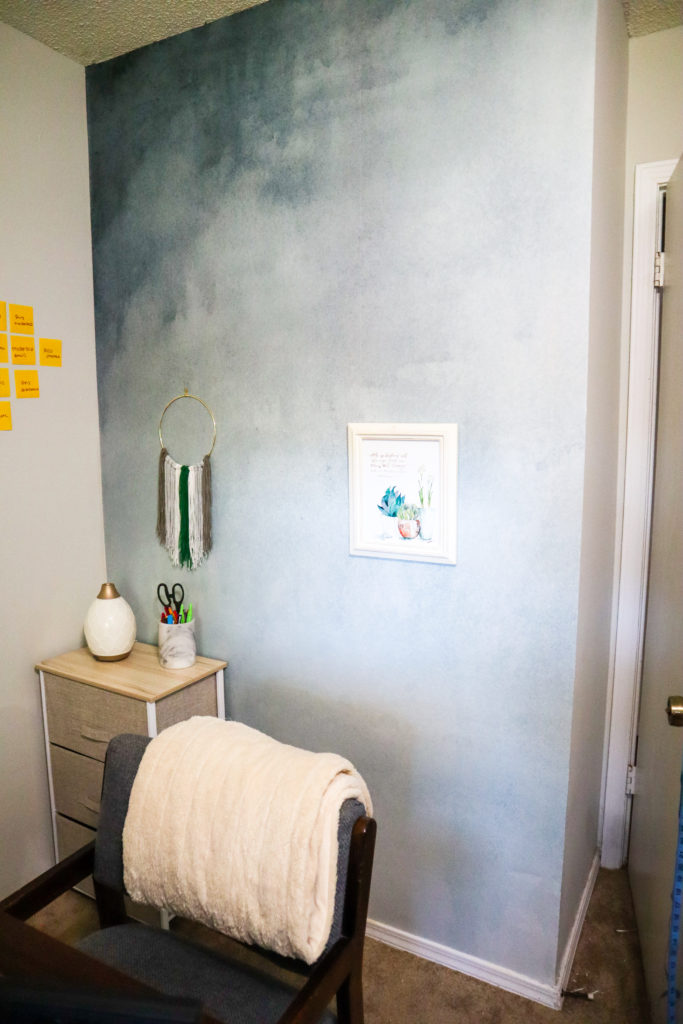
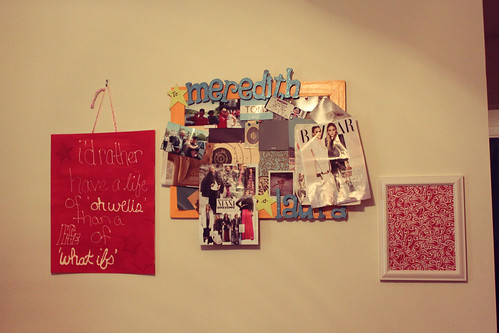
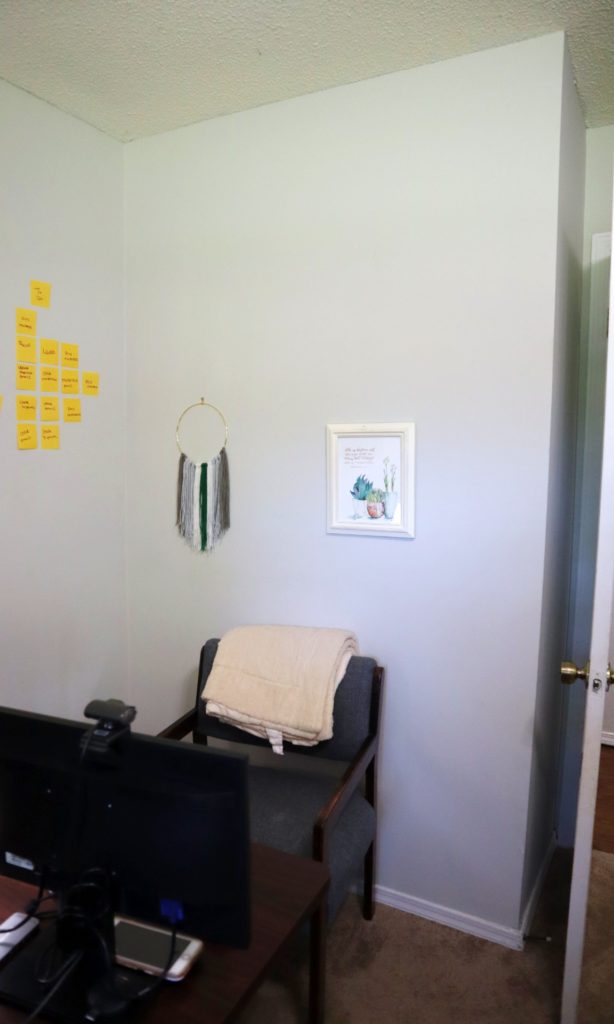
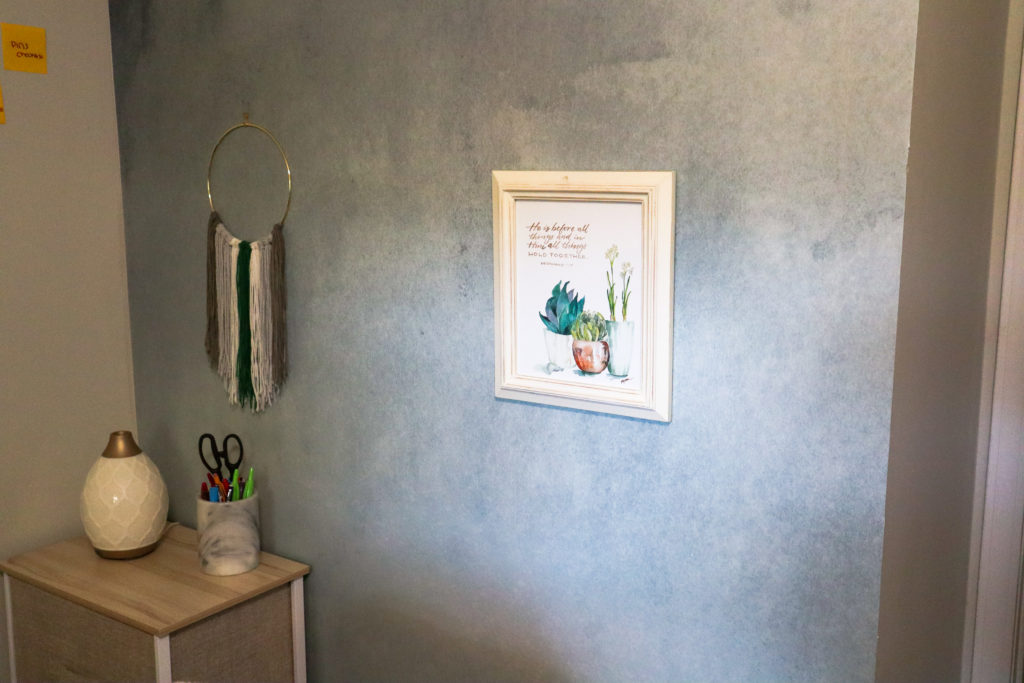
Now before I share just how easy this whole process was, let me share with you a cringe worthy picture of how it looked before.  It was just so boring. It lacked any creativity, any thing.  My hangings just looked and felt out of place.  And below you can see a nice after picture – the hangings are back, but with the colored background they just don’t feel out of balance any longer.

photowall, wallpaper home office, diy office makeover, easy office makeover, affordable office makeover

This project was just so easy to tackle.  It took me less than 2 hours from start to finish – it probably could have taken even less than that, but I was doing it by myself.  I’m not the tallest girl in the world, so even on the step ladder I struggled to reach the top of the wall.  Plus, every time I turned around a dog was under my feet or laying on a tool or trying to carry a tool off so that added time.

photowall, wallpaper home office, diy office makeover, easy office makeover, affordable office makeover

Photowall made the whole experience super simple.  Inside the box was the numbered sheets for the wallpaper so I knew exactly which piece was next and which direction to put it on the wall.  The glue was easy to make – they send it in powdered form, you mix with a gallon of water and let sit for 5 minutes then voila – you can get started. I didn’t even tough 1/10 of the glue that it made.  Then the directions were easy to follow and they have a video on Youtube I found that made it look really simple.

I did purchase a wallpaper kit off amazon, but Photowall does sell them.  I had this for another project that I didn’t end up doing so I just used what I had.

photowall, wallpaper home office, diy office makeover, easy office makeover, affordable office makeover

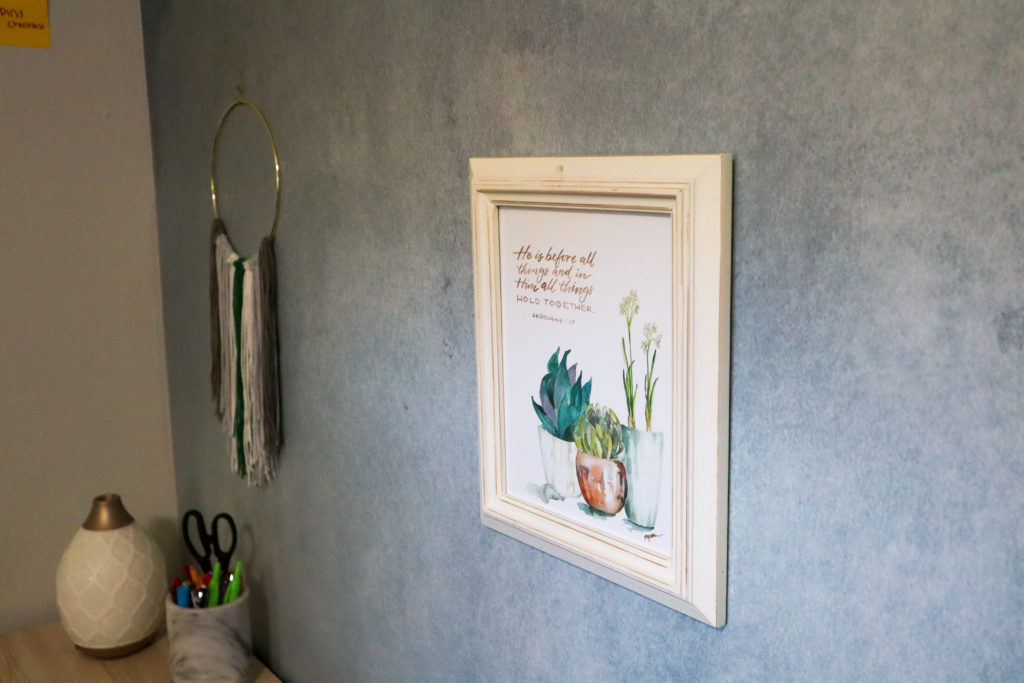
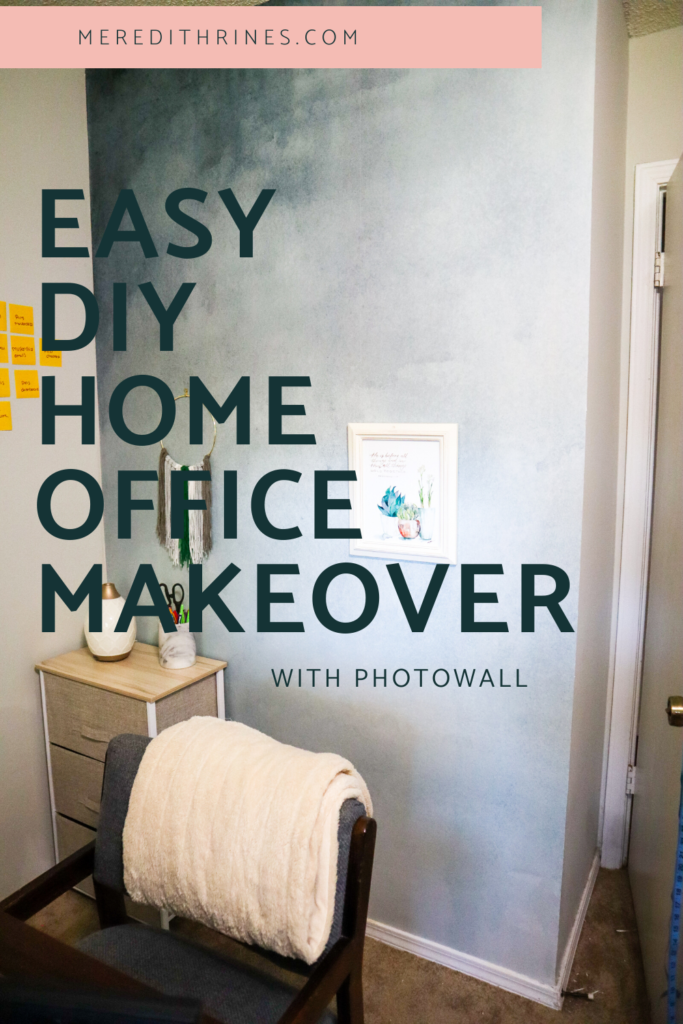
I even added an art piece I had ordered from GraceLaced and a knit creation I made with some yarn I ordered from Hobby Lobby and this gold circle off Amazon.  I was tired of having piles of paper on my desk from current projects, upcoming projects, and just endless to do lists (you know what it’s like) so I found this great fabric drawer chest from Amazon for under $30!  I also have one more piece to add, but it is still at the framers and I could not wait to share my final space with you.  So I’ll do an update once that gets in.

For someone who has never hung wallpaper before, I have to say it turned out great.  You can’t even see the lines between two pieces. Every speck and piece of watercolor art lined up perfectly.  It was easy to trim off the excess and the quality is outstanding.  I have to give a huge thumbs up to Photowall. Not only was the ordering process super simple, but the customer care has been fantastic.  I highly recommend working with them on your next project! I’m already planning my next wall (hint hint – the master bedroom), too!

They even were kind enough to send me a discount code for you, too!  You can use merelynne25 for 25%off your order until July 31, 2020.  So as you’re staying home these days, now is the perfect time to work on some DIY makeovers to those tired rooms you’ve been staring at.

Let me know in the comments which room you’re going to makeover first!

photowall, wallpaper home office, diy office makeover, easy office makeover, affordable office makeover

photowall, wallpaper home office, diy office makeover, easy office makeover, affordable office makeover

Easy DIY Grandparents Day Card {The Perfect Craft for Your Kids}

grandparents day card, easy grandparents day gift, diy grandparents day gift, cheap grandparents day gift, grandparents day, gift for grandma, gift for grandpa

Are you needing a last minute Grandparents Day card for this weekend?  Well I got you covered! This is actually the gift we put together last year when I realized it was National Grandparents Day around 2:30 in the afternoon (oops!).  You can use what you already have on hand, which means no running to the store and you can save a little bit of money in the process.


Here’s what you need:

2 pieces of construction paper (you’ll need two different colors, I used white and blue)
2-4 different colors of paint
1 sealable baggie
pair of scissors
glue
stick on letters or markers (if you don’t have any stick on letters OR if you have nice handwriting)
1 marker

Here’s how to make this super easy DIY Grandparents Day Card:

Cut out a shape with one of the colors of construction paper – I picked a heart, but you could pick a circle, square or even a star.  

Add a few drops of paint to your shape and then slide into a baggie.  I used my mess-free baby painting technique at this point.  It really helps save the clean-up time and you don’t have a toddler running around your house covered in paint.

Slide the painted masterpiece out and let dry.  You can take a hairdryer to it to speed up the process like I did (I told you I remembered late in the day).

grandparents day card, easy grandparents day gift, diy grandparents day gift, cheap grandparents day gift, grandparents day, gift for grandma, gift for grandpa

While the paint is drying you can decorate the front part of the card.  Here you can have your little one color on it, you can write on it or you can take the easy way and use stick on letters.  I found a sheet of silver letters in my old scrapbooking materials that were hidden in a closet.  After realizing I had just enough letters, my decision was made for me.

After the paint has dried, glue your painted piece into the middle and fold.  You can take a marker to sign your little one’s name and put the date on there, too.

That’s it.

Super simple.

Like I said above, this is what we did last year for Grandparents Day.  It was a huge hit!  Every grandparent loves to get artwork from their grandchildren – it’s a known fact.  Why I like having the artwork take up the whole inside of the card was because they can now frame it or hang it on the fridge to see the whole design.  

Wee Bit Excited

So, I might be just a little too giddy about my new adventure that I told you about the other day (here).  If you are in need of some new paper goods, then check out my shop over on Etsy.

I was so excited that I took a screenshot of my listing in the search results for my undated planner/organizer.

Screen shot 2013-05-23 at 12.58.21 PM

Thanks for all the support!

Cheers!

New Adventure

Alright, it’s time for a new adventure.  I have to keep moving.

You may have noticed that the name of the blog has changed.  That’s because ….

I would like to introduce you to my new Etsy shop – MereLynneConcepts.  I will continue to add items over the next few days (hopefully) for a long time.
calendarcoverdraft

calendardraft

I would love it if you would take a look at my shop and I am open to any suggestions that you might have.

10 Things I’m Thankful For

B&W #roadtrip

Happy Thanksgiving! I’ve decided that since it was Thanksgiving and all that it would be a good time to write down what I’m Thankful for this year.

1. My family. After this afternoon’s FaceTime session with them I realize that they are quite unlike any other family I know and for that I’m truly thankful.

2. J. It has been a wonderful year with him and I am grateful every day that we met sitting in Steak-N-Shake late one night.  It’s great having a guy that is so supportive of my ideas, my dreams, and everything going on in my life.

3. My friends. The first text I received this morning was from friends wishing me a Happy Thanksgiving. It’s great to remember all the fun times we’ve shared in 2012: a cruise, a haunted house, road trips, weekends at the lake, ‘family’ dinners, and so many more.

4. Work. This year has been quite a departure for me from the past several.  I started an amazing journey as a Weight Watcher Leader and have met so many amazing, supportive people since that time.  I’ve also been blessed with a job at a local law firm that has supported me through my school with a flexible schedule and has always been a place to go when I need an extra quiet study room at midnight.  Finally, I recently started a job as a Sales Associate at a retail store and cannot wait for my future with such a bright company.

5. Maggie.  We all know how obsessed I am with that pup so it’s no surprise that I can’t even make it half-way through my list without mentioning her.  Maggie and I have had quite a life together these past years.   I am thankful that she picked me that cold, rainy day in a hospital parking lot.

6. Graduate School.  Though I complain about it.  I am grateful that I’ve had the opportunity to further my education.  In less than 25 days I will be walking across the stage at Missouri State receiving my Masters in Business Administration degree.  Alright, so I actually won’t be getting my diploma that day, but I will be receiving an empty leather holder that symbolizes all the hard work and late nights I have put in these past 2 years.

7. My parents.  I know that I mentioned family as number 1, but the more I thought about it I really think my folks deserve their own number.  My Mom and Dad are awesome.  Seriously, I have the best parents around.  They support one another as they support their two kids.  I cannot say thank you enough to the two people who brought me into this world, guided me, and taught me to be an independent, educated, young adult.

8. J’s family.  They have welcomed me into their lives this past year and I’m grateful.  J’s family is absolutely wonderful and knows how to have a good time.

9. My Grandmas.  I’m lucky to have two amazing Grandmothers that have taught me a lot as I’ve grown up.  Still to this day the sound of wind chimes puts a smile on my face thanks to my Grandma D. who always had them on her front porch.  Grandma W.’s sandtart cookies are my all-time favorite and each Christmas I look forward to them.

10. Creativity.  I like that I can think out of the box (most days) and have a passion for creating.  There are so many ways to reduce stress out there and I’m glad that the one that helps me calm down the most is just so simple.

Okay, I know this post was a bit long.  Sorry.  Happy Thanksgiving and may your day be filled with happiness!

Check Marks for Fall

fall

Now that it is finally starting to feel like fall around the heartland I can create my fall to do list.  Here are a few of the things that I cannot wait to cross off with my favorite season of the year.

1) Ghost Tour of the historic Pythian Castle here in Springfield.

2) Carve a pumpkin.

3) Host a ‘family’ Thanksgiving dinner with J and the pup.  Since are families live 3 hours apart it will be hard to spend time together on the actual day, so we have hopes of celebrating together – just our little family.

4) Update my wardrobe with a few new chunky cardigans and eye catching scarves.

5) Spend some time reading something out of enjoyment and not necessity.  First up – Gone Girl by Gillian Flynn.

6) Complete a few crafts that I have been putting off, including my new nail polish display rack.

7) Start researching a new home to rent this coming Spring.

8) Become a bit more organized with my budgeting.

9) Drive to my absolute favorite in the world Apple Butter Festival in Kimmswick, MO

10) Develop some new post ideas and tutorials.

Now that fall has officially arrived, what are your plans?

September Favorites


1/2/3/4/5/6/7/8/9/10

Looking back at my favorite fall posts for the month of September.

DIY Canvas Word Art with Paint {Tutorial}

step6

I found a way to combine my love of art, music, and crafts.  This past weekend I created a work of art using lyrics from one of my favorite songs by New Found Glory.  The song: Tell Tale Heart.

Supplies:
1 Canvas, Mod Podge (I used Matte), X-Acto knife, paint brush, magazines (or newspaper), painters tape

step1

Step One: I taped off the edges of the canvas using painter’s tape.  I wanted the edges to remain white.  Step Two: I found some neat magazine clippings and used Mod Podge to adhere them to the canvas.  Then let dry.  step3step4

Step Three: I arranged the letters to the lyrics on the canvas.  step4a

Step Four: Paint over using one, two, or more colors.  I used four.  I like color and couldn’t seem to stop adding more.  step5

Step Five: After it is dry, peel off the vinyl letters using the X-Acto knife, if needed.  Step Six: If desired, use one more layer of Mod Podge over the artwork.

step6

Enjoy your new masterpiece.

DIY Ribbon Wreath

FallFinished

Recently, while browsing Etsy I came across some adorable ribbon wreaths.  I decided to make my own and then because it was pretty easy, I made one for a coworker who is obsessed a fan of the HOGS.

Just a warning that my pictures may be a bit jumbled with the directions – I forgot to take a few photos while doing my first wreath.

measuring

1) cut ribbon into about 4 1/2″ – 5″ pieces.  I used several different designs on my wreaths.

ribbonandpin

2) loop the ribbon and stick a straight pin through, like so.

beginningstages

3) start sticking on.  Continue until all the foam is covered.  My wreath was quite a bit smaller than my coworkers.  I used about 22 yards of ribbon and about 200 pins.  On the HOGS wreath I used 36 yards and about 350 straight pins.

GoHogs

4) after you have the wreath to your desire amount of fullness, then hot glue letters on.  I went with a fall theme for mine since I just can’t wait for the season to change.

almostfinished
closeupoffall

Now you have a fun, festive wreath. Enjoy!

DIY Project Board

To say I’m a dreamer is a bit of an understatement.  I have all these ideas and projects swirling around in my head at all times.  This past weekend, I finally took a moment to capture my ideas.  But first I had to create a project board, naturally.

supplies

You’ll need: 1 picture frame of your choosing, fabric large enough to cover the entire frame, scissors for trimming, and dry erase markers.

First measure the fabric.  I wanted mine to be a bit larger than the frame backing (for good measure).

step1

Second, I cut (not much explaining there).

Finally, I put it all together and then hang on the wall.

finished

Overall my Project Board cost me $9.00 and about 10 minutes, which includes re-hanging my pictures on the wall to make room.

finishedprod

I think it turned out great and now I have a place to capture projects and ideas.

hangingonwall

Now, I could have put some lettering spelling out “projects” on the fabric before piecing the frame back together, but I didn’t think it was necessary and who knows – that frame may take on a second life someday.

The total cost for this project broken down:

Frame – $4

Expo markers – $4

Fabric – $1

Total: $9 and about 10 minutes

Enjoy!