Category: DIY

Planting Lavender and Mint

repel flies

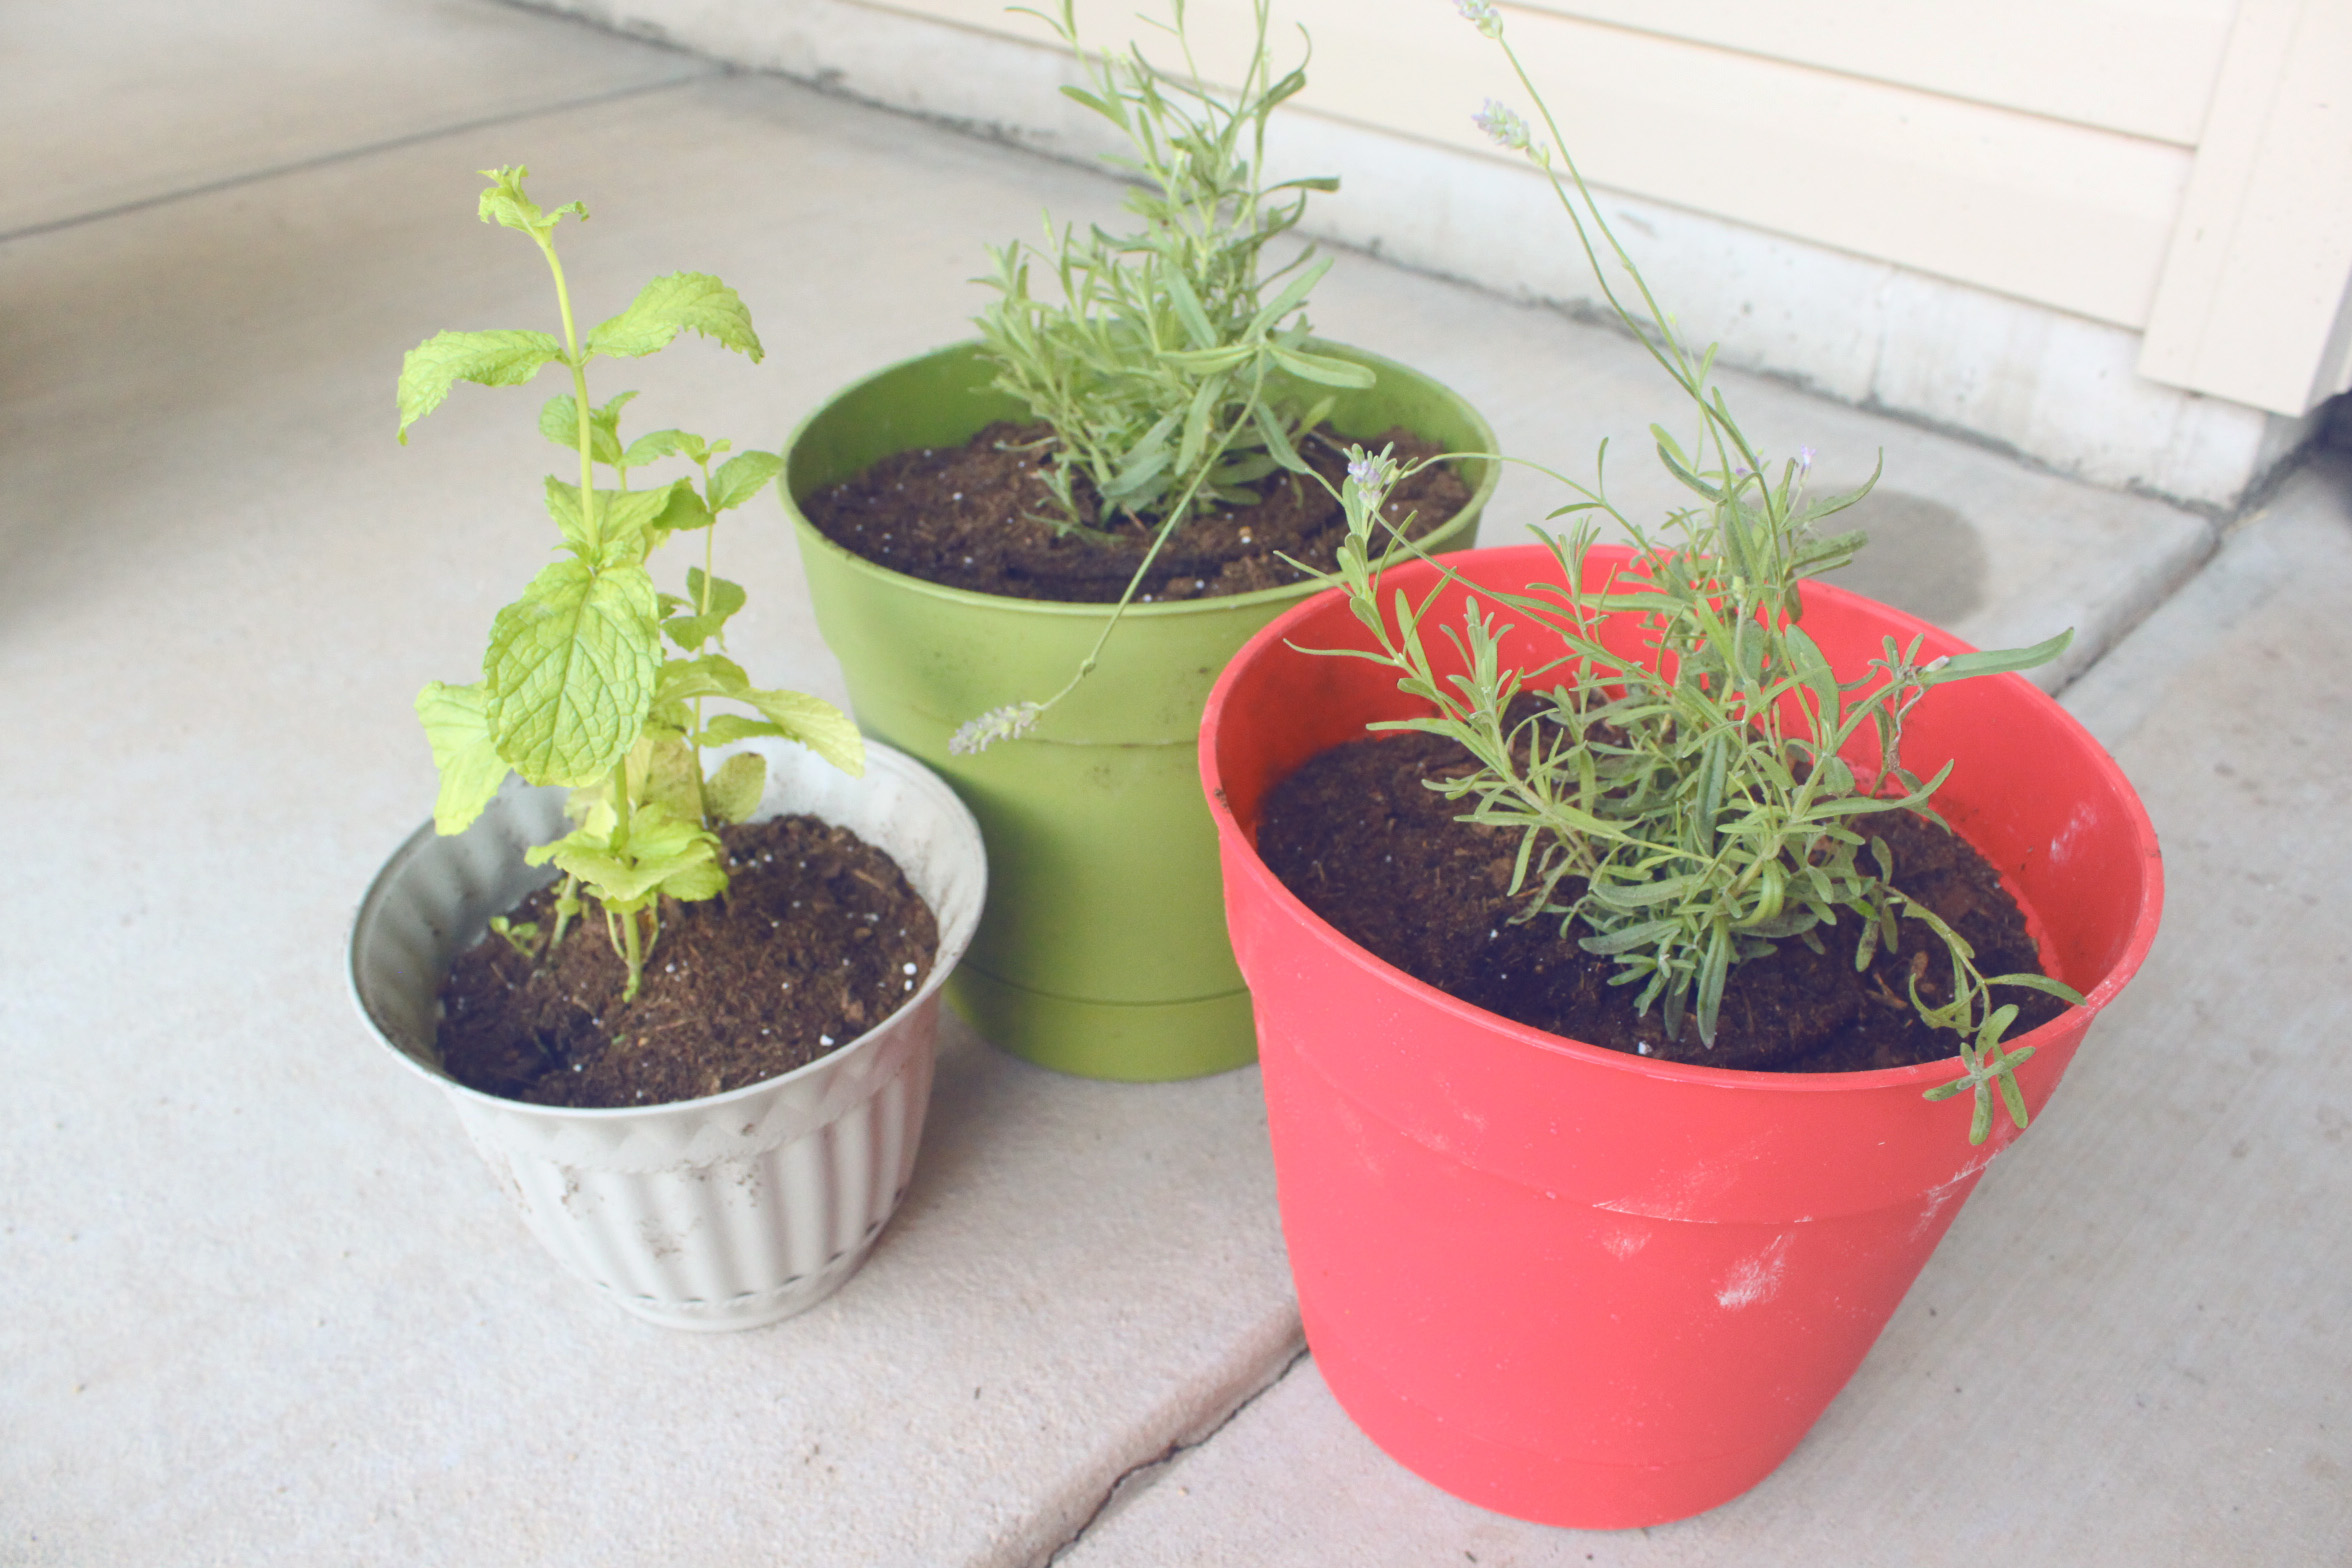
Nothing better than adding a little bit of greenery around the back patio.  J and I took a trip to the local nursery and found some plants to add to our yard.

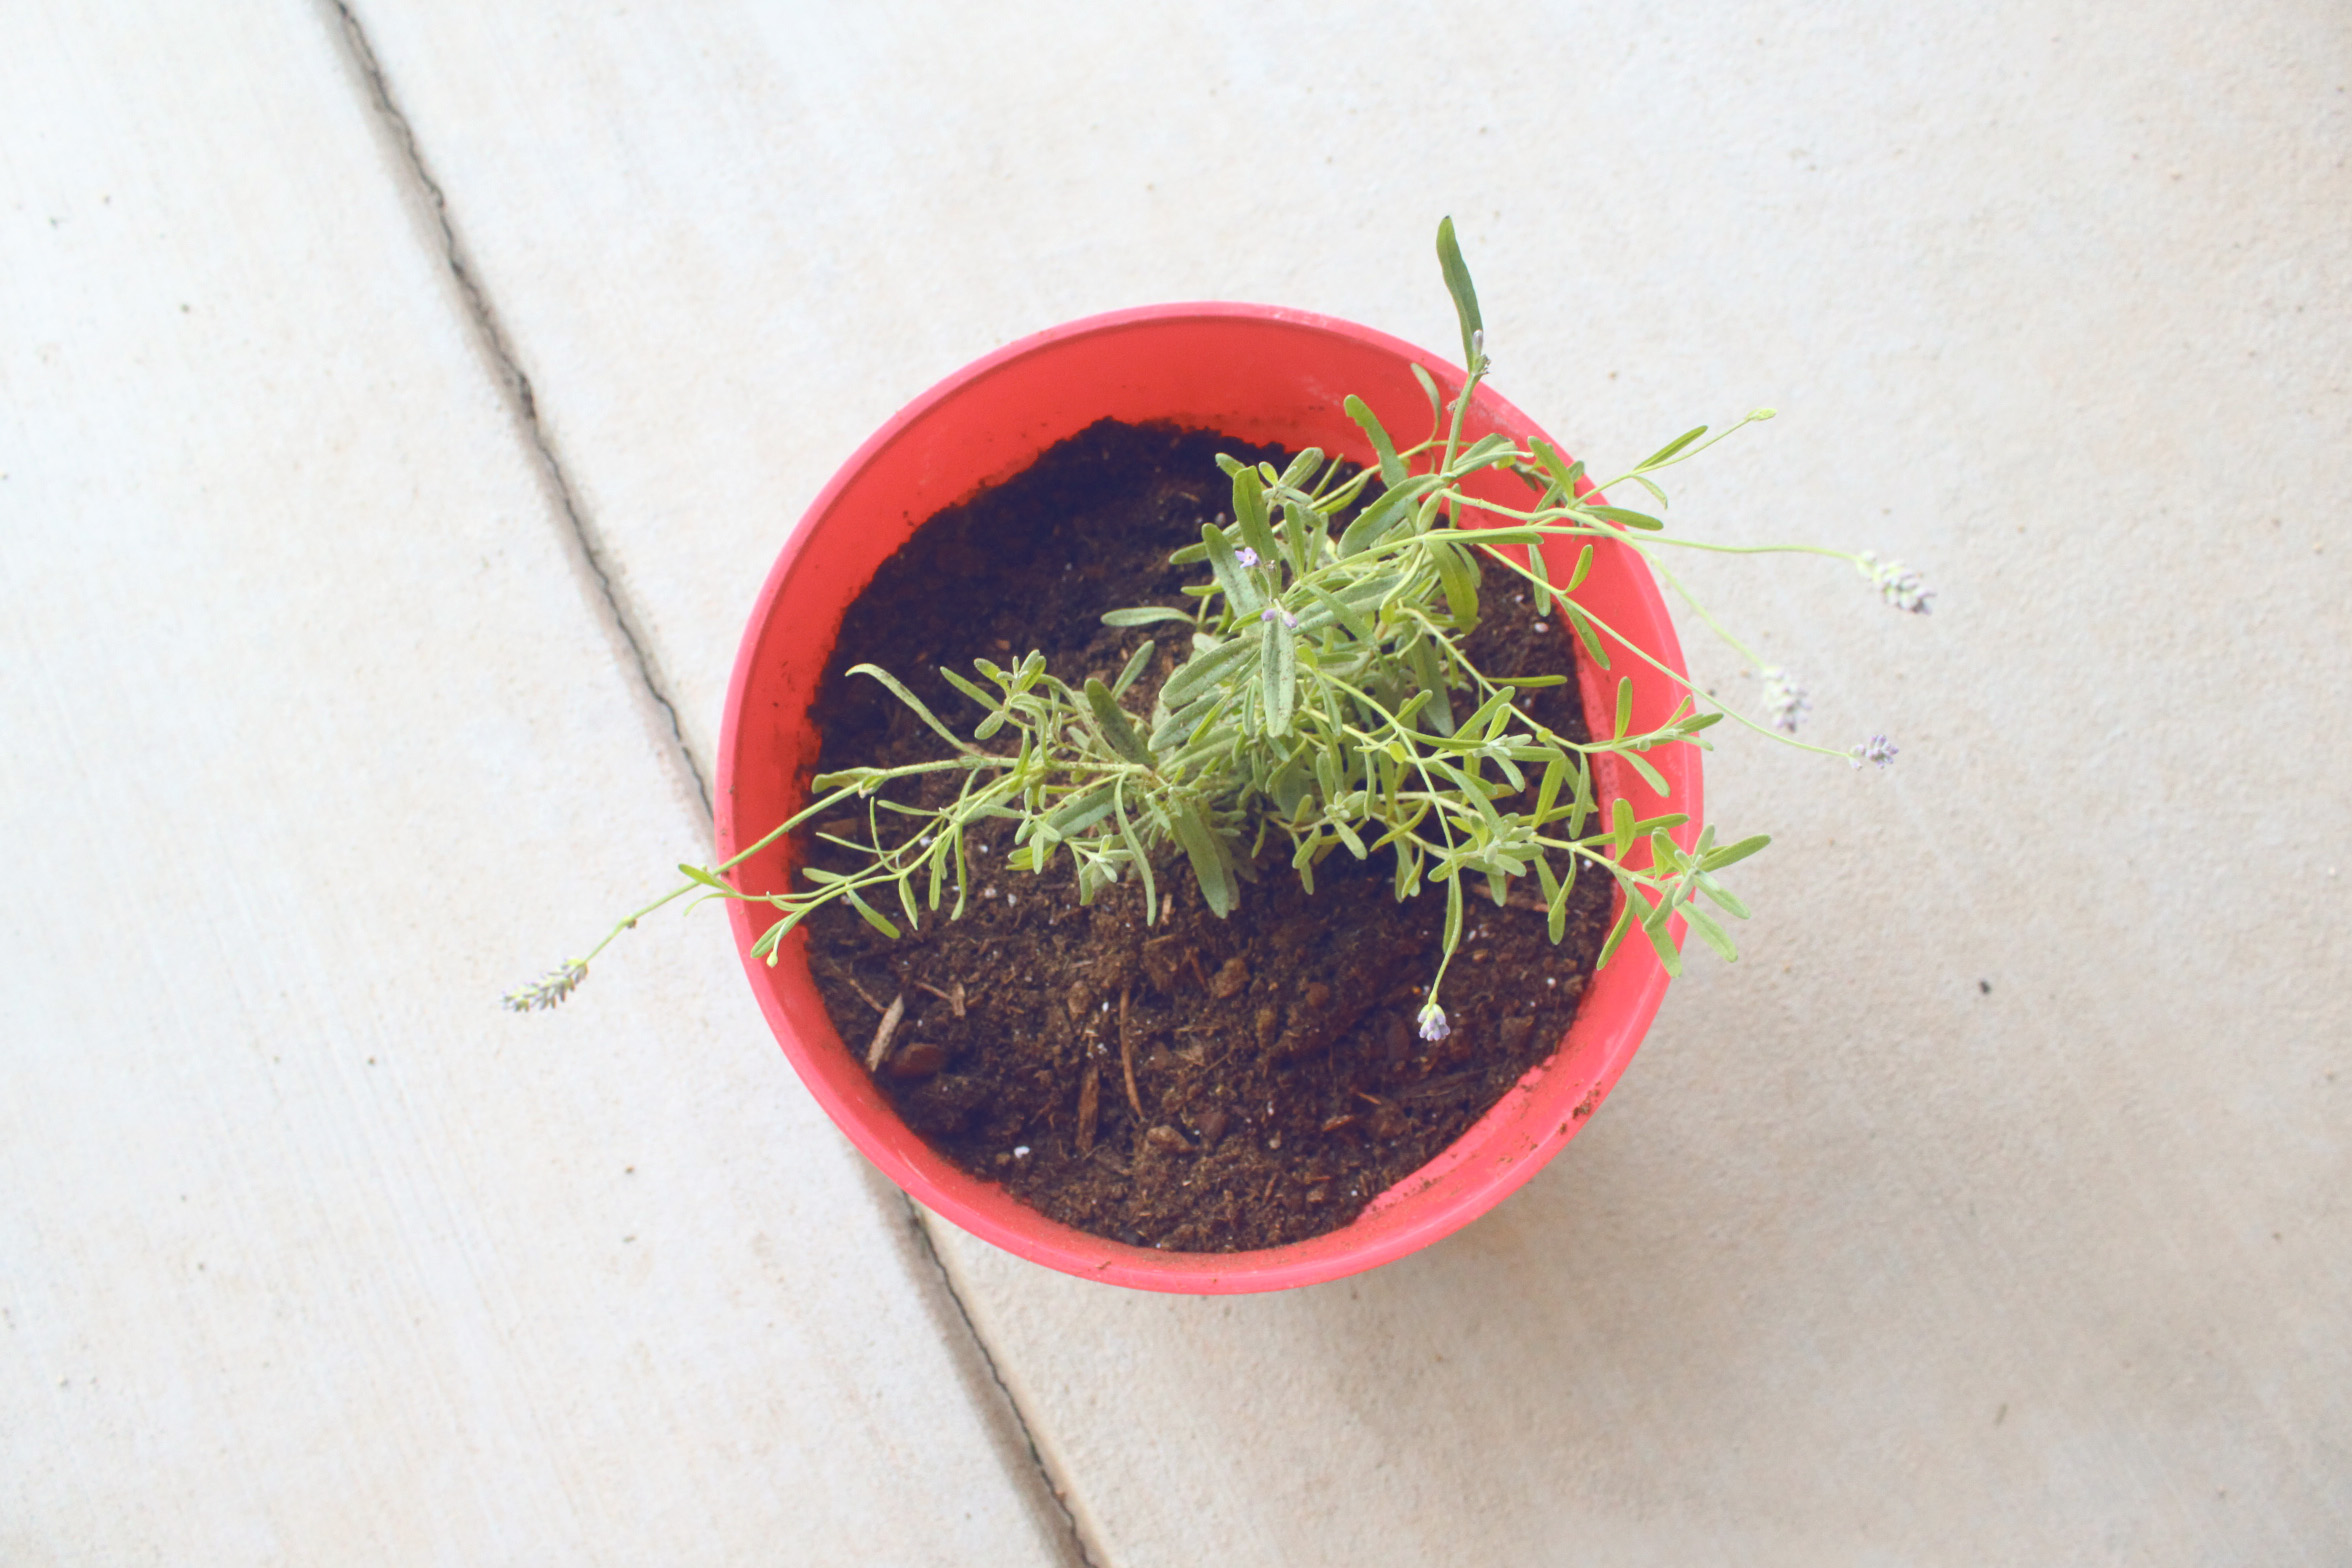
First, lavender, which is probably some of my favorite.  Then we added some mint.  After some research we found that mint was great to repel insects because of the odor it puts off.

plant_red
Of course these plants didn’t seem to be too time consuming for me.  Both needs to be watered every other day and the plants crave sunshine, which we have ample amounts of.

Here’s what you need:

1) planters – I used one for each plant, a 12″ for lavender and 8″ for the mint.  You want the mint to have more of a shallow pot because of their roots.
2) gravel
3) potting soil
4) gloves

The project took about 30 minutes to finish.

rocks
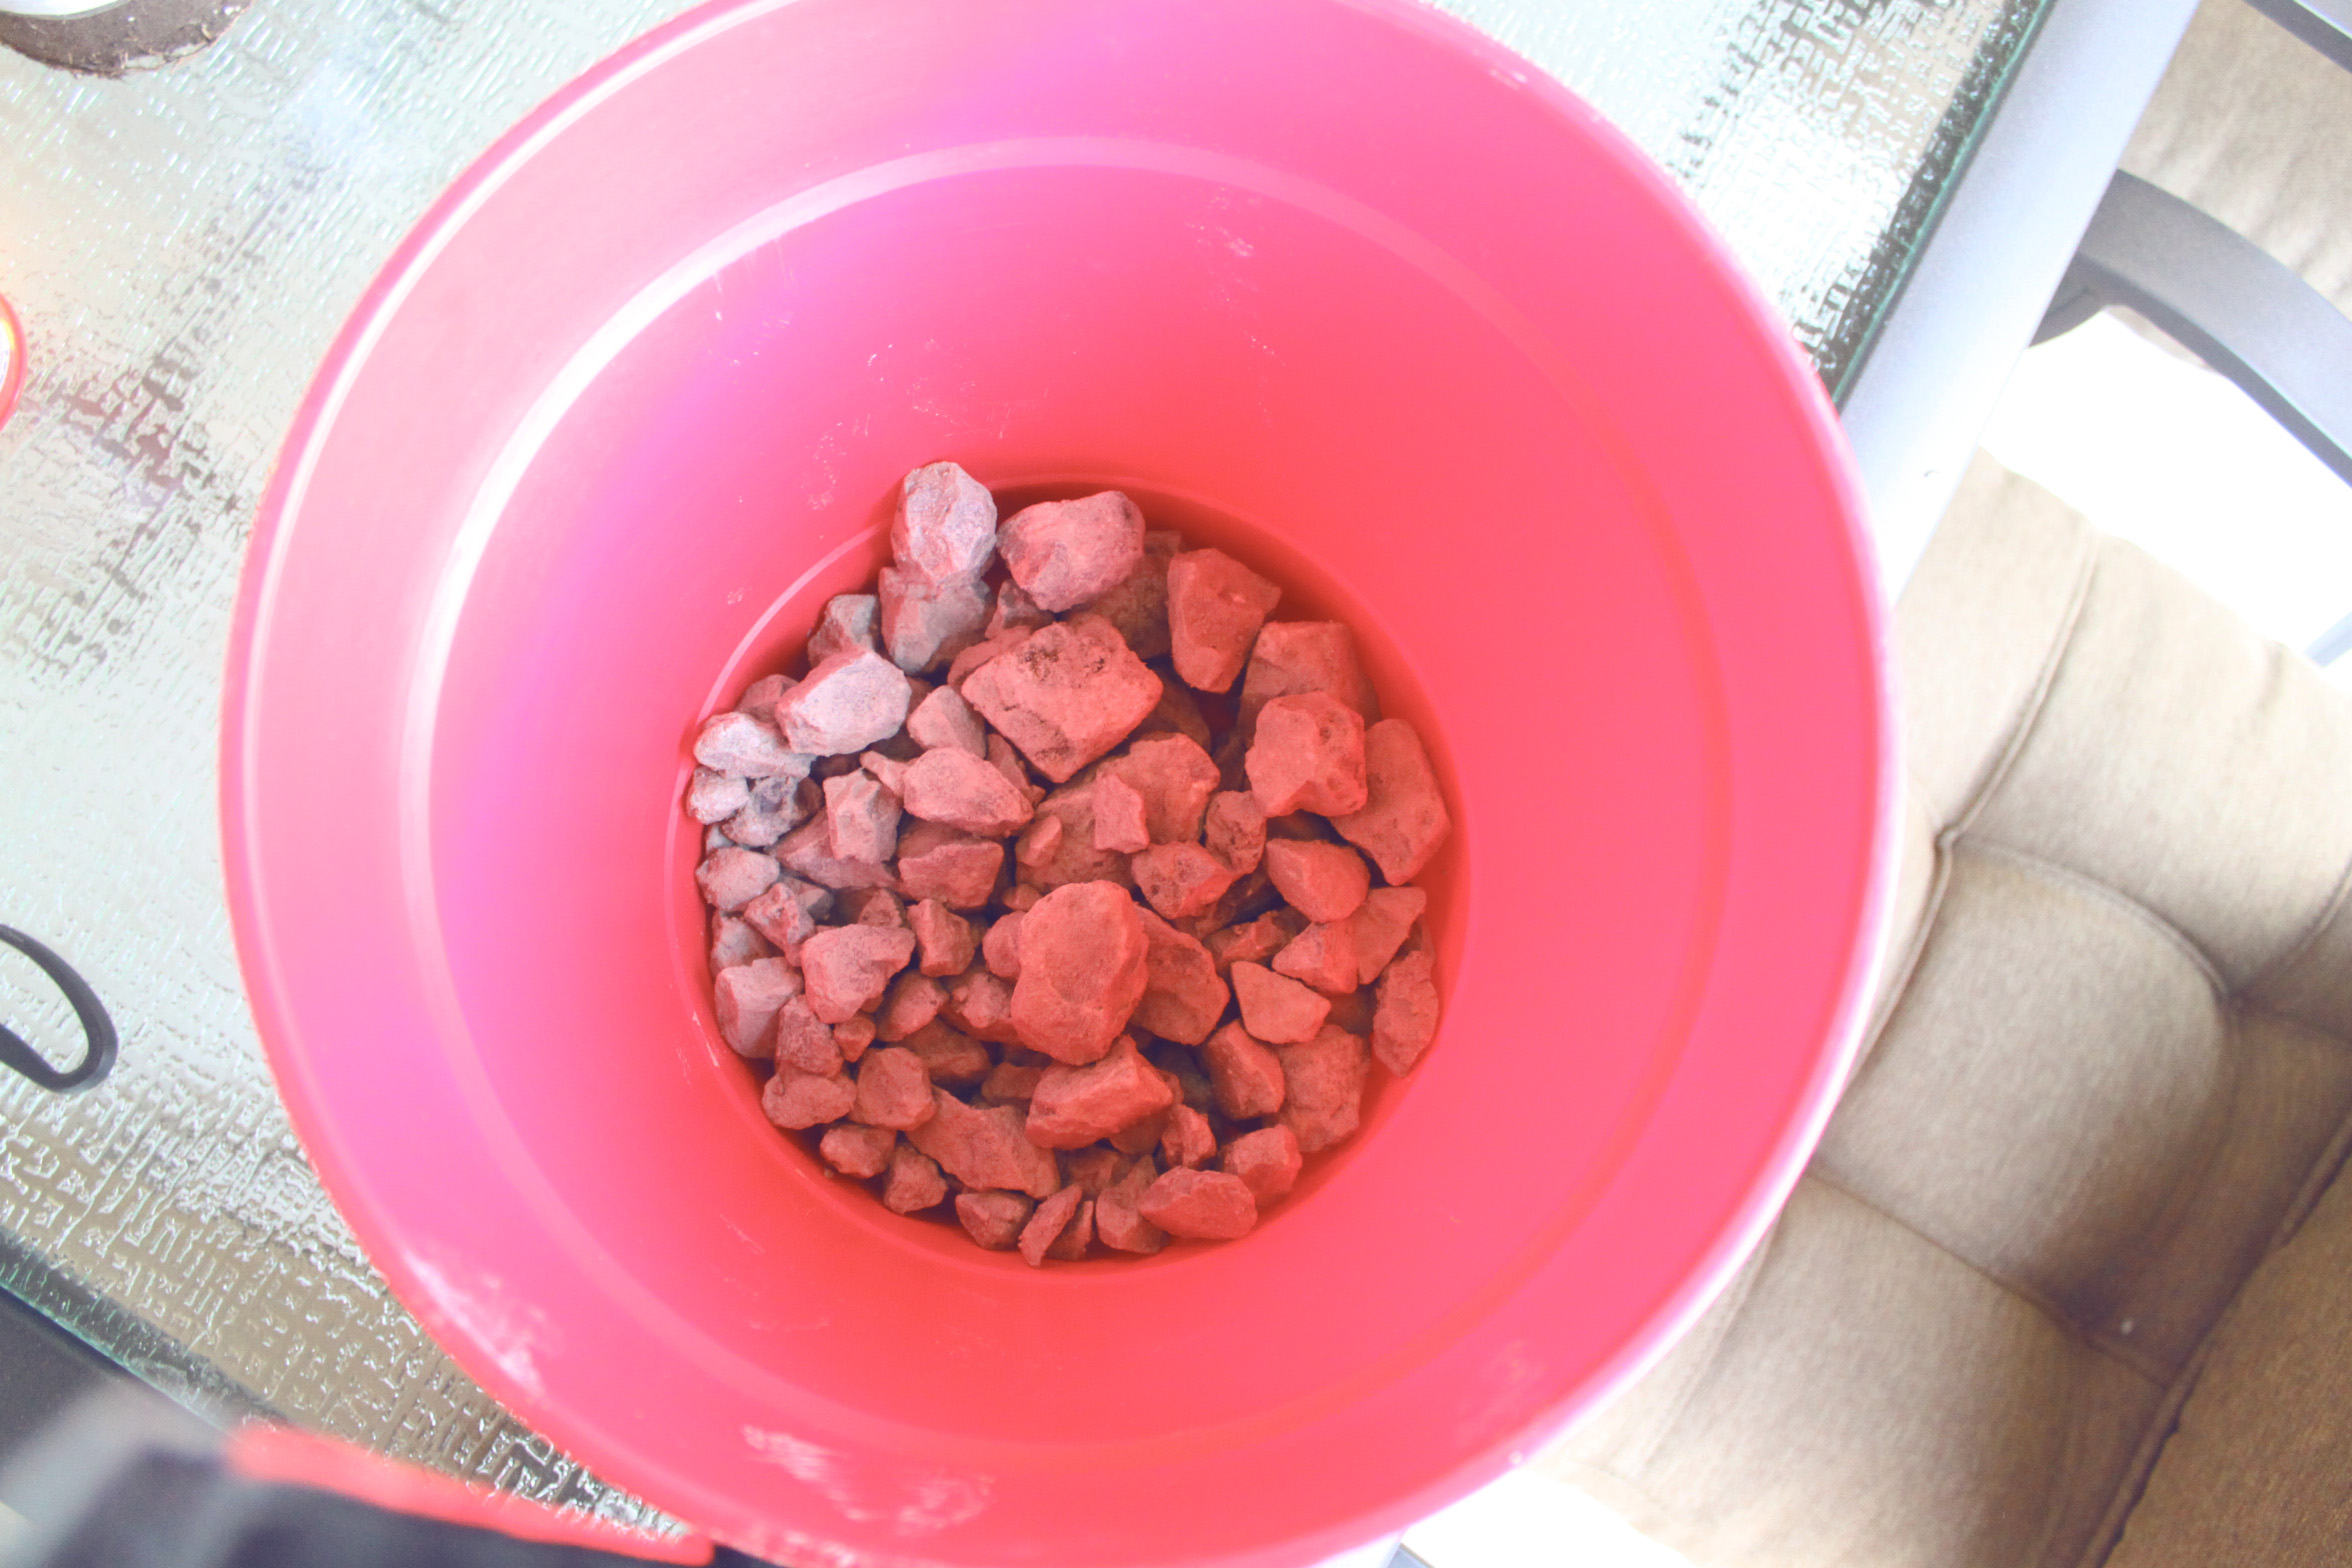
First, fill the bottom portion of each pot with gravel. This addition will help with drainage.

plants

That’s it. Pretty simple and makes a great addition to any backyard. I can’t wait to keep adding plants and flowers to make our yard a little more homier.

Cheers!

How to Remove Pet Odor from Area Rugs

rug2

Alright, I have two dogs and okay, my area rug in the family room started smelling a bit.

It happens when you have a puppy that is learning how to be house-broken.  Not to mention this said puppy is absolutely terrified of people and has a problem holding it in when she gets scared.  It’s hard to be upset about being scared, but I can be upset that my brand new, gorgeous rug was starting to smell.

Finally, after buying carpet cleaner after carpet cleaner I learned of this neat little trick that worked perfectly.  So, I thought that I would pass it on to you.

What you’ll need:

1) The rug you want to clean
2) An area outside to layout the rug in the sunlight
3) Spray bottle
4) White Vinegar
5) Water
6) Hose
rug
First, you want to soak your rug with the hose.  I like to use a good amount of water pressure to make sure to break up any dirt.
ingredients
Second, spray down the rug with your vinegar solution (1 part vinegar and 3 parts water)

Third, let dry in the sun.  I think the heat from the sun really helped get rid of the smell.

Voila!  Easy, simple and completely doable.  The rug is as good as knew and our house smells wonderful.

Cheers!

Wee Bit Excited

So, I might be just a little too giddy about my new adventure that I told you about the other day (here).  If you are in need of some new paper goods, then check out my shop over on Etsy.

I was so excited that I took a screenshot of my listing in the search results for my undated planner/organizer.

Screen shot 2013-05-23 at 12.58.21 PM

Thanks for all the support!

Cheers!

I said “Yes!”

keep-calm-we-got-engaged-1

It’s official, J and I are engaged!

28084_10100525995737464_509688762_n

I still get a big, goofy smile on my face when I say that sentence. I have been in la-la land planning, dreaming the perfect wedding.

I hope to share ideas and DIY projects that we will be incorporating into our wedding.  So far, I’ve ordered a few items from Etsy.  A lovely save-the-date sign from ArmyMOMOfTwins for our engagement photo session and because her signs were just too hard to pass up I also ordered a Mr. and Mrs. sign for our reception chairs.  Check out the save-the-date sign here and the reception chair signs here.

I had a hard time deciding which projects that I wanted to make myself and which ones I would order from Etsy or have someone else do.  I finally reached a decision maker that was too hard to argue with… If it is going to cost more to get the materials needed to make it than it would to purchase (including shipping costs) than I would order it.  It was simple money-saving tactics that persuaded me.  I don’t need a bunch of paint, ribbon, and other items that I will not use for another project.

I hope to share my projects, ideas, and final outcomes throughout the planning process.  We have about 9 months till the wedding, so I have some work cut out for me.

Cheers,

Mere

photo credit

Check Marks for Fall

fall

Now that it is finally starting to feel like fall around the heartland I can create my fall to do list.  Here are a few of the things that I cannot wait to cross off with my favorite season of the year.

1) Ghost Tour of the historic Pythian Castle here in Springfield.

2) Carve a pumpkin.

3) Host a ‘family’ Thanksgiving dinner with J and the pup.  Since are families live 3 hours apart it will be hard to spend time together on the actual day, so we have hopes of celebrating together – just our little family.

4) Update my wardrobe with a few new chunky cardigans and eye catching scarves.

5) Spend some time reading something out of enjoyment and not necessity.  First up – Gone Girl by Gillian Flynn.

6) Complete a few crafts that I have been putting off, including my new nail polish display rack.

7) Start researching a new home to rent this coming Spring.

8) Become a bit more organized with my budgeting.

9) Drive to my absolute favorite in the world Apple Butter Festival in Kimmswick, MO

10) Develop some new post ideas and tutorials.

Now that fall has officially arrived, what are your plans?

Breathe in, breathe out

Red & Peace

red & peace.

Untitled

studying for an E-Marketing test. I know all about this chapter on Social Media… some would like to call me “addicted to all forms of social media.”

PinterestTwitterTumblrFlickr – Bloglovin

Untitled

My Empire … My Rules by OPI

I have this tendency to do a DIY manicure at least once a week. Sometimes, though, if I have extra time or if I’m stressed (like I was this past week) I can fit in 2 manicures.  Then when the color dries on my nails and that topcoat goes on – all is right with the world.  Call me crazy, but it relieves the stress.  And since it only seems to relieve stress for just a minute I like to keep a bottle of polish near by.

No Heat Curls {Tutorial}

I have seen these headband, no heat curls on some blogs and pinterest.  So, I decided to give it a try.  My hair has a natural aversion to curl – this aversion goes way back to when I was a senior in high school and waned curly hair for prom. You know the classic – you always want what you don’t have syndrome.  After several, long hours at the salon my hair was curly… and weighed an extra 10lbs from all of the product!

I’ve gotten off topic.  You take a stretchy headband and place over your head (across your forehead).  Then take your hair and wrap it around the band until it’s all tucked away. like so…

In the morning your hair may look something like this …. or if you are a more peaceful sleeper it may not look so jacked up.

Take out the band and ta-da you have curls!

Disclaimer: I’m sorry that I decided to go au’ natural in these photos and…well for the poor quality.  I was pretty tired the night before and then might have overslept the next morning.  Girl does have to get her beauty rest!

So far, the curls have lasted.  Of course, I gave them a good dousing of hairspray.

Enjoy!

About 8 hours later, I was still sitting in front of my laptop studying for my pending stats test.  I had ran to the grocery store, started a casserole for dinner, and may have taken a break…or two.  Here’s what the hair looked like:

I think it still had some nice texture to it. Definitely not the same amount of curl tho! Darn my hair!

September Favorites


1/2/3/4/5/6/7/8/9/10

Looking back at my favorite fall posts for the month of September.

DIY Canvas Word Art with Paint {Tutorial}

step6

I found a way to combine my love of art, music, and crafts.  This past weekend I created a work of art using lyrics from one of my favorite songs by New Found Glory.  The song: Tell Tale Heart.

Supplies:
1 Canvas, Mod Podge (I used Matte), X-Acto knife, paint brush, magazines (or newspaper), painters tape

step1

Step One: I taped off the edges of the canvas using painter’s tape.  I wanted the edges to remain white.  Step Two: I found some neat magazine clippings and used Mod Podge to adhere them to the canvas.  Then let dry.  step3step4

Step Three: I arranged the letters to the lyrics on the canvas.  step4a

Step Four: Paint over using one, two, or more colors.  I used four.  I like color and couldn’t seem to stop adding more.  step5

Step Five: After it is dry, peel off the vinyl letters using the X-Acto knife, if needed.  Step Six: If desired, use one more layer of Mod Podge over the artwork.

step6

Enjoy your new masterpiece.

DIY Ribbon Wreath

FallFinished

Recently, while browsing Etsy I came across some adorable ribbon wreaths.  I decided to make my own and then because it was pretty easy, I made one for a coworker who is obsessed a fan of the HOGS.

Just a warning that my pictures may be a bit jumbled with the directions – I forgot to take a few photos while doing my first wreath.

measuring

1) cut ribbon into about 4 1/2″ – 5″ pieces.  I used several different designs on my wreaths.

ribbonandpin

2) loop the ribbon and stick a straight pin through, like so.

beginningstages

3) start sticking on.  Continue until all the foam is covered.  My wreath was quite a bit smaller than my coworkers.  I used about 22 yards of ribbon and about 200 pins.  On the HOGS wreath I used 36 yards and about 350 straight pins.

GoHogs

4) after you have the wreath to your desire amount of fullness, then hot glue letters on.  I went with a fall theme for mine since I just can’t wait for the season to change.

almostfinished
closeupoffall

Now you have a fun, festive wreath. Enjoy!