Category: Blog Tips

How to Personalize Your Snapcode

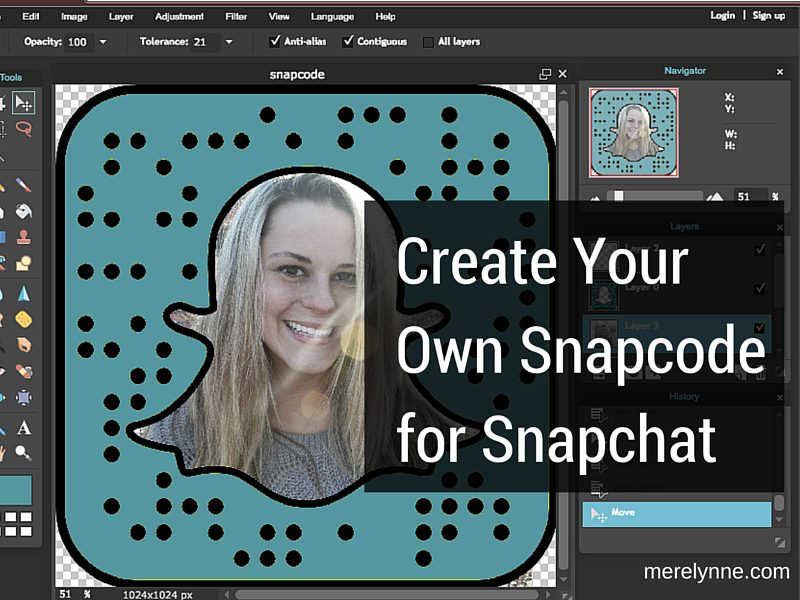
Create Your Own Snapcode for Snapchat

I have finally started getting into Snapchat.  I used Snapchat when it first came out and then I stopped.  But I’ve been seeing some of my favorite bloggers use it and I love the behind-the-scenes glimpses in their lives.  So I wanted in on the action and created a new account.  I’m constantly sharing the struggles of having a newborn, working, and being very sleep deprived.  Follow me @meredithines.  

You know, it’s easy to hide yourself and hide behind a blog post.  But to grow your business then you can’t be afraid to stand out. (Tweet that!

Anyway, I had to personalize my own Snapcode to match my blog a bit better and add my username.  It’s super easy and thought I would share it with you.

Step 1

On your computer, login to Snapchat.

Step 2
personalize snapcode

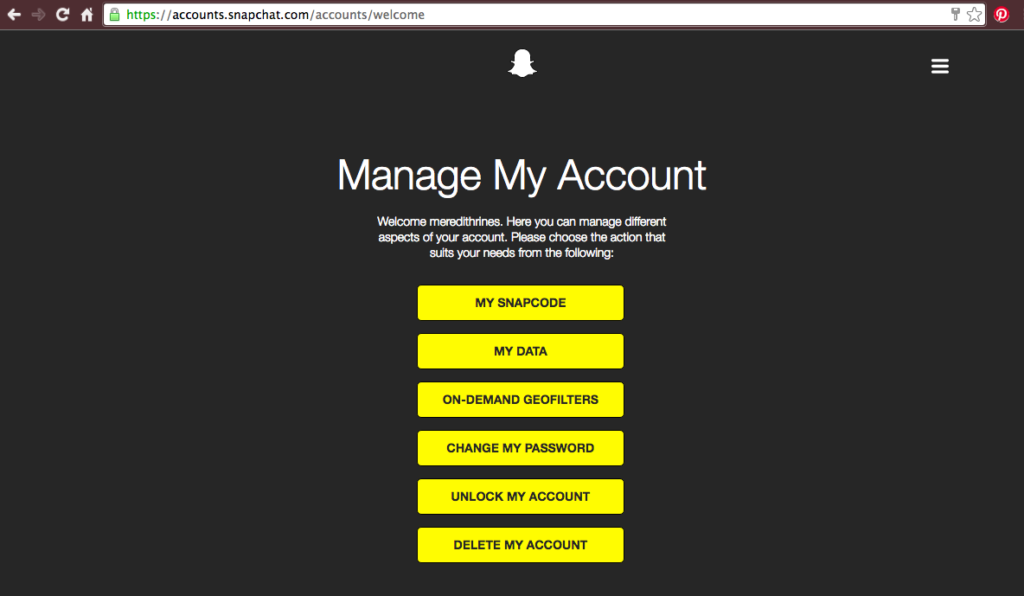
You will see a screen like this one, click My Snapcode.  Then click Download Snapcode.  It will download as a ZIP file containing the PNG and SVG files of your Snapcode.  

In the file there are Snapchat’s Dos and Don’ts of personalizing your Snapecode.  Pay attention to those guidelines, otherwise your code won’t work.

Step 3

Use a photo editor for the next steps.  I like using Pixlr, a fee online editor that is similar to Photoshop.  Open the PNG format.  

Step 4
personalize snapcode

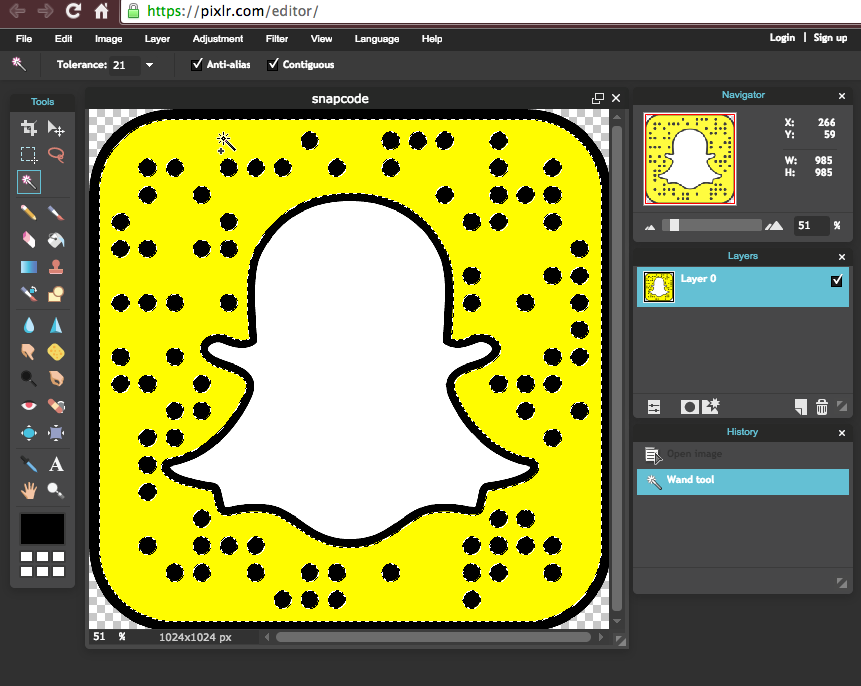
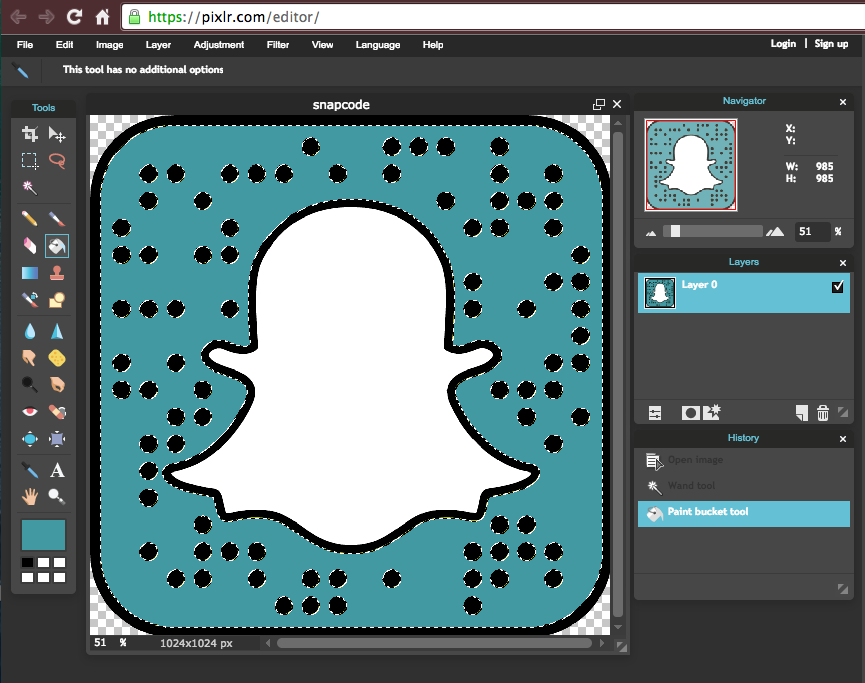
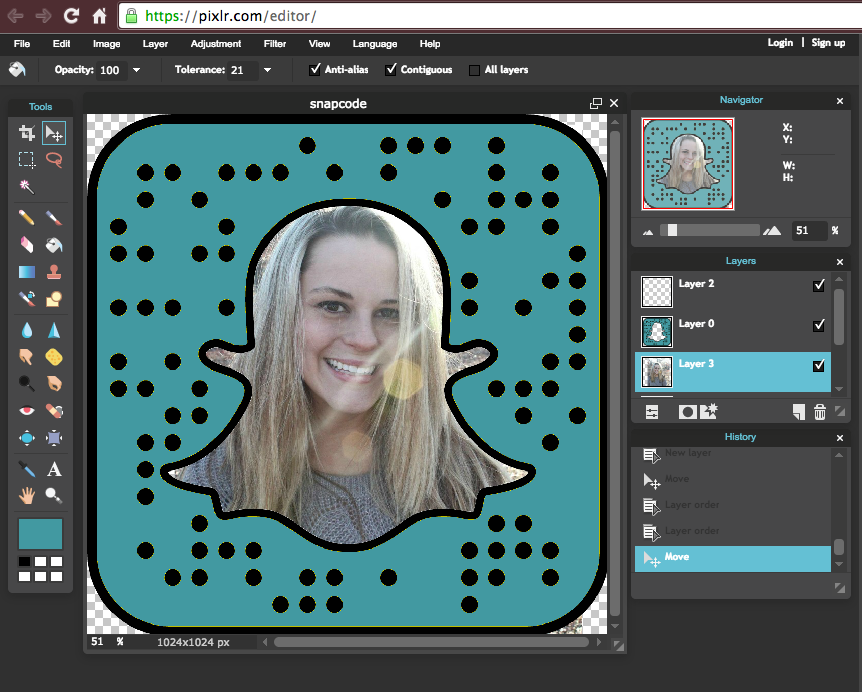
Select the wand tool and select the yellow portion of the image.  Once it’s highlighted, you can change the background to your color choice by using the paint bucket.  I think making it a color you use on your online presence is a good idea.  I use teal in a lot my images, so that’s what I went with.  If you know the color code you would like to use, you can enter it in.
personalize snapcode

Step 5

You can enter your own image under the ghost.  Using the wand tool, select the white portion.  Then click delete.

Step 6
personalize snapcode

Selecting the image you want to use.  Go to Layer > Open image as layer.

Step 7

Move the image under the ghost.  Click on Layer > Move layer down.

Step 8

If you have a portion of the image that sticks out, you can remove it.  Use the lasso tool.  Draw around the part that you want to remove. Once highlighted, hit the delete button.

Step 9

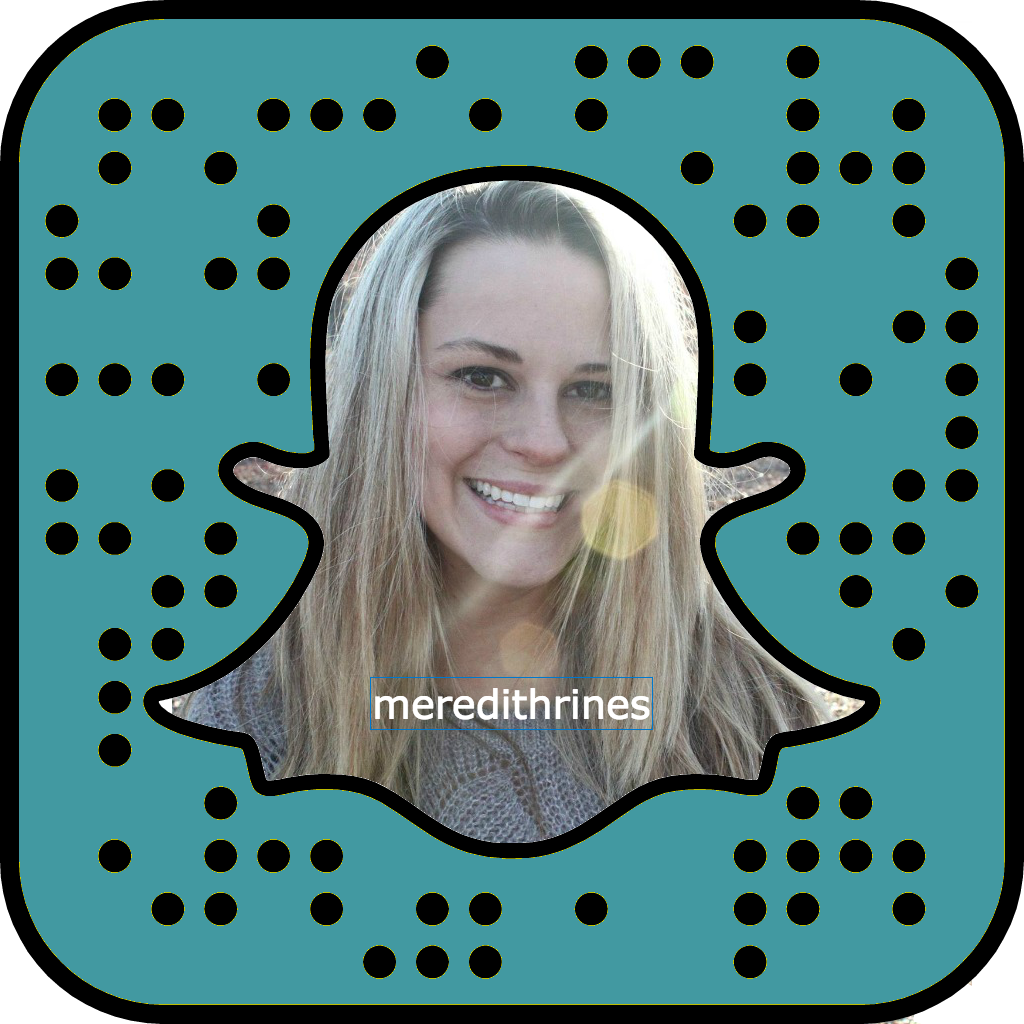
You can add text at this point.  Just don’t cover up the black dots since that’s your code.

Step 10
snapcode

Save your image and you’re done.

Thanks for stopping by!  Hope this helps!

Leave me your snapchat name in the comments so I can follow you.  
In the Name of Blogging


in the name of blogging

I’m sure if you’re a blogger than there are things and stunts you’ve pulled all for the sake of a good post. What have I done, that I never thought I would, all for the sake of blogging?

Here’s what I’ve done for my blog:

– stood awkwardly in public while trying to get my picture taken
– rearranged a whole room for one simple picture, just to put it back like it originally was
– become more of a list maker (what I need for each post, post ideas, image ideas, and so on.)
– check Instagram way too often through out the day

meredith rines

Here’s what I’ve needed for my blog:

– pretty, colorful plates
– light reflectors to get the perfect shot
– photography how-to lessons
– photo editing – I use picmonkey and canva for most of my images
– clean images of my Mac laptop
– social media scheduling platform, I use Hootsuite
– a new cell phone with a better camera

You see, I could probably go on and on with what I NEED for this blog. But I think most bloggers feel my pain. One of these days I’m going to get smart and spend a whole day creating a bunch of different stock photos for my posts and Instagram shots. But that day hasn’t come yet.

What have you done in the name of blogging?

How to Schedule Social Media Posts for the Month

How to Schedule Social Media Posts

I was in a meeting for a non-profit organization that I currently am on the board for.  Many of the other members were wondering why we didn’t have much activity on social media, especially with our huge annual conference coming up.  The woman who handles are social media wasn’t there, but I quickly starting wondering why she wasn’t pre-scheduling the posts.  It’s a snap to do and really, you can set it and forget it.  Of course, I’m not recommending not checking your social media for an entire month, but essentially it’s possible.

I told my fellow board members the ease of scheduling posts, articles, sharing stories, sharing blog posts was super easy.  I even offered my help to the woman in charge.  I thought if I could teach her how to be proactive with social media then the board will be happy, we will get our message out to more people in the community, and even increase participation in our conference.

Then I started thinking about how many bloggers, business owners, etc. may not know how to schedule social media posts.  So I thought I would share how I do it.  It’s not perfect by any means and I’m pretty frugal so I don’t actually pay for any of the services I use.  I know there are probably better ones out there that cost money, but I’m not interested in those.

I use Hootsuite* as my platform.  I use it for two main reasons: 1) it’s easy to use 2) it has a free version, which is what I use.


HootSuite: Social Relationship Platform
*
how to schedule social media posts

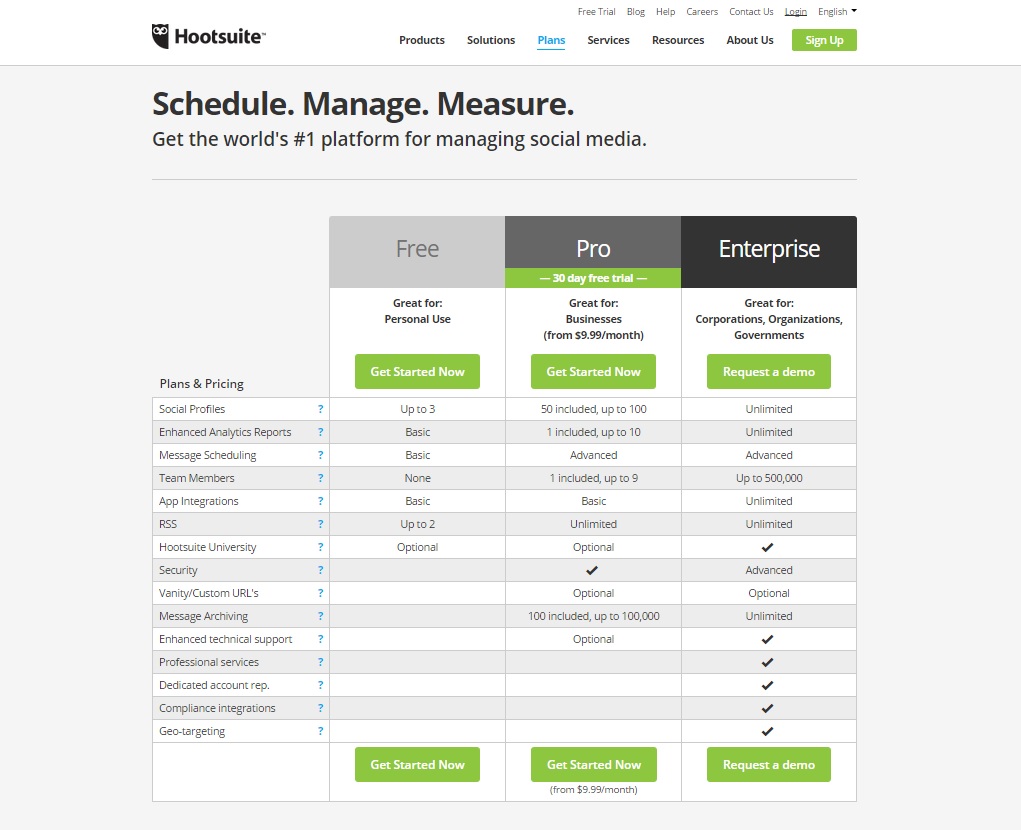
The first thing you want to do when you get to their homepage is sign up for an account.  Hootsuite* has three options – Free, Pro, Enterprise.  If you’re just starting out or don’t have $9.99 a month to spend until you grow a little bit, then select Free.

On the next screen, you’ll enter your email address, password and timezone.

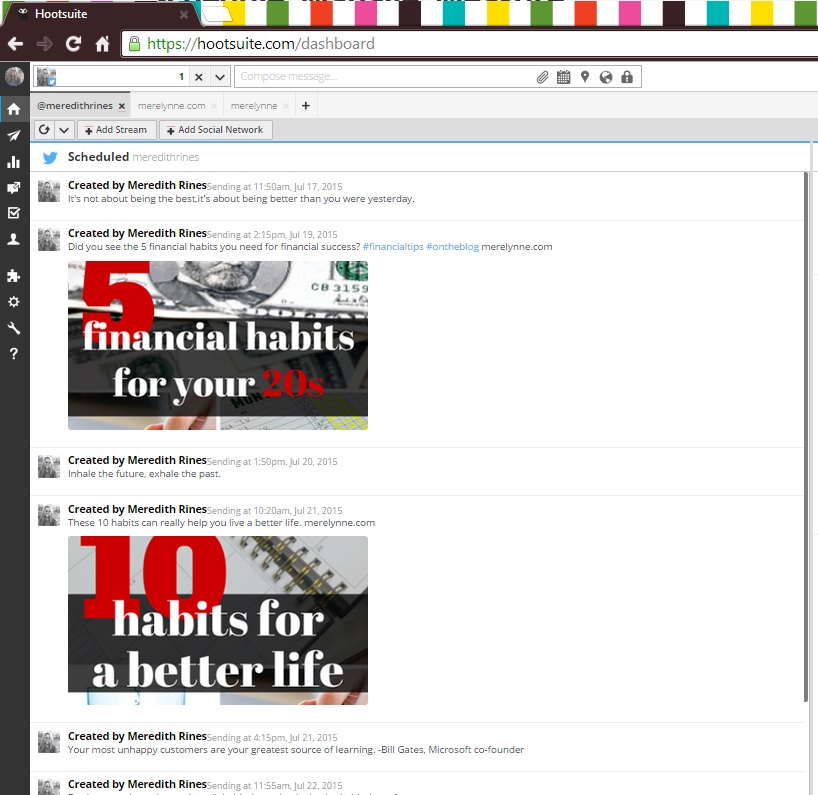
Then you’ll want to connect your social networks.  I have my Facebook page and Twitter page connected.  Once you’re on your dashboard then you can start scheduling your posts.  Here’s what my scheduled posts stream looks like.  I go ahead and schedule my upcoming blog posts, too.  That way if I get busy at work or on the weekends then my blog post is going to be shared with my Twitter followers.  Plus, you can find what time of day and which day of the week most of your followers are on social media.  I researched by using information online and checking my Google Analytics information.

scheduled posts

Once you get your blog posts scheduled then go find quotes, articles, other bloggers’ posts that you like to schedule.  Make sure you’re posting 2-3 per day at varying times.

I don’t use any tool to schedule pins on Pinterest, yet.  I haven’t found one that I like a lot that doesn’t cost too much for the budget I have.  Remember I’m frugal and until my blog starts making more money then the costs of these programs, I’m just not going to be able to use them.  If you know of a program that can pre-schedule my pins that doesn’t cost, please let me know!

schedule social media posts

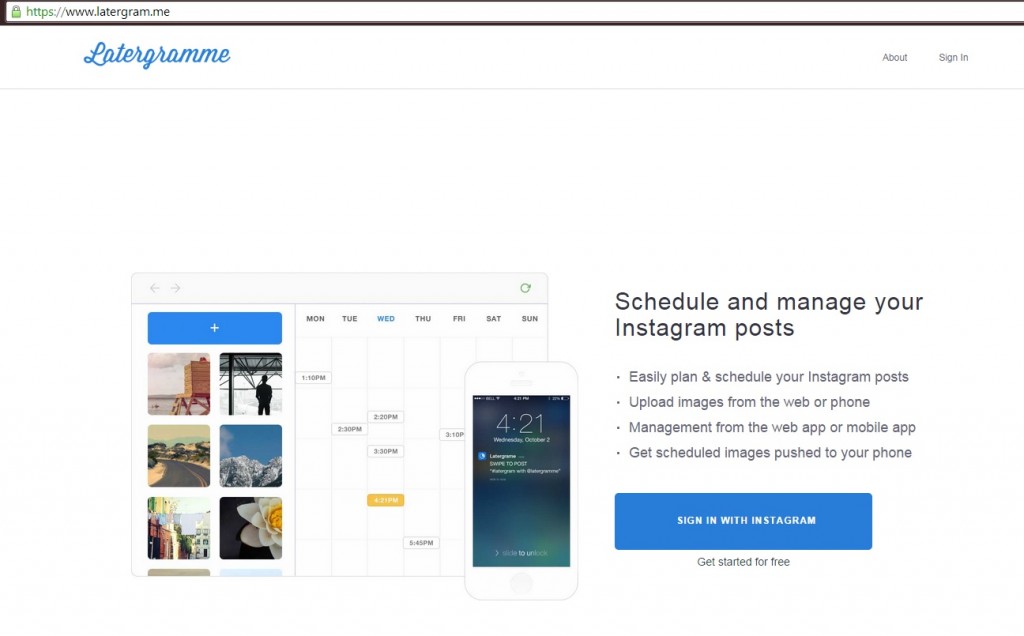
I currently use an app on my phone called Latergramme.  It’s free (of course) and it allows me to schedule Instagram posts.  The one downfall is that it doesn’t actually send the post, but it alerts me when at the scheduled time.  All I have to do is get into the program and hit Post Now.  Then my Instagram app opens and allows me to post.  One thing I really like about Latergramme is that I can not only schedule the image, but also the quote to go along with it.  So when the time comes my post takes less than 60 seconds to go live.  I love that!

* This post contains affiliate links.

Revamping a Blogging Schedule and Editorial Calendar

I have tried a different blogging schedule and editorial calendar almost every 3 months over the years. I find one and settle for a few months then it just seems to overwhelm me and I can no longer keep up.  J and I just moved, not only to a new home but a whole new town.  Our lives have been a bit of a mess and I’m sad to say my blogging schedule for the last few weeks has been a bit wacky.  I do not believe that blogging should feel like work, I mean I’m not making a 6-figure income from this little hobby of mine. Until that time comes, this hobby will be just that – a fun side project I’m passionate about.
However, I do like having a routine I can stick to. Something about being organized makes my heart happy. I have been working with one for the past few months and it seems to be working well. I thought it would be great to share my blogging schedule and how I organize my editorial calendar.

blogging schedule, editorial calendar
Creating a blogging schedule.

I typically post 3x a week. Monday, Wednesday and Friday. The posts go live early in the morning thanks to my WordPress scheduler. Plus I have it setup so once the post goes live a tweet and facebook post are sent automatically. Thanks to the Microblog Poster plugin, it does all the hard work of posting to Twitter, Facebook, etc. for me.
I am not opposed to posting more than just 3x a week, but long gone are the days of feeling a need to post Monday through Friday. Again, I’m not making buko bucks over here.

editorial calendar, blogging schedule
Organizing my editorial calendar.

My editorial calendar is nothing more than a spreadsheet located on my Google Drive. There are 6 columns: Subject, Pictures-to do, when, posts-to do, when, date to be published. Each one is pretty self-explanatory, but let me break it down for you.
Subject: what is the title or gist behind the post
Pictures – to do: A simple reminder that pictures either need to be taken for the post or edited.
When: The first “when” column is for the pictures. When do I need the pictures fully finished and ready to be uploaded?
Posts – to do: Do I need to write the post, proofread, edit, etc.?
When: The second version of this column is for the copy. Same idee as the pictures – when do I need the copy finished and ready to be posted?.
Date to be published: The date the post is going live on merelynne.com
Pretty simple, right? I’m going to tell you though, the moment I started with this spreadsheet it was like the stars aligned and it was magical. My new editorial calendar is a running idea keeper for me.
I then use my Google Calendar. I created a new calendar titled “merelynne posts.” Here I put the title of the post on the day it will be published. Now I can look at the entire month and see which days I don’t have a post for and make sure my order makes sense. Sometimes I like to connect my posts to one another and it’s nice to see it all laid out for me. There is also a handy plugin in WordPress called WordPress Editorial Calendar. It’s the same idea as the Google Calendar but you can actually drag and drop to change your publication dates instead of having to go into the actual post. It’s neat. I use that too, but it’s more of a scheduler for me.
As of today, I have ideas that run all the way into mid-July. It doesn’t mean that I have each posts written or even started for that matter. But I do have the idea behind those posts and really, that’s the starting point.
Thanks for letting me share with you how I organize my blogging schedule and editorial calendar.
How do you organize your ideas? Leave me a comment letting me know. I would love to share ideas and maybe learn a few things.

My Personal Branding Statement

personal branding statement
I was following Jill Celeste’s 21-Day Personal Branding Challenge and one of the tasks was to create a personal branding statement.  Imagine that, huh?  A personal branding challenge and a task on the list is to create your own personal branding statement.  I should have seen it coming, but alas I was not prepared.  There were over 21 tasks on the list, but I selected my 21 and then one-by-one started tackling the easy ones.  Towards the middle of April I realized that I had only the more time consuming or difficult ones left.

One being the personal branding statement.

After struggling for a while to come up with anything, I reached out to the challenge’s community.  Someone gave me the best advice with one simple question.  Why?  Why do I want to do what I do?

I sat back and just started asking why… why… Meredith, seriously why?

Then I wrote.  It didn’t make much sense and my brain was all over the place.  But that didn’t matter.

It’s important when writing a personal branding statement to free-think and just allow yourself to brainstorm all the possibilities.  From there you can tailor it down and become more eloquent in your writing.

Here is what I started with:

I want to have a creative outlet for myself.  I have many different areas that interest me and I know that I am not alone in having a craving to learn, share and do more.  I work hard to make the place we live a home with good food, fun projects, and spending time with family and friends.  I want to be a source of ideas for other women when it comes to decorating, personal finance, self-esteem and healthy living.  I want to be open with myself and others about my struggles of my self-image and help others overcome their fears in opening up.

Then I walked away and came back with fresh eyes.  I do believe it’s important to let everything marinate for a bit.  This is your brand, your business, and a simple statement that describes you to the world.  You want to make sure you like the final product and are not rushing it.  The days of rushing through class projects to get them turned in on time are over.  This is real life and real life needs to be better than something that will earn you a B.

Here is my final personal branding statement:

merelynne.com is a creative outlet for other women who have a variety of interests and who crave to learn, share and do more.  merelynne.com is a source to learn fun projects, a place to find good food and a celebration of spending time with others.  It is a go-to place for living an organized life, positive self-esteem tips and healthy living.    

It’s been a few weeks since I have written the statement and I have to say, I still love it.  It hits what I want to be right on the head and it pushes me to strive harder.

Chh Chh Chh Changes!

I am changing a few things around the site over the next few weeks.  First up – emailing the most recent post.  If you subscribe to receive my updates (and you really, really should) then you probably noticed the email looked a little different.  Hopefully all the bugs were worked out before the message was sent, but if you notice any errors then please let me know.

I’ve switched everything over to Mail Chimp and am liking the ease of everything so far.

Also, if you read my posts directly on the site then you probably noticed the blue bar at the top of your screen.  I added a new way to gather information so others can receive a dose of love (or my new posts…).  As of now you will receive an email with each new post – just like before.  I will be working over the next few weeks to offer a thank you gift for signing up and when that happens I will switch the emails to be weekly instead of as a new post is created.  I do not like it when my inbox is overloaded and I really do not want to do that to you guys.

Thanks for the support and I am hoping the new system works flawlessly.

FREE Grow Your Blog Goals Template

blog goals template

As we start off another year I have big dreams for merelynne.com and my Etsy shop.  I have tried to capture every idea on paper or in a Google Drive document, but after awhile I seem to be overrun with ideas.  I really do not want to lose one or worst – never take the time to actually achieve one of my goals.

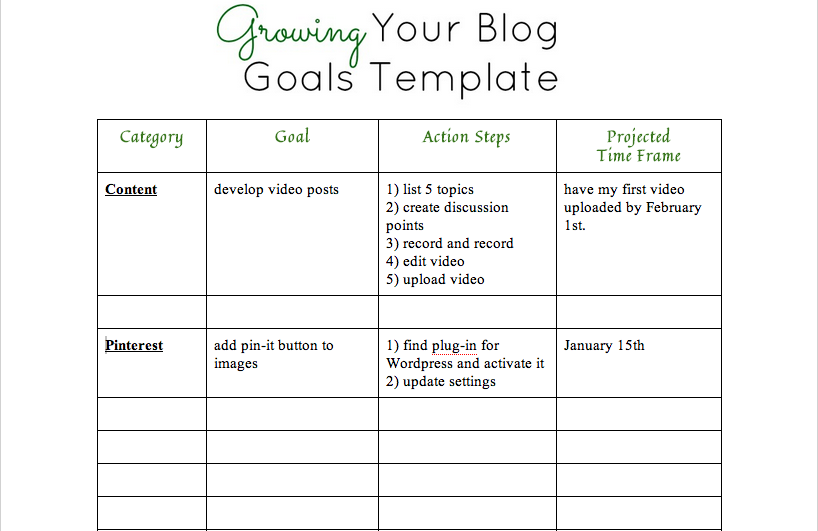
In an effort to be organized this year, I created a blog goals template to capture my ideas and set a time frame with action steps.  Here’s what my template looks like with a few of my goals listed.

grow your blog goals templateHere’s how I plan to make this goal sheet work for me:

1) divide and conquer – by setting up a category section then I know where each goal belongs.  I can spend time working on building my Pinterest following and if a new idea for content or Twitter pops into my head then I can write down the goal.  I do not know about you, but I have a tendency to get easily distracted.  If a new idea pops into my head I am immediately down the rat race of a new plan and sometimes forget to finish my original task.

2) list the goal – by specifically stating what you want to achieve then that will help develop a plan to get there.

3) action steps – I believe that the action steps are a vital part of goal setting.  These can be anything that will help you get to the final goal.  For me, this includes a brainstorming session where I sit down with a paper or sit in front of my computer and just start thinking.  What do I need to achieve this goal?  What resources do I already have?  What do I need to buy/learn?

4) projected time frame – to me this step is important, but is also negotiable.  I like to have a target date in mind, but I don’t beat myself up if I don’t hit it.  Let’s say it’s now March and I take a look at my goal sheet to see that I have not achieved my goals for January yet then I can take a look to either revaluate the goal or the time I spend on the blog.
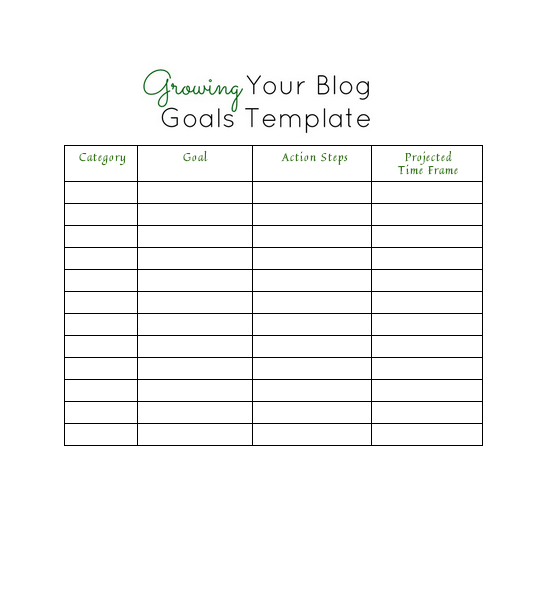
Growing Your Blog Goals TemplateLet’s make 2014 the best year for growing our blogs and our brands.  You can download, for FREE, the growing your blog goals template here to help you get off on the right foot.  Leave a comment and let me know what your biggest objective for 2014 is.  I would love to hear all of your fabulous goals.

You have a nice face :: New Headshots

headshotsWhen I was home over Thanksgiving I had my sister follow me around with my camera to take a few new headshots.  My parents’ neighbors probably thought we were crazy.  J and my sister’s boyfriend made fun of our poses.   Also, it was pretty cold outside so it made even harder to concentrate.  In the end I got quite a few good shoots and have used them endlessly already.

headshots

I’ve never had real headshots taken before and am pretty excited to finally have some.  Here is a sneak peek at my favorites, even if some aren’t “headshot” material but just me being myself.
headshots

What I’ve learned from blogging

blogging
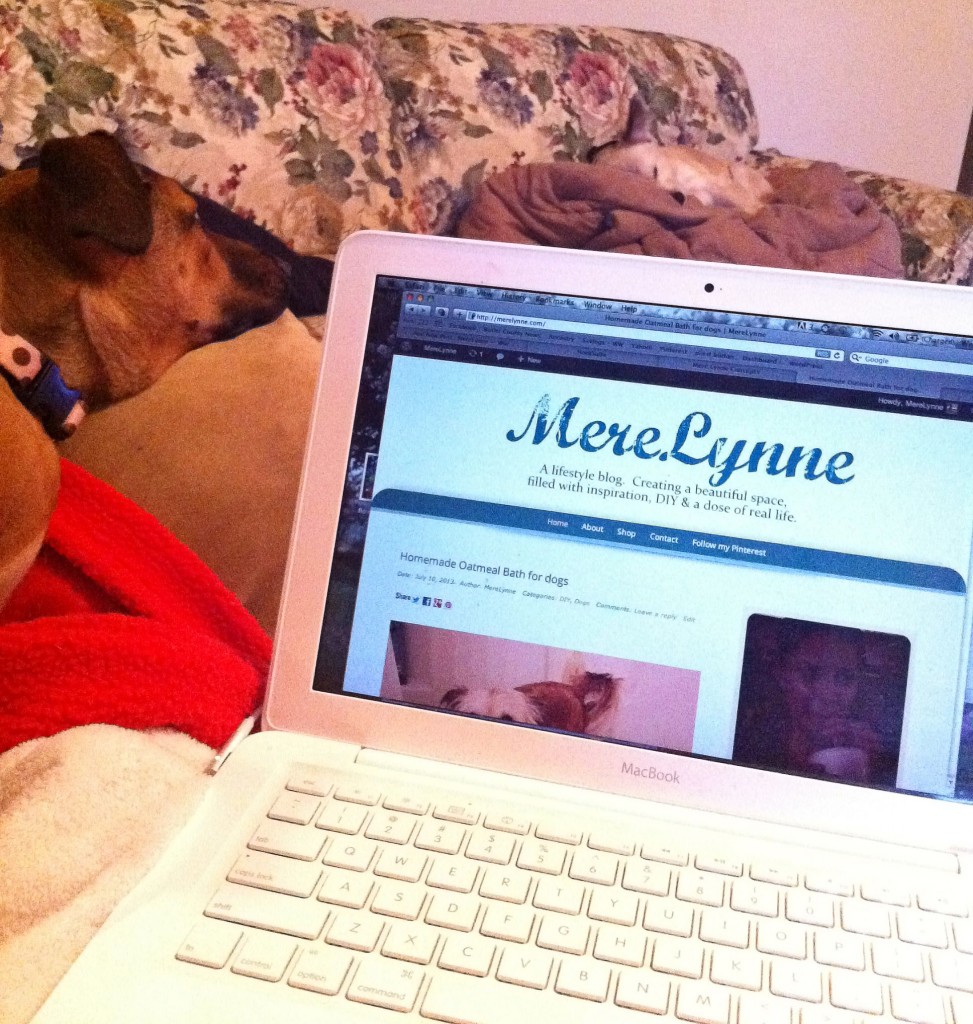
Today’s workspace

Blogging.

It’s fun, it’s creative and it helps me meet people across the country.

I’m still new at this whole blogging thing, well not really new new because I’ve been blogging on and off for about 4+ years now.  But I’m new to consistently blogging.

Here’s what I’ve learned from blogging and I’m sure I have much more to learn:

1) post often – the more you post the more your blog will be indexed with Google

2) comment on the blogs you read – I don’t get a lot of comments and that’s okay.  Someday though.  But I comment on the blogs I read and think it’s important to comment.  Commenting gets you involved and helps others to see your name and perhaps click on your link to your site.

3) pictures are key – I remember years ago reading about how you should never have a post without a picture and I try to follow that with every post.  If anything, pictures make your posts more appealing.

4)  learn the basics of social media.  I love social media, I’m kind of a social media junkie so I lucked out on this one.  I use HootSuite and schedule posts to my twitter and my facebook page once I write a post.  Now I don’t have to take time out of my day to send a tweet or a facebook status update.  It does it for me.

5) be true to yourself – my first blog was a lot about DIY projects.  I love DIY projects, but I don’t have time to do 3-4 projects a week to keep my blog updated.  Props to the people that can complete 4 DIY projects a week, I do not know how you do it!  I simply do not have it in me.  This blog is so much more me… I can talk about my real life, post some DIY projects, and share what inspires me.  I am influenced by so many different things and the idea of creating pigeon hole was not working.

Remember a blog is for you and only for you.  If you create something with this idea of making all this money or becoming an internet celebrity then it simply will not work.  I write for me.  I journal my thoughts and projects that work for me.  That is what is important to me and that is all that matters.

Happy blogging!

Cheers!

Follow on Bloglovin