Category: DIY

DIY Grandparents’ Day Gift {Personalized Oven Mitts}

diy gift ideas, diy oven mitts gift, diy christmas gift, diy birthday gift, diy mothers day gift, diy grandparents day gift

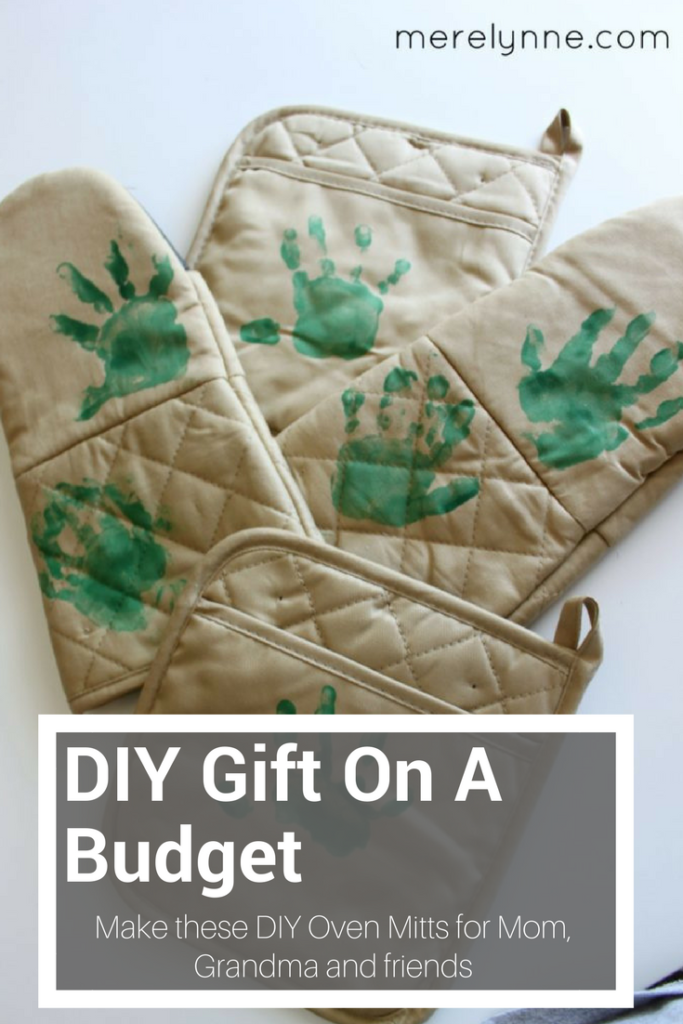
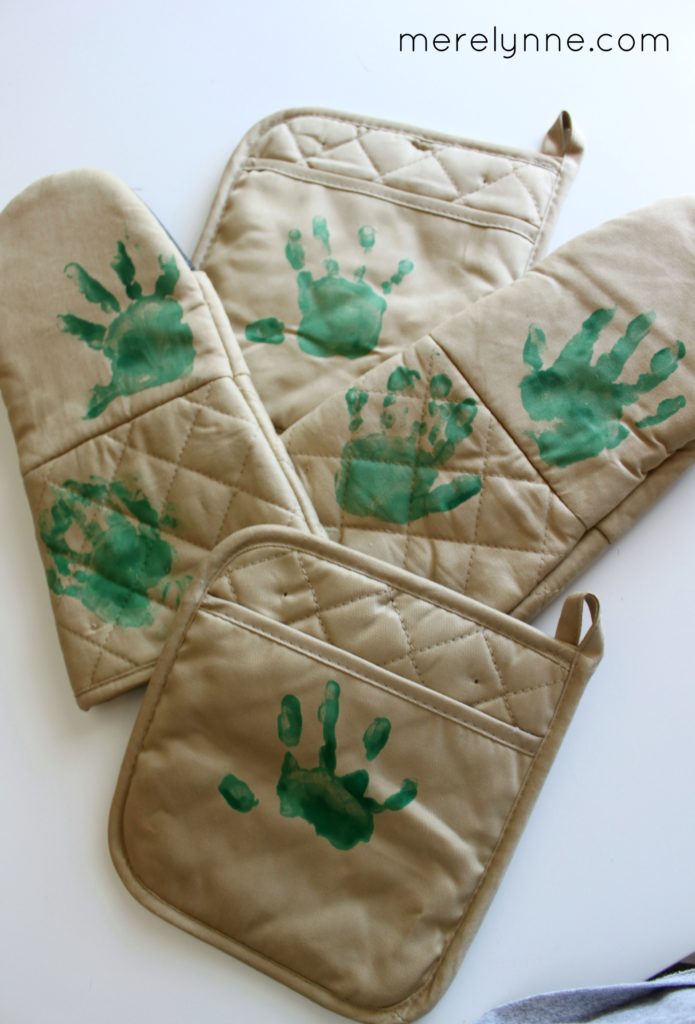
Do you know what is not easy?  Getting a toddler to hold still long enough to put paint on their hands and then take that painted hand to press on an oven mitt.  It’s just not easy!  Don’t get me wrong he loved the part of smearing his hand in the paint, but then he wanted to play with it and not cooperate.  I’m pretty sure I got more paint on me then on the oven mitt or even the plate filled with paint.  

We wanted to create a sweet Mother’s Day gift for my Mom and my Mother-in-law this year.  We were getting ready to leave on our Florida vacation the next day so I wanted something that we could easily create and something that would be easily packed in our already filled car.  

I had been scouring Pinterest for a few ideas and I just love the ones using our little guys hand and feet prints, but I have to admit it was so much easier to get a perfect stamp of his hand or foot when he was just a newborn.  Now at a year old, it’s like wrestling a really strong monkey who makes noises at you and somehow overpowers you.  

DIY birthday present, DIY gift, easy birthday gift, cheap birthday gift for mom, mother's day gift, grandparents gift idea

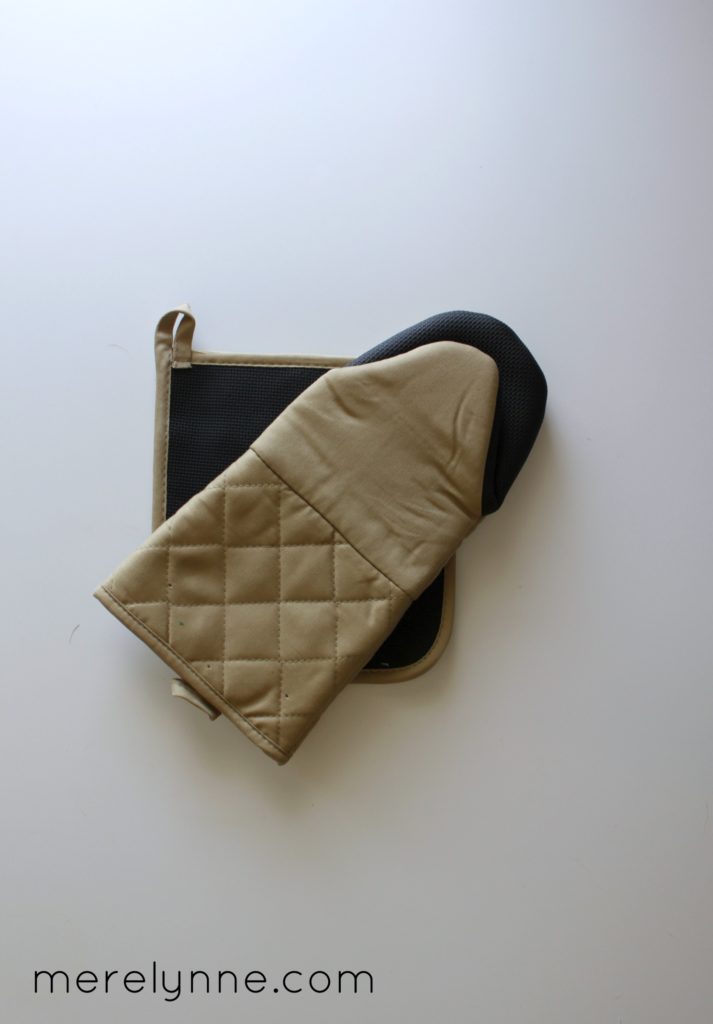
To find these oven mitts I went to the local Big Lots to see what they had.  I had planned to go to Wal-Mart, but Big Lots is so close to our house and I like keeping things simple!  I paid $6.00 for each set, so it was a little over $12.00 with tax.  Next, I dug in my craft bin (which is actually a old tool box) for some green paint and some fabric paint to finish them up.  

These DIY oven mitts were so simple and so easy (minus the toddler making messes).  I made them for Mother’s Day, but you could even make them for Grandparents’ Day or even as a sweet Christmas gift. I just love making homemade gifts – nothing says I love you like taking some time out of your busy schedule to make something.  Now don’t get me wrong, I am not super crafty and I am not a perfectionist, which means a lot of my gifts don’t turn out the cutest.  Once our little guy is a bit older I can pawn off the workmanship on him so there will be a good reason as to why the paint is smeared or the something is misspelled.  

Here’s some of my other easy and budget friendly DIY projects:

DIY Sharpie Mugs

DIY Front Door Vine Wreath

DIY Ribbon Wreath

DIY Christmas Photo Ornaments

DIY Father’s Day Gift with Handprints

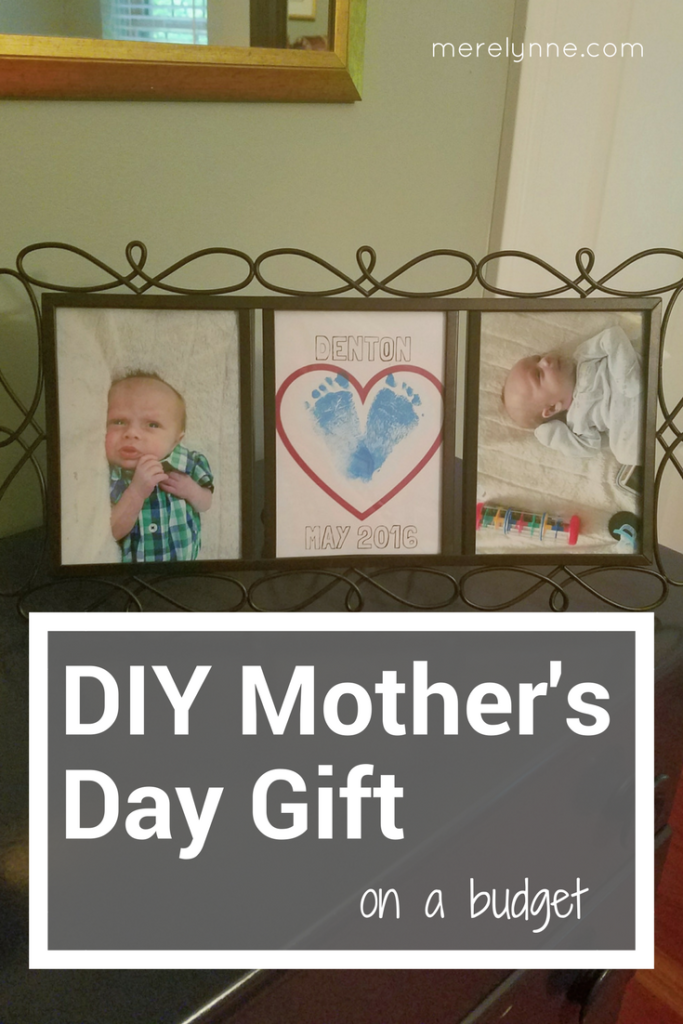
DIY Mother’s Day or Birthday Gift with Pictures and Handprints

DIY birthday present, DIY gift, easy birthday gift, cheap birthday gift for mom, mother's day gift, grandparents gift idea

Funny story – this past Christmas I made a super sweet wall hanging for my Mother In Law.  I took our little guy’s footprints around this nice poem I had typed.  I then framed everything together in this beautiful frame.  After we gave the gift, they were passing it around reading the poem and looking at it.  Someone in the family noticed the poem was about Grandchild’s Hand and the hope for the future…. But I had stamped our son’s FOOTPRINTS on the paper.  What?!?! I don’t even know what I was thinking!  

I remember trying to get his handprint while J held him and he just kept fighting me.  Each attempt was worse than the one before.  The print was smeared or I didn’t get a whole print.  So after what felt like a thousand attempts, I just did his feet.  But it never occurred to me I needed to change the poem!  UGH!

Oh well.  Now I just had to change the poem (which I still haven’t done yet) and the gift will be just fine.  

DIY Father’s Day Gift

diy father's day, father's day gift, create your own father's day, first father's day, gift for dad (1)

Father’s Day is about two weeks away and it’s time to treat the special man in your life to something nice.  If your kids Dad is anything like J then they deserve it.  Last year I wanted to create something special for him since it was his first Father’s Day and honestly, money was a little tight.  After NICU bills, physical therapy sessions, and so on I knew the gift needed to be something I could create with what I had on hand.  I thought about doing a DIY Father’s Day gift to add a little personalization to it so it would be special for years to come.  

I went to Canva.com and created a simple image that just said Happy Father’s Day.  Then I printed it out.  I even made it in black and white so I could print it at home on our laser printer.  

dad gift, diy father's day gift idea, diy father's day, gift for dad, easy gift for dad, cheap father's day gift

I updated the image to this year’s Father’s Day so feel free to click the image above to print out.

Once I had the image printed, I went to Hobby Lobby to look for a frame.  I had a gift card leftover from my birthday so I used it towards an 8 by 8 frame.

I headed home and dug out some ink I had from our wedding a few years ago.  We did a thumbprint painting as our guest book and I purchased several different color ink pads.  I kept them knowing I would use them one day.  I waited until Baby was sleeping then I pressed the ink pad on his foot then onto the page.  I repeated using his hand, too.

The ink pad made it really easy to use.  I didn’t have to worry about spilling paint everywhere and since it was what we used for people’s thumbs at our wedding I knew the ink would come off easily.  I had a wet wipe ready and as soon as I pressed his foot and hand onto the page I was able to clean him up.

I then made sure the prints were nice and dry before sealing into the frame.  I think the gift turned out great and it will be neat to have such a keepsake for years to come.

DIY Mother’s Day Gift or Birthday Gift

Affiliate Disclosure: I am grateful to be of service and bring you content free of charge. In order to do this, please note that when you click links and purchase items, in most (not all) cases I will receive a referral commission. You will not pay more when buying a product through my link. Your support in purchasing through these links enables me to continue to offer you lots of free stuff. Thank you!

DIY mother's day gift, DIY birthday gift for mom, DIY photo gift

I wanted to treat my Mom to something special for her birthday and Mother’s Day last year.  I know, I know I can’t believe I am just now getting around to sharing what I did last year! #momissues

Our little guy was right around a month old, I was still struggling with the recovery from my c-section, I was tired and learning to adapt to this whole motherhood thing.  My Mom was great (a little overwhelming at times, but what new Grandma isn’t), she had really helped with the Baby and there were a lot of days she would just bring me lunch and sit with me for an hour.   When it came time to start thinking of Mother’s Day and her birthday, which is just a few days later, I knew I wanted to do something special for her.  Our son is my parents’ first grandchild and they were over the moon with excitement for him, so I knew he had to be a big part of her gift.  That’s why I wanted to create a DIY birthday gift for her.  

Honestly this gift can be created for a birthday, Mother’s Day or even Father’s Day gift.  Heck, it would even work for Grandparents’ Day.

J and I were trying to mind our budget, like always.  And with medical bills and some home projects our money was pretty tight.  I had to put on my thinking cap and come up with something creative that wouldn’t break the bank.

DIY birthday gift

I headed to Hobby Lobby and came across this pretty picture frame that holds three 5×7 images.  Luckily it was on sale and was 50% off.  After taxes I paid a little over $13.00 for it.  You can find the exact same frame on Amazon for less than $16.00 if it’s just easier to order one.  I typically buy everything on Amazon, but for those last minute items I tend to go shopping in-person.  

Once I saw the frame, I decided I would do something similar to my DIY Father’s Day gift I created for J.  I created a simple image using canva.com.  They had the heart image under the elements heading and under the shapes tab.  I then added his name, the month and year to remember when it was done.  

DIY mother's day gift, DIY birthday gift idea

I came home and used the same ink pad that I used in J’s gift that was leftover from our wedding thumbprint tree guestbook.  I simply pressed his feet into the heart by overlapping his heel prints.  I let it dry then placed it into the center frame.  I used plain printing paper so there wouldn’t be a problem with the thickness when I tried to close up the back. 

I then headed onto walgreens.com to upload a few pictures.  I of course googled a coupon code and found one for 40% off.  I ended up paying less than $3 for the images.  I placed them in the remaining slots and that was it.

DIY mother's day gift, DIY birthday gift for mom, DIY photo gift

I updated the image so feel free to download the DIY Mother’s Day PDF or click the image above to print. 

So for right around $17.00 I created a really sweet and memorable Mother’s Day gift.  My Mom loved it and she still has it proudly showcased in her home.  I have plans to do personalized gifts for both grandparents every year – that way they can get gifts that show off how their grandson is growing and I know they’ll be gifts they want to have around.  

DIY Birthday Party Decorations

Affiliate Disclosure: I am grateful to be of service and bring you content free of charge. In order to do this, please note that when you click links and purchase items, in most (not all) cases I will receive a referral commission. You will not pay more when buying a product through my link. Your support in purchasing through these links enables me to continue to offer you lots of free stuff. Thank you!

DIY birthday party decorations, gone fishing party decorations, first birthday party ideas, gone fishing party theme

For our little man’s party I ended up creating most of his decorations.  I searched on Pinterest (you can check out my board of inspiration) for tons of ideas.  Then I went to start looking at buying the decorations.  Whoa!  Those prices were big, at least in my book.  I knew if I wanted to provide lunch for everyone then I wouldn’t be able to afford all of those fancy decorations.  So I took what I saw on Pinterest and made it myself.  You can make your own party decorations, too.  All you need is a little bit of planning and some creativity.  I swear you can create most of the decorations for a fraction of the retail price.  

I want to have an Honest Abe moment with you…. If I had the extra room in my budget and wasn’t worried about saving money then I would have just purchased everything we needed because it would have been easier.  I didn’t spend but a few hours making everything, but it would have just been easier to buy it all; however, that is not my reality.

Before I go any further I need to say… 

I am not the most crafty person in the world. I lose my patience easily.  I am all about progress not perfection.  Also, after looking at the party pictures I realized that I did not do the best at taking pictures of my decorations.  I was so pressed for time and then when the party came I was enjoying my son and our family and friends.  

Now with that being said let me share with you my DIY birthday party decorations. 

gone fishing birthday, diy smash cake, first birthday party, birthday party on a budget, meredith rines

I created a photo wall using a net I ordered off amazon for less than $6.00.  I took a gamble ordering this decorative net because I couldn’t specify which color I wanted.  But after reading the reviews and seeing the prices of the other nets, I decided to roll the dice.  I was so happy I did!  I ended up with a yellow one, which was perfect.  Honestly any color would have been fine and I would have made it work.  The net was huge and I wound up cutting off a portion I needed.  I didn’t use the rest of it and now I have it tucked away for a future party.  

I used clothespins that I already had on hand to hang the pictures and then used some leftover fishing line from when J went fishing a few weeks ago.  I found these bobbers on amazon for around $4.00 and had my friend help me string them to the net.  

The pictures were part of the package our photographer gave us from our family shoot a few weeks ago.  

I then placed our kitchen table in front for a place to gather the gifts.  This wall cost me about $10.00 to do.  Not too bad.

Then over on the food table I ordered a table cloth from amazon (because everything comes from amazon!).  This striped plastic tablecloth was perfect.  I actually ordered two, but since it was windy we decided not to cover the tables outside.  They were only $2.99 each (the price actually has lowered when I was writing this post!).  Since it was so cheap, I decided to hold on to the one I didn’t use and the one we used was still in perfect condition, so I wiped it off and folded it up.

I made a few food decorations using canva and some construction paper.  I already had the dowels and the papers so after I printed them in color, I cut out the images, glued to the construction paper and taped to the dowels.  I think they turned out perfectly!  I even created them as PDFs so you can download them yourselves.

I purchased a tackle box from walmart for about $8.00 and used those to place the gummy worms, Twizzlers and Swedish fish in.  Now that the party is over J has a new tackle box he can use!  I’m the best wife ever!

gone fishing birthday, diy smash cake, first birthday party, birthday party on a budget, meredith rines

The smash cake was probably the easiest decoration I made.  Two pieces of construction paper, a dowel and tape was all that was needed.   I even shared how I made his smash cake for only $3.00.   After we took our family photos a few weeks ago I learned just how much our little guy doesn’t like cake.  I think the icing is too sweet for him.  So I didn’t want to spend too much on his cake, including decorations.  In the smash cake pictures, the cake topper (the one I spent over an hour creating) was the first thing destroyed and ripped.  I learned my lesson!  For the party I kept it simple.  

I took a red and white piece of construction paper.  Then using my compass from the 6th grade (yep, I still have my compass that we used in beginning math class with the original pencil!) I drew a circle on each piece.  If you size the circles correctly you should be able to get 2 circles from each color, and I used the second one for the high chair.  I then cut the white piece in half and using a very old glue stick I put it together.  After I was finished I realized I forgot the top part of my bobber, so I used red scraps and made it work.  After it was glued, I took a black marker and wrote “the big one”.  I used regular tape to stick the dowel on and that’s it.

gone fishing birthday, diy smash cake, first birthday party, birthday party on a budget, meredith rines

For his high chair pennant, I took some orange tissue paper I had on hand and cut it into strips.  Then I tied the strips to some blue gift ribbon (I couldn’t find my twine and I was tired of looking so I improvised).  I then cut out a circle using red and white construction paper, glue it together and took a black marker to it.  I think it turned out wonderful!

gone fishing birthday, diy smash cake, first birthday party, birthday party on a budget, meredith rines

Outside we decided to not do any decorations since it was windy.  We had two canopies set up and our little kiddie pool for the kids to play with.  The kiddie pool was a huge hit!  I bought a magnetic fishing set which came with 2 fishing poles, 2 nets, a blow up pool (that we didn’t end up using) and tons of fish, sharks, and food (weird, but they were probably the favorites) pieces.  Now the party is over, little man has lots of new bath toys to play with.  I bought the pool for about $8 from Wal-Mart and the set was about $25 on Amazon.  

That’s it!  That’s the DIY birthday party decorations we created for our little guy’s first birthday.  I was all about keeping it simple, doable and within our budget.  To keep you on track, I talked about how I stayed organized by using this handy checklist.  

DIY Smash Cake for the First Birthday

gone fishing birthday, diy smash cake, first birthday party, birthday party on a budget, meredith rines 
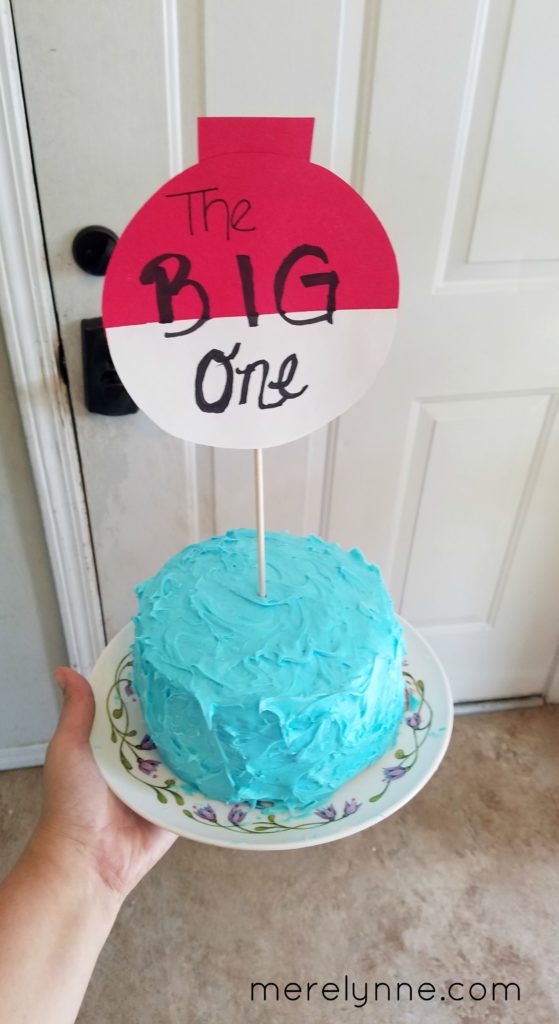
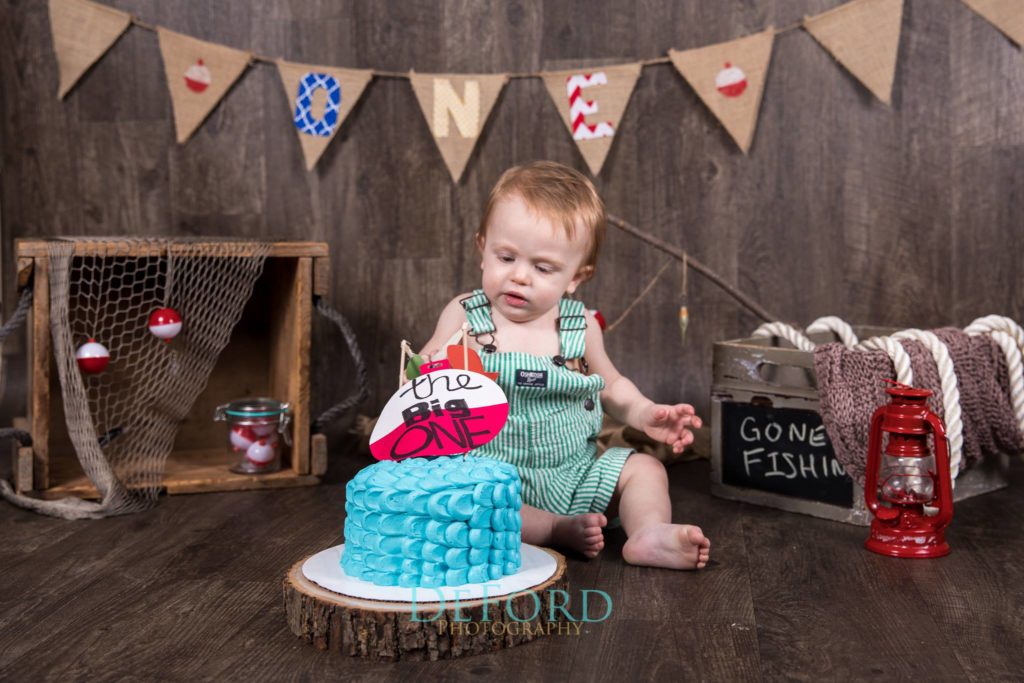
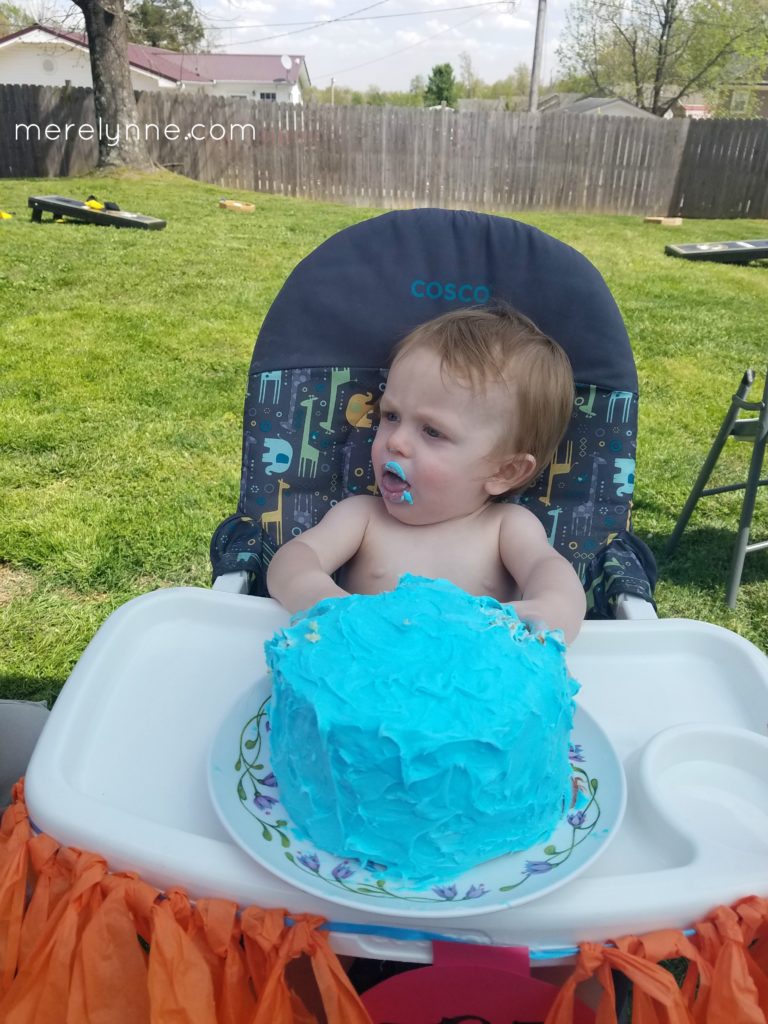
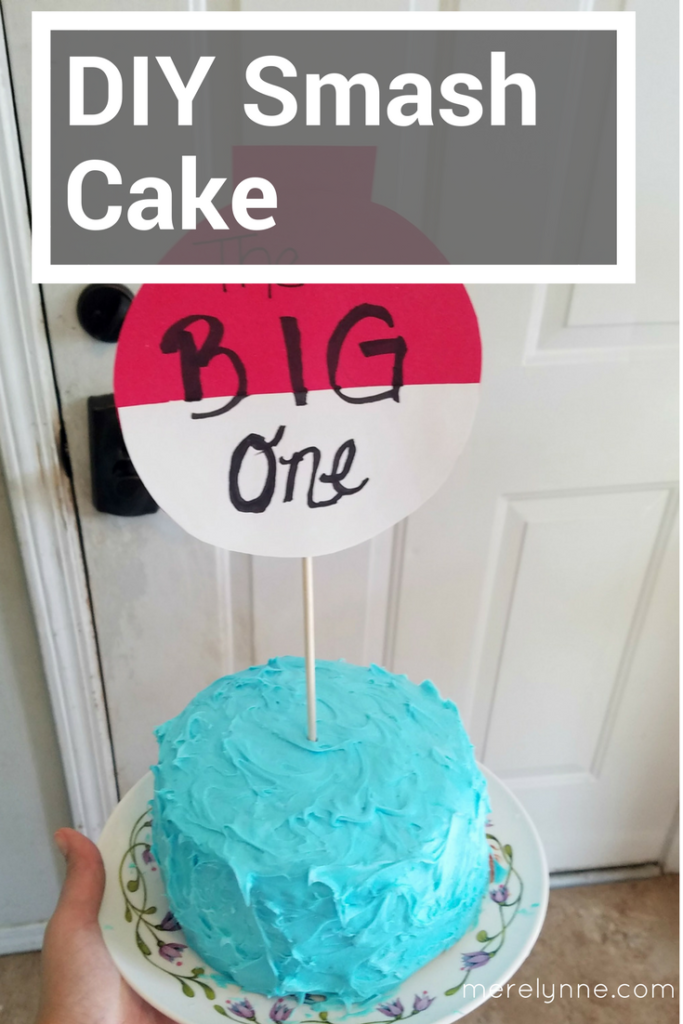
Please, please don’t try to look up smash cakes on Pinterest.  You will see some of the prettiest cakes ever created and then you will get it in your head that you can be that talented.  It’s a lie!  You can’t.  At least I couldn’t.  A few weeks ago I attempted to create my own smash cake.  I baked the cake, I made homemade buttercream icing and I pipped a design onto my cake.  It was awful.  The icing was drooping, the color was more mint then blue and it looked awful.  I asked J for his honest opinion and he said “maybe you should save your homemade cake for the party and order one for his pictures.”  I knew right then and there my cake was a disaster.  

I ordered a cake from the local bakery for our little guy’s pictures.  The cake was beautiful and so simple.  

picture by Josh DeFord Photography

I knew it was going to be a big deal if his party cake wasn’t as nice as his picture cake.  I still wanted it to look good and decided to take a different approach.  I went with easy instead of making it hard on myself.  That way if it didn’t turn out I could blame that.  Instead the cake turned out great!  It was a lot better than my first attempt.  Not as pretty as the bakery made cake, but not too shabby either.  

As he O-Fish-Ally turned one last weekend, we celebrated!  I wanted to make sure we saved money where we could and one of the best ways to do that is by baking your own smash cake.  Trust me!  There is no need to go out and buy a made cake that your little one is going to destroy in 2 seconds.  Unless of course you want to and have built in your budget.  I’m all about saving time and money, but I also know that not everyone enjoys baking.  So if it’s not your thing, then please go right ahead.

gone fishing birthday, diy smash cake, first birthday party, birthday party on a budget, meredith rines

Here’s how I made a DIY smash cake on a budget:

I purchased a boxed cake mix that was on sale for $1.00 (gasp! boxed cake mix!… I know, I know).  I also purchased two cans of icing that were on sale for $1.00 each.  I already had the oil, eggs and water.  So my DIY smash cake only cost me $3.00.

I used two round cake pans to bake the cake, after they cooled I then took a bowl to cut out a smaller portion of each layer.

Once I cut out the portion, I popped the cake into the freezer so it would be easier to ice.

I took one can of icing and used it to do the crumb coat and the layer between the cakes.  I then popped it back into the fridge for about 10-15 minutes.

The second can of icing was the one I added some blue food coloring too.  I had about 6-8 drops to get the right color blue.  I then iced the rest of the cake.  

I added my DIY cake topper and that’s it!

gone fishing birthday, diy smash cake, first birthday party, birthday party on a budget, meredith rines

Super simple.  I baked the cake on Friday night so it would be nice and cool on Saturday.  Plus I knew how hot it was going to be on Saturday and I didn’t want to have the oven running in the morning heating up the house.  So I opted to bake on Friday night.

DIY Gone Fishing Birthday Party {free planning checklist}

first bithday checklist, party checklist, gone fishing birthday party, baby's first birthday party


Well as you can probably tell from all of the birthday posts lately and over on Instagram, our Baby Boy turned one a few days ago.  I swear Sunday morning I woke up and felt as if I had been hit in the head with a baseball bat.  I was so exhausted by the end of Saturday night and am so grateful our man slept amazing.  But seriously, I was dragging so bad Sunday.  I just wanted to nap and drink all the coffee.  But here I am, fully recovered and the house is back in order.  

I like to be prepared for just about everything, so when it came to planning a party during tax season I had to rely on one of my favorite tactics – the checklist.  I created a to-do list and checklist to help me plan our son’s DIY gone fishing birthday party. I wanted to make it memorable without going broke. So we created a lot of the decorations ourselves and made most of the food for the big day. I even made his smash cake. It probably wasn’t the prettiest cake around, but it served its purpose!

A few months ago I talked about how I was starting to plan for his party. But in reality I started planning the first week of January. I put together a very detailed to do list that encompassed everything from the big stuff (like mail invitations) to the small stuff (like buy ice). I didn’t want to forget anything. I also figured if I had a to-do list then I could rope in a few extra hands to help me put it all together.

Now that the party has come and gone, and we’ve barely survived it. I think it’s time to share my trusty checklist with you. I wanted to put together something that work great for the everyday planner and for the last minute planners.

I also had it broken up by what needed to be bought so we weren’t shelling out a huge chunk of money right before the party. I wanted to space it out so it was around paydays and times of the month where our bills were a bit lighter.


Here’s what we wanted from his first birthday party:

We wanted to have it at our house

We wanted it to be on a Saturday afternoon so it would be easier for out of town guests

We wanted activities for kids to play

We wanted family and friends there to celebrate with us

We wanted it on a budget

gone fishing birthday, diy smash cake, first birthday party, birthday party on a budget, meredith rines

I think we more than met our goals!  I started planning weeks ago for this party.  I am such a planner and a list maker that I created a checklist to go off of.  I wanted to share my DIY party checklist with you so you can use it for your next party.  It really helped me stay on track and not get overwhelmed.  Plus, we were able to split up the stuff we needed to buy so it wasn’t one big chunk at one time.

first bithday checklist, party checklist, gone fishing birthday party, baby's first birthday party

I kept the checklist with me at my office until about a week before the party.  Then I stuck it in my purse so I could keep it with me.  I’m sharing how I created my own decorations later this week, so check back.  You can download your DIY birthday party checklist here.
gone fishing birthday, diy smash cake, first birthday party, birthday party on a budget, meredith rines

For the kids’ activities I decided to keep it simple.  We purchased a kiddie pool for $8 at Wal-Mart and filled it with fishing toys.  I found this amazing magnetic fish toy on Amazon that was filled with 50 pieces (I added a picture below).  It came with nets, a basket, two fishing poles and tons of objects for the kids to fish for.  There was even a blow up pool that came with it, but we opted for the kiddie pool.  It was about $25 and it kept all of the kids occupied.  We may have had a few take a dive, but no one was hurt and they had a blast!

For food, we kept it simple.  J grilled hamburgers and hot dogs.  I had my office tax season party for clients the day before so I was gifted pulled pork, cowboy baked beans (the kind with hamburger meat, bacon and peppers in it… yum!) and a veggie tray which saved us some serious money.  The hot dogs, burger and buns cost about $10 thanks to things being on sale.  

I also added a few snack items like chips and dips (which were gifted to J so we didn’t have to buy them), candies that I bought on sale and a fruit tray.  I had the fruit tray made by my local bakery and it cost $40… what?!?!  Let’s just say I learned my lesson of asking about price… 

I should have asked how much it was going to cost because I could have saved over half of it by making it myself.

Lesson learned.  

I also had the bakery make cookies for the party.  I ordered 2 dozen iced cookies and 2 dozen chocolate chip cookies.  Both of them were a huge hit!

I say overall the food cost less than $100 and decorations cost about $50.  The only other item I purchased was matching t-shirts for us to wear.  I got them on Etsy for about $40, but after I ordered them I found a local girl who could have made them a lot cheaper.  I guess I should have done a little more research on Facebook and asked around before ordering.  I really like them though and the quality is great, plus they came in record time.  So it was a win for sure!

The total cost of our party was about $200.  We have more than enough food left for about 3 other meals, which will save us more money.  Plus it was so great to have all of our family and friends (well the ones that were able to make it since it was Easter weekend, it was a bit difficult for everyone) at our home to celebrate our little man reeling in the big ONE!


Mess Free Painting For Your Baby

mess free painting, activities to do with baby, 9 month baby activities

When our little man was sick not too long ago we spent a lot of quality time together. By the second day we were both going crazy from boredom. He was so use to be at his sitter’s house with other little kids and I was use to not being with him 24 hours a day. So we needed a plan. A distraction. I saw on Pinterest an image… and that’s all I needed. It’s title had me from the first glance “Mess Free Painting”  I was like the heavens opened up.  We had a painting party right in the middle of the kitchen floor.

It only lasted about 20 minutes, but it was enough distraction I needed to have my lunch finish cooking and him to pass enough time to eat again.

I found some construction paper in a closet, who knows how old it is, but it was there. I cut it into smaller pieces and put some old craft paint on it. Now here’s how you tell how old your craft paints are. When you open them and nothing but a clear liquid comes out then it may be time to toss them. Or when you shake them and only hear chunks moving around then it’s time to give in the towel and move on. So after a few tries we finally found three colors that were still good. White, yellow and teal. Not the best choices, but he’s 9 months old so it’s not like really cares. Then the construction paper choices weren’t any better either, red and blue. Oh well! We’re not going to be winning any awards today.

mess free painting, activities to do with baby, 9 month baby activities

mess free painting, activities to do with baby, 9 month baby activities

mess free painting, activities to do with baby, 9 month baby activities

So I put dots of paint on the paper and slid them into a gallon-size baggie. Sealed it up and laid them in front of our little man. He went to town. Smashing them, picking them up, throwing them and then trying to eat them. At that point I knew it was over.  Here’s a great tip though, that I almost found the hard way.  It’s called mess free painting because it’s all contained in the baggie.  So make sure your baggie is sealed all the way.  Also make sure your paper fits fully inside the baggie.  Mess free painting is all about being smart.  You may have to trim some paper off to fit inside your bag.  I used gallon sized bag and didn’t have to cut much off.

I took them out of the baggies and set on top of foil on our washing machine to dry. I chose foil because that’s all I had on hand. I chose the washing machine because I gave up the illusion of getting caught up on laundry earlier that day.

I had the pictures of him making his masterpieces printed. Then I sent one picture to my Mom, J’s Mom, my sister and J’s sister. I of course kept the best for myself and framed it for our wall.

This kid has skills!

mess free painting, activities to do with baby, 9 month baby activities

Then when the painting was finished, he discovered the bottom drawer which houses the plastic baggies.  And did he go to town!

DIY Valentine’s Day Printables

diy valentine's day printable, valentine's day freebie, valentine's day card, diy valentine's day card

J and I’s first Valentine’s Day was so special. We had already been dating close to a year at that point and had just gotten engaged a few weeks before. So we wanted to do something that would mean a lot, but also something that was very much ‘us.’

J knows my love of sushi and took me to one of my all-time favorite restaurants. Of course it was packed full of these lovey-dovey couples. We ordered too much food, had a few drinks and we talked for hours. It was amazing. We talked about our future and the dreams we had.

Now fast forward to our 5th Valentine’s Day together. Things have changed. No more expensive sushi dinners. It’s a night for dinner in, a sweet card, and spending time together.  It’s crazy to think about what we talked about that first Valentine’s Day.  We had no idea what our future would hold, and now here we are celebrating our little guy’s first Valentine’s Day. I know he won’t remember this holiday, but I will and that means something.

While growing up my Dad always sent my sister and I our own Valentine. When we were younger he would have our gift sent to ours school for a special delivery. It was amazing having big balloons delivered where everyone saw. I felt so much pride carrying that balloon home on the bus and walking down our street with it. I know I had a huge smile on my face.  I felt so special!

Then as my sister and I got older our Dad would have packages delivered at our sorority house, our apartments and our work. It was nice knowing that my first Valentine was my Dad. He never forgot.

Now that I have a little boy I want to do the same for him. I want to teach him what it means to love someone. That it’s important to remember those that you care about.

Being his first Valentine’s Day means I have to start off a new tradition. I don’t have to go overboard and blow my budget, but I have to take time to do something that’s just for us.

This year, I’m making a sweet picture of him on his first Valentine’s Day.  I plan on hanging it up in my office as a sweet reminder.  

Okay, Okay, I know this isn’t really a gift for him….. but it’s a memory I can give to him when he’s older.

However, I wanted him to have something to give out so I created two DIY Valentine’s Day printables.  

diy valentine's day printable, valentine's day freebie, valentine's day card, diy valentine's day card

If you’re little one is older or goes to daycare then this little gift will be great!  Our little guy goes to a sitter during the day.  He has made fast friends with the other kids she watches, so we wanted to do something nice for them.  I’m having a little card printed and will pair it with some candy.  It doesn’t have to be much, but it’s the thought that counts.  I got a little card-making-frenzy and made a second card to hand out to friends and family.  I’m telling you these DIY Valentine’s Day printables took me less than 10 minutes to make then I emailed them to my local print shop.  I didn’t need a lot and since they are not very big they were able to print more than one on a page.  You can have the print shop cut them or if you want to save a little bit of money, you can cut them yourselves.  I think cutting is around $1 for this few pieces.

diy valentine's day printable, valentine's day freebie, valentine's day card, diy valentine's day card

You can download the bee printable here.

I also created a second card to pass out to family.  I used canva to create both cards and it took no time at all.  I wanted to keep some space at the bottom to tape a little baggie of candy to.

diy valentine's day printable, valentine's day freebie, valentine's day card, diy valentine's day card

Download the puppy printable here.

DIY Wreath {The Perfect Christmas Present}

DIY Wreath, DIY Christmas present, how to make a wreath

Last year I DIY’d this cute wreath for my sister.  I wanted to share about how I made it and was able to stay within our Christmas budget, but I didn’t want to spoil the surprise.  So I tucked this away to share this Christmas.  This gift is seriously the cutest and easiest to put together.  You can really customize it to fit the personality of who is receiving it.  My sister lives in this cute house in this sweet neighborhood.  You know the type of neighborhood where everyone waves to each other, you can easily borrow your neighbors leaf blower and you attend each others’ birthday parties.  I wanted to make her the perfect wreath that would fit her and her house.  

I headed to my local Hobby Lobby to pick everything up.  I started with just a basic wreath, it was brown and pretty boring.  Then I picked up the greenery to add some color.   

Here’s what you need for the easiest DIY wreath:

wreath base
greenery
floral wire
hot glue gun
wooden letter
spray paint
ribbon (optional)
flowers (optional)

Pretty much every piece of this wreath is optional.  You can really mix it up.  

DIY wreath

The first thing you want to do is lay the greenery over the wreath.  Then once it’s in the perfect position you can grab your wire to attach it to the wreath.  Just wrap it through the brown pieces to secure it.  I also used my hot glue gun to fill any missing spaces and to ensure the greenery would cover what I wanted to cover.  

DIY green wreath 

I wasn’t the best at taking pictures last year since I was trying to get like 5 other DIY projects done that day.  But I had a wooden B for her last name.  I took it outside and spray painted it with a color I had on hand.  It was a glossy maroon color.  Super pretty.  It took about 3 coats to get it to my liking.  Then after it was dried I glued it to the wreath.  At this point you can add more colors with any flowers or a nice big ribbon.  I used the ribbon to make it easier to hang on the door.  

DIY twig and greenery wreath

I was able to use a 40% off one item coupon so it made the whole project very affordable.  The wreath was on sale for 50% off and so was the wooden letter. The only item that was full price was the greenery.  So I purchased one using a 40% off coupon then returned later in the week to get the second piece of greenery using another 40% off coupon.  I already had the ribbon, spray paint and hot glue so that was pretty handy.  I really think this wreath made a statement and it was great to give something handcrafted to my sister.  

A DIY wreath doesn’t have to be that difficult! 


My Favorite Carpet Refresher for Cheap

Note: Some links in this post contain affiliate links, which means I may receive a commission if you make a purchase. Thanks for supporting my blog!

My Favorite Carpet Refresher for Cheap

I shared a post way, way back when about a great DIY carpet cleaner. Well I’m still using it and have even developed new ways to use it to really get some fresh smelling, clean carpets at our house.

It’s no lie – three dogs do not mean you’ll have spotless carpets all the time. Especially when one of those dogs scares easily whenever a friend comes over, a car drives by or a leaf floats by the window.

I’ve developed tricks to score clean carpets.  Now with a little one here, we want to make sure our carpets are clean.  He’s months away from crawling, but we do need to do tummy time with him.  I don’t want to put him on any dirty carpets, actually I don’t even want to be walking around barefoot with dirty carpets – gross!

DIY carpet refresher

I’ve added a new carpet refresher to my DIY carpet cleaner and I just HAD to share it with you.

Before I vacuum I sprinkle my magic ingredient on the floor, well actually I go over the floor once just to get the bulk of the dog hair up. Then I add my magic ingredient…

Want to know what my favorite carpet refresher for cheap is?  It’s…

My Favorite Carpet Refresher for Cheap

Baking Soda

Yep! I sprinkle baking soda over my carpets, let it sit for about 10-15 minutes then vacuum it right up. Once that’s done I go over it with my DIY carpet cleaner in our steam cleaner.  Our carpets will be sparkling clean and smell so good by the end of it.

I’ve found that baking soda is a better carpet refresher than the store-bought brands. Plus, my fearful dog was actually allergic to the last few store brands I purchased. Poor pup would sneeze and her eyes would get all gunky for weeks afterwards. When I started using baking soda, her allergies went away.  That was a huge plus for me.  I couldn’t keep using products that were causing her problems…. that’s not a good dog mom.

I also know that with three dogs any vacuum cleaner just won’t do.  We have invested in a good pet vacuum for all of that dog hair.  I love the Hoover WindTunnel Pet Rewind Vacuum.  It works great for all of those hair nightmares.

My Favorite Carpet Refresher for Cheap

Here’s what I do, step-by-step for my DIY carpet refresher to really work:

Lightly vacuum my house to get most of the dog hair up
Sprinkle about 1 cup of baking soda on my carpets, depending on the size of your space you may need more or less
Wait 10-15 minutes, then vacuum the baking soda up
Fill my steam cleaner with my DIY carpet cleaner
Steam clean the carpets

I will say our house smells great and the carpets look wonderful.

Stain Tip:

If you have a stubborn stain then I recommend sprinkling a heavier amount of baking soda on the spot, then directly spraying white vinegar on top.

You might have done a science experiment using banking soda and vinegar in elementary school. The two ingredients will have a reaction when combined and they will bubble up. The bubbling is what you need to get the stain lifted.

Once you spray the vinegar on the baking soda, take a small brush and start scrubbing. Once you’ve scrubbed it out, simply vacuum up the remainder baking soda after it dries. Voila!  Stain is usually gone or a lot less visible.  I’ve had a few spots where I had to do this more than once to get completely gone.  But it was worth it because even the store-bought stain removers weren’t budging it.