Month: April 2016

Let’s Be Friends

The nursery is complete and we’re ready for this little boy to make his arrival.  I cannot wait to see what this little boy looks like, to hold him, count his fingers and his toes, and to just be a mother.  It’s been a long 9 months – part of me is so excited to see this journey end, but another part of me will miss the little kicks into my ribs.

Baby boy is so loved and he hasn’t even graced us with his presence yet.

The little boy is due within the next week or so, I would love to share my journey as a new-mom with you. I have a feeling that I won’t be around much on the blog for a few weeks.

Don’t worry I do have a few posts scheduled already, but there won’t be much news on his birth until I get back into a routine.

If you want to follow along with me on my journey to motherhood then follow me on Instagram.  It’s going to be an exciting next couple of weeks and I can’t wait to share a piece of it with you.

let's be friends

I love finding new moms and bloggers to follow. So add me so I can learn more about you.
I’m also on Facebook and Twitter!

How to Plan for Maternity Leave at Your Work

How to Plan for Maternity Leave at Work

Maternity leave is an important topic to talk about.

Your employer may offer something completely different than your friend’s employer.  Yet, what is the right way to prepare for it?  You want to make sure your job is being done correctly while you’re gone (no matter how long that might be) and your boss wants to make sure there is a chaotic mess left for when you’re gone.

In my job I wear many different hats. One moment I’m the Marketing Director, deciding on emails, facebook campaigns, letters, planning client appreciation events, calling prospective clients, and reaching out to new clients.  The next moment I’m the financial planning assistant, completing paperwork, handling maintenance on clients’ accounts, meeting with new clients, and answering questions. Then  my final hat for the day could be the Sales Director, managing contact with current clients, preparing client touches about any focus we are working on, and so on.

My day can be all over the place and it can be overwhelming at times. But I love it. I love not knowing where my day is going to take me and to know that I can be doing a variety of different tasks. However, it doesn’t make it so easy for when I’m going to be gone. It can be tricky trying to explain to a fellow co-worker how they can help me out. I decided my maternity leave will be easy to follow and nothing would get overlooked. Summers might seem slow in an accounting office, but it’s not for me. That’s when I work on all of my marketing pieces for the entire year, start sending out touches and kick start marketing campaigns. It’s a busy season for me.

One of the best decisions I was to plan for maternity leave at work. I can’t tell you how much of a stress reliever it is to know your work will be taken care of and you won’t have a huge pile when you return.

I wanted to share some helpful tips so you can be ready to leave your work to take care of you and baby. No matter how long your maternity leave is or how short, these tips will work for you.

It’s important to have a plan in place well before the baby is due. You never know if your little one will be making their debut early or not. It’s best to be prepared for the unexpected.

Know Who Will Be Wearing Your Hats.

The first thing you want to do is know who will be covering you. Is it one person or are multiple people going to be splitting your duties? Either way you need to know. I think it’s easier if one person covers because then all of your to-dos and instructions and thoughts are just passed to one individual. However, that may not be feasible. At most offices your cover will already have a full-time job with their own work that needs to get done.

If you have multiple people covering for you then you need to talk to your supervisor or office manager to determine who is going to take care of what. Which parts of your job is person A and person B going to cover.

For me I had two people covering for me. One covered all of my marketing duties while the other covered my financial planning and sales director tasks. I wasn’t too worried about the financial planning side, mainly because she’s been doing it for years and is the person who trained me. So I knew she had it! She could do that job in her sleep!

The marketing pieces were a bit more worrisome for me. I have created a few strategies, mailings, and so on over the past year that all need to be kicked off while I would be gone. So I wanted to make sure they went out without any problems.

Here’s what you do after you figure out how your job will be split:

Write down everything that will need to be done 2 weeks before and 2 weeks after your scheduled maternity leave (just to be safe, remember?). I used an Excel spreadsheet to write down all of my tasks so I could update it as things changed.

Write it all out.

Next, create any procedures that aren’t already made. For me, scheduling our company’s blog posts was something only I have ever done. So I had to create written procedures with clear directions so my replacement could handle. I had to be very, very specific. But that’s okay. You need to be with procedures.

Treat a procedure as if someone off the street was coming in to handle that specific task. You want them to be easy to follow, clear and to the point.

Be specific.

Give specific deadlines. If someone is trying to do their job and yours then you need to give them specific deadlines so they can get it done. Also, you need to give them an idea of how long the task will take them. Keep in mind they don’t do this every day so it may take them longer.

“Mail newsletters on May 27th.” That is a specific deadline.
“Mail newsletters by end of May.” That is not.

The reason you want to give a specific deadline and an idea of how long each task will take is so they can plan the appropriate amount of time to get it done. For me I have marketing letters, emails and touches going out constantly. If something is off a week then I can become annoying to clients and prospects because they are getting touched too often. So I’m very picky about the dates anything goes out. I want to make sure we don’t send anything too close together causing someone to opt-out because they think we send too much information.

Go over everything with your replacement. Schedule an hour or so to go over all of your tasks. Make sure they understand what is expected of them and how to get help if they need it.

Make a copy to give to their supervisor so they will help make sure things are running smoothly.

The next step is very optional, but I am a Type A person so it’s what worked best for me. I took all of the tasks, mailings, blog posts, appointments to be scheduled, etc. and put a note in my Google calendar. That way I could make sure things were getting done at the end of the week with a simple email.

Make it accessible.

Finally, make a folder of all the notes, procedures and daily to-do list that you will be given. That way if you need to add to it, it’s easily accessible. I also liked the idea of having it ready to go just in case I went into labor prematurely and wasn’t going to be there as late as I wanted or thought.

If it’s okay to call you or email you while you’re gone, then let them know. I don’t mind a text, call or email. If I’m busy with baby then I simply won’t answer. However, I would much rather be asked a question before something is done then to learn it wasn’t done the way I wanted.

What did you do to plan for maternity leave?

Why You Should Compare Your Baby’s Health Insurance – How We Saved $1,000 a Year!

Why You Should Compare Your Baby's Health Insurance

Months before our son was born J and I were already thinking of his health insurance. Being first-time parents, we really didn’t know what all we needed to do. We had a ton of questions –

When does the baby’s insurance start?
When do we need to sign up for it?
Should be under my employer, J’s employer or under his own plan?
What all would it cover?
What would be the monthly premium cost?
What should the deductible be?

Too many questions. Luckily, our office has a wonderful insurance lady that I’ve known for awhile. I was able to ask all of my questions to her. So helpful!

Here’s what I would recommend to any new parents:

Ask your HR officer or office manager what the monthly premium cost would be to add your new baby to your plan. Then ask for the details – deductible, what all is covered, etc. They should be able to tell you or find out for you.

Next, have your spouse do the same thing. That way you can compare.

When we did this we found out J’s insurance would be almost double the monthly cost when compared to my office’s insurance.

Finally, talk to an independent insurance agent and have them run a quote for you. They can compare different insurance companies to find a good deal and a plan that will fit you.

Once you have all of the information then you will be able to make an informed decision. Don’t blindly add your newborn to you or your spouse’s plan without doing the work.

You could be costing yourself an extra $1,000 a year!  That’s how much more our insurance cost would have been by adding our son to J’s plan.

We decided on the best plan that fit us, our baby and our budget. We not only looked at the monthly cost, but also the benefits of each plan. How much were the co-pays going to be, what was the in-network and out-of-network deductibles.

If our little one needed prescriptions, we wanted to know the cost we needed to cover.

We also wanted to make sure the pediatrician we wanted was in our network. That way we wouldn’t have to worry about the extra cost.

There are so many aspects to health insurance outside of the monthly cost. So you need to ask around, do your homework and not be afraid to make a decision. You aren’t going to hurt anyone’s feelings by selecting one plan over another.

We ended up saving over $1,000 a year, how much could you save?

Make sure you compare your baby’s health insurance to see what the best options are.

We also didn’t know when to add him to my plan.  After talking with my employer’s insurance agent, we found out that we just need to email her or call her once the baby is here.  She was clear that we could wait until we got home from the hospital since it would probably be the last thing on our minds that day.  That was a relief!

How to Get Free Mac Makeup

How to Score Free Mac Makeup

Alright, I have a confession to make. Mac Makeup is my favorite. I blame my sister for my obsession. It started because of her.  She introduced me to it years ago when I was in high school and I’ve never looked back.  But… free Mac makeup makes my heart pitter-patter.

I just think their quality is outstanding and the fact their makeup stays in place all day is a major win for someone like me. I have a habit of touching my face without thinking about it and most other makeup brands are gone before lunch, but not Mac.  I try not to splurge on too many items since we’re working hard at sticking to our budget, but I just can’t convince myself to put that cheap of products on my face.  Don’t get me wrong, I’m a fan of Covergirl products and use those, too.  But I have pretty sensitive skin so anything lower in quality will usually cause me to breakout after one application.

It’s no secret that Mac isn’t the cheapest around. But quality is worth it when it comes to putting something on my face. I have to admit that I can’t always afford Mac. But when I splurge for it, I make it last as long as possible!

Over the years, I’ve learned the ways of Mac.  Just like any good cult-follower there are tricks you need to know.

I wanted to share how to score free Mac makeup with you.

Mac has this awesome recycle program that rewards their loyal customers.

free mac makeup

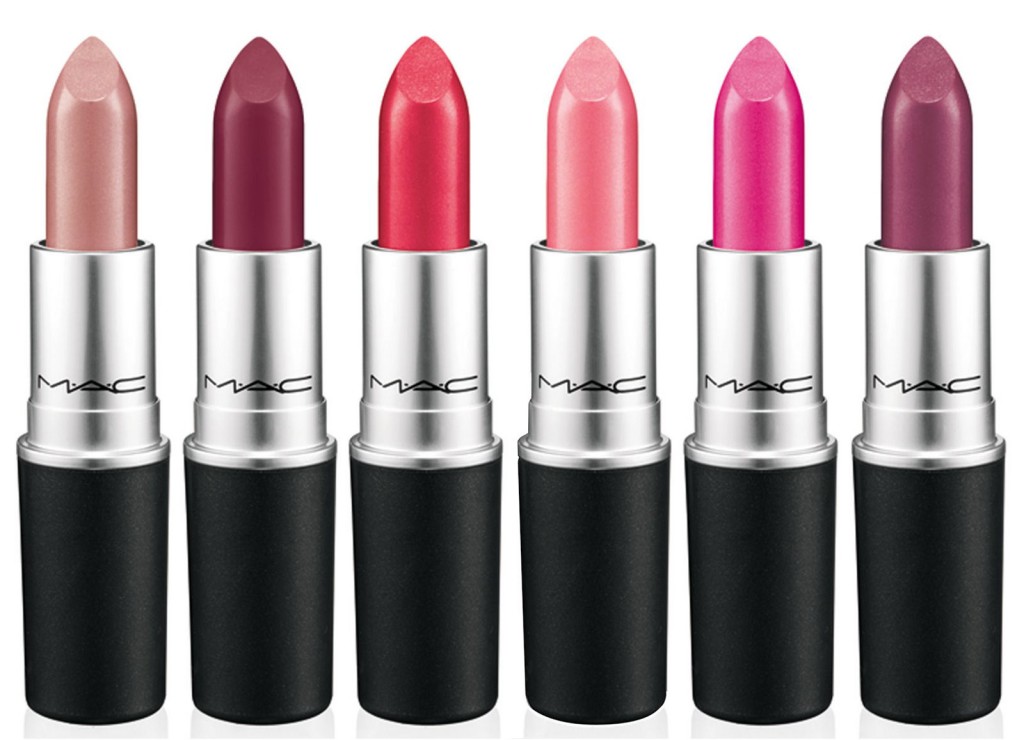
Turn in 6 empty Mac containers to any store and they will give you a free lipstick of your choice. They have so many lipstick color choices to choose from and they average about $17 each. Quite a savings!

Just remember to hold onto your Mac containers.

I keep a plastic bag under my bathroom sink and whenever I empty one out, I just toss it in there. Then when I’ve saved enough, I make a trip the Mac kiosk in the mall. I would love to live near an actual Mac store, but I think that would be dangerous.

Another money savings tip for Mac Makeup: If you setup an appointment to have one of their makeup professionals work their magic on you then you usually get a coupon for any of the products they used. It’s not too bad of a deal!

My Pregnancy Must Haves

My Pregnancy must-haves.  I wanted to compile my go-to favorites for when I was pregnant. Now that our little boy is here, it’s nice to think back about that time in my life. Yes, it wasn’t that long ago but it felt like it was a lifetime ago now that I have a newborn at home.

I struggled at the beginning of my pregnancy with being nauseated almost every day and suffering from mind numbing migraines.  I actually had a few other scares at the very beginning, but those quickly passed thanks to my doctor putting me on some medicine.

I was one of those oh-so lucky ladies whose feelings of being nauseated and migraines continued through most of my pregnancy.  As I got closer to the end – I’d say about 5 months along, my heartburn kicked in.  I actually didn’t know what it was at first.  I’ve apparently never had heartburn before so this was a whole new experience for me.

There are so many symptoms that come along with being pregnant …. nausea, fatigue, headaches, aches, leg cramps, back pain, grumpiness, blah feeling about my looks, and dry skin.

I developed a sort of system to deal with my pregnancy symptoms and what to do to handle when I was hungry, or should I say hangry.  I want to share those with you.

Here are my pregnancy must haves:

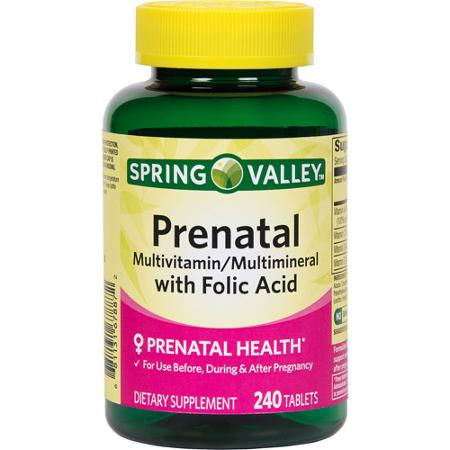
Prenatal Multivitamin – these are a must.  After talking with my doctor, he didn’t have one brand he recommend over another.  He simply told me to find one that didn’t make me sick and go with it.

pregnancy must haves

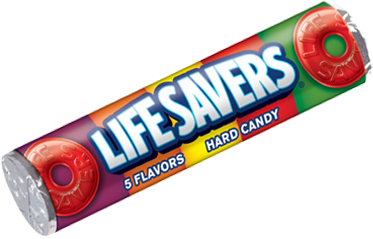
Life Savers hard candy – I’m a huge, huge fan of hard candy.  It reminds me of being a little girl going to church and getting to have a few pieces each Sunday.  These really helped curve my nausea.  It was something flavorful to take my mind off of my sick stomach.

Tylenol – I used Tylenol quite a bit at the beginning.  When I say quite a bit, maybe like 3 a week.  I wasn’t a huge fan of putting medicine in my body while pregnant.  Actually, I’m not a fan even when I’m not pregnant.  But sometimes I had to.  If I would not treat my headaches then they would quickly turn into migraines.  It go so bad that for almost a whole week I wasn’t able to fully function.  J had me call the doctor he prescribed a medicine that had Tylenol, caffeine and something else.  It really kicked my headaches and was totally safe while pregnant.  One little pill and within 20 minutes my headache was lifted.  I still tried hard not to take too many of them.  I know they are totally safe and I have nothing against taking medicine, but I try to stay clear of most medicines because a Tylenol can make me sleepy.  Now this one the doctor gave me had caffeine, so it was so much the sleepy part, but I still tried to avoid it.

destination maternity work clothes

Maternity dress pants – these were a huge life saver for me.  I even shared a post on where I got my favorite maternity pieces.  Working at an accounting firm during tax season while pregnant meant I had to be presentable.  So I found some great pieces that really lasted me.

Leggings and tunics – this was my weekend / week night staple.  I even pulled it off at work a few times.  I just wore my normal leggings, no need for maternity ones for this girl!  I could really pull together a decent outfit without much effort.  So nice for those days I was barely moving.

pregnancy must haves

Tums – I tried for a long time to not take Tums, but they are safe and my heartburn was awful.  I finally caved and started popping them.  I tried to not take more than 2 a day and I would actually suck on them.  I like the taste of Tums, so it wasn’t too bad.  But I felt like it lasted longer and really helped the moment they hit my tongue.

pregnancy must haves

Pregnancy pillow – I ended up not using this as much, just because it’s so big.  But it does work great for those that don’t have to share their bed with three dogs. HA!  I purchased this one on Amazon and it really helped cradle my growing bump.  Plus you can twist it to help you have a back support while you’re watching TV in bed.  At the beginning I used it under my legs more than anything.  It really helped with my leg cramps during the night!

What are your go-to pregnancy must haves?

The Rule to Afford Anything You Want

The 70 Rule to afford anything you want

I may be frugal, but I am not cheap.  I spend my money wisely so that we can live a debt free life.  Now don’t get me wrong, we have a long road ahead of us to becoming debt free and affording everything we want…

But we’re getting there with baby steps.  As I’ve learned and mastered this whole budgeting thing, I’ve realized that I don’t want to go without.  One of my biggest fears is having to live paycheck to paycheck.  Most people are afraid of drowning, or dying alone…mine is living beyond my means.  I do have other fears (dang clowns!), but I just don’t want to be a burden and live a stressed life because of my money choices.

J and I have an agreement – we can have anything we want, but we just have to save for it.  He wants new bowling equipment – that’s fine, save for it.  I want a new design for this blog – then I have to save for it.  It’s simple.

We’ve started living by the 70-10-10-10 rule… It has a long name, but it’s a game changer!

Jar of Money
Image by © Royalty-Free/Corbis

Here’s how it works:

70% of our income goes to our expenses.

Expenses like cell phone bill, utilities, groceries, gas, insurance, etc.  This is where those irregular payments go into.  I shared about our sinking fund before.  We count those as monthly expenses since they are expenses in the future.

Here’s an example:

You and your spouse take home $4,000 a month.  This amount is what you deposit into your checking account.

70% of $4,000 is $2,800.

All of your monthly expenses should be $2,800 or less.  Groceries, car payments, car insurance, life insurance, entertainment, gas, utilities, credit card payments, loan payments, etc.  Even the expenses that aren’t on a monthly basis, such as personal property taxes, home insurance, etc. are all treated like a monthly bill.  You can read more about it in my sinking fund post on how we do that, but we treat any current or future expense as a monthly bill.  In the end all of your monthly expenses should all be around $2,800 or less.  Not more.

how to spend your tax refund

10% goes towards savings.

We put about 10% of our income into our savings accounts each month.  We have an emergency fund that we put money in.  We like to keep at least $1,000 in there as our zero balance.  I put a little more in the account every month just in case we need to fix the car, replace the hot water heater or have an unexpected medical bill.  Especially with the baby on the way, we like the thought of having an extra cash cushion in our savings.  

Again, using $4,000 as our take-home amount.  You should be putting an extra $400 a month into your emergency fund to build it up or into an extra savings account.  

NOTE: Be careful on your savings account.  If you have more than 3-6 months worth of living expenses then you need to start using your money to pay off bills or for another purpose.  You want your money to work for you.  It’s not doing any good sitting in a savings account collecting a small amount of interest.  Put it to work.

tips on doing the debt snowball, how to do the debt snowball

10% goes towards paying down debt faster.

We’re able to afford about 10% of our monthly income and put it straight to debt.  Some months are easier than others, but on average we’re paying more and more.  We’re doing the debt snowball method to get ourselves out of debt and it’s working.

Let’s use our $4,000 take home as an example again.  

10% of $4,000  is $400 a month.  You should be allocating an extra $400 a month towards your debt snowball.  If you can afford more or already have your emergency fund built then you should definitely put additional funds to get out of debt faster.

10% goes towards retirement and tithing.

Some will say that you should work on getting out of debt first then start on your retirement.  However, I don’t like that theory.  I love compound interest.  Being in our late 20s, almost 30s I thought it was important to get started on our retirement savings.  We have it automatically come out of our joint checking account in the middle of the month so we don’t even have to think about it.

If you have any money leftover or would like to split the last remaining to donate to charity or your church, then that’s what you should do.  This last 10% can be shifted to fit your needs and wants.  You go with what’s most important to you.  Just make sure you’re covering your monthly expenses and working on getting out of debt.  Those are the big kickers for any budget.  

If you’re living above your means then it will be a revolving door of stress and worries.  Trust me.  The first step in implementing the 70-10-10-10 Rule is to work it out on paper.  Take out your handy budget and start playing with the numbers.  See where you’re overspending and where you need to pick up some slack.  The first thing to go for many families is savings.  So make sure you’re working on building your emergency fund and then start finding extra money to pay towards debts.

NOTE: Please don’t think these percentages will work for everyone.  They won’t.  No matter how hard you try.  They are a guideline.  Some months we go over and others we’re right on the dollar.  Find a combination that works for you.  Just make sure you’re hitting all of the areas that you can afford.  I started with the most important categories – expenses and savings.  Then I worked in paying down debt and retirement/tithing.  So that’s how you need to create your budget.

Let me know how this spending rule works for you!

How to Score a Free Breast Pump

Affiliate Disclosure: I am grateful to be of service and bring you content free of charge. In order to do this, please note that when you click links and purchase items, in most (not all) cases I will receive a referral commission. You will not pay more when buying a product through my link.


How to Score a FREE Breast Pump

Now that the baby is almost here, the anxiety of being a parent is setting in.  I’m sure I’m not the only first-time mom that feels this way.  I’m not worried about the delivery mainly because I will be in a hospital and know that I can trust God to make sure me and the baby are okay.  However, I am starting to freak out about leaving the hospital.  I’m going to be a mom.  It’s a scary thought!

Deep down I know I will be a great mom and can’t wait to meet my little boy.  But I just want to make sure we have our bases covered.  After having some amazing baby showers, we really did get most of what we need or what we think we’ll need.  One thing still puzzled me … a breast pump.  I really had no experience with them and didn’t know what to look for or what to avoid.  Luckily I had a few friends recently have a baby and they were a huge help.  I had even heard that some insurance will cover the cost of a breast pump, too.

I love a good deal and do you know what’s better than a good deal?

When you can get something for FREE!

So I decided to checkout the possibility of getting a free pump.  Because breast pumps aren’t cheap! They can range anywhere from $150 to $300 depending on the brand, style and gear you get to go with it. That’s a hard pill to swallow when you’re pregnant and the cost of diapers, wipes, clothes, and everything else is starting to sink in.  Now I want to share…

How to score a free breast pump with just a few clicks:

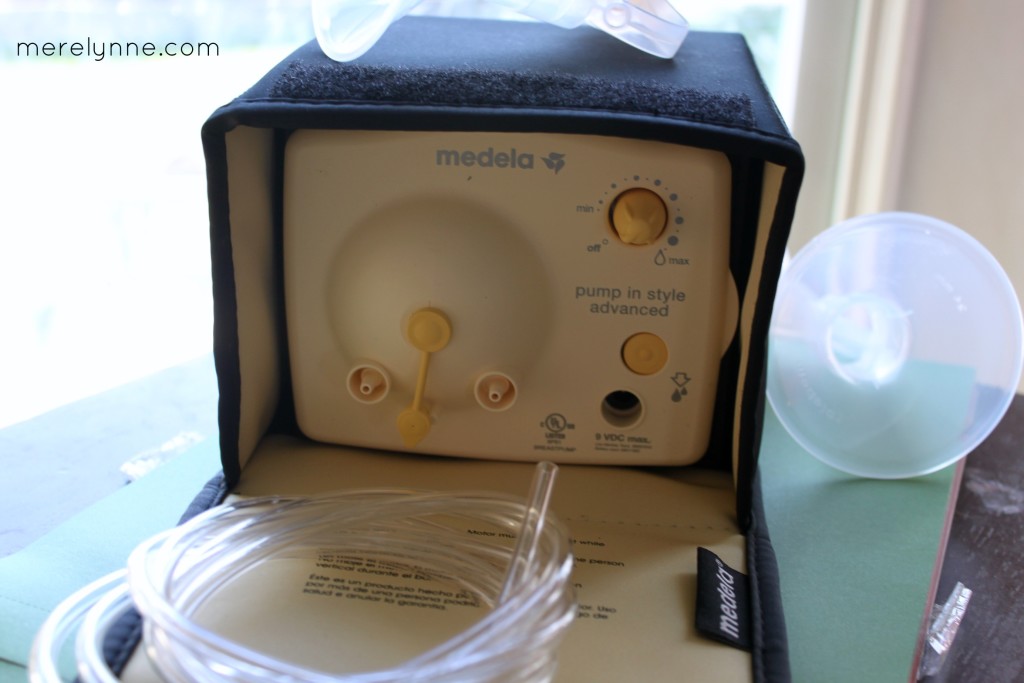
free breast pump

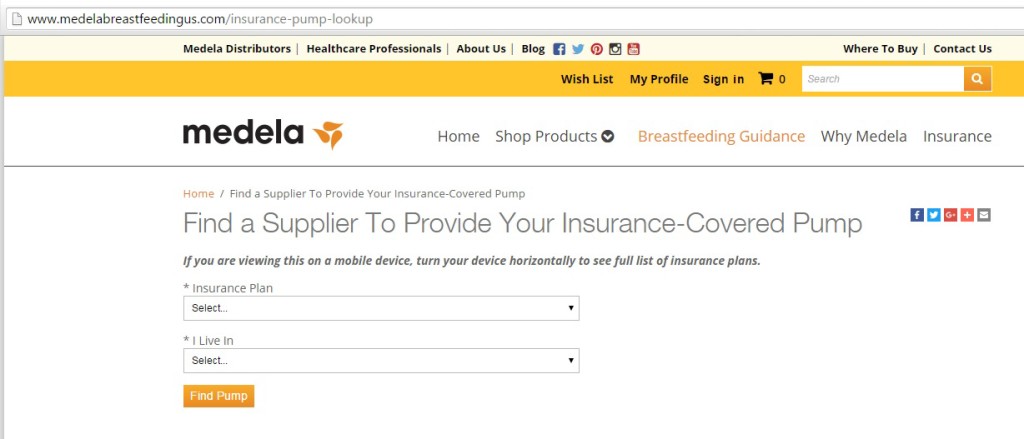
I really wanted a Medela breast pump after talking to a few people. First, it was a brand I recognized and second, I heard good things about them. So I went to their website where they have a handy look up to see if your insurance covers the cost of a breast pump.

insurance covers breast pump

You enter in the name of your insurance carrier and the state you live in. Then it will take you to suppliers. I clicked on the first one I saw because again, I recognized the name and I tend to overthink things a bit. So it was just easier to go with the first.

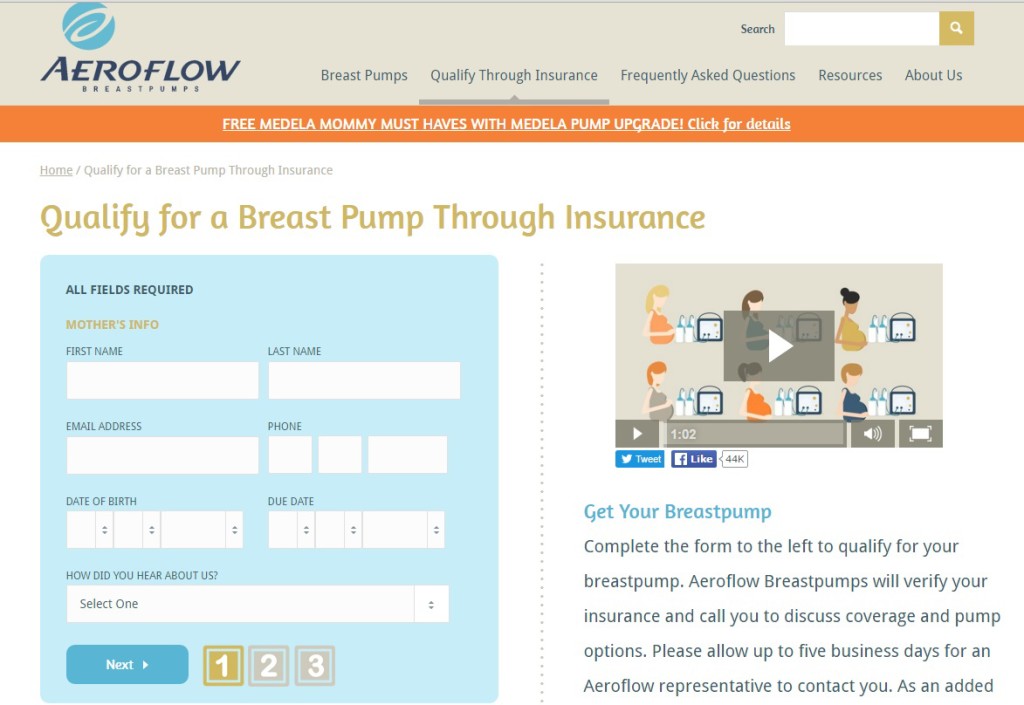
For me the first on the list was Aeroflow Breastpumps. You can go to their website and see if you qualify through insurance.  The whole process is really easy. Seriously!

how to get a free breast pump

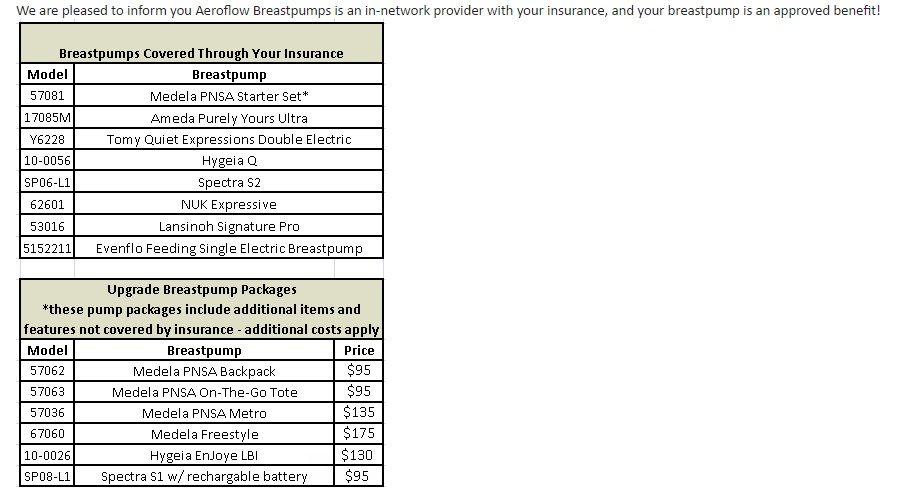
I filled out my contact information and insurance information. The next day I received an email letting me know which pumps I qualified for.  There were some that were free and some that I could upgrade to for a discounted price. I decided to stick to the 100% free since this was my first-time and I had no idea about any of these.

free breast pump

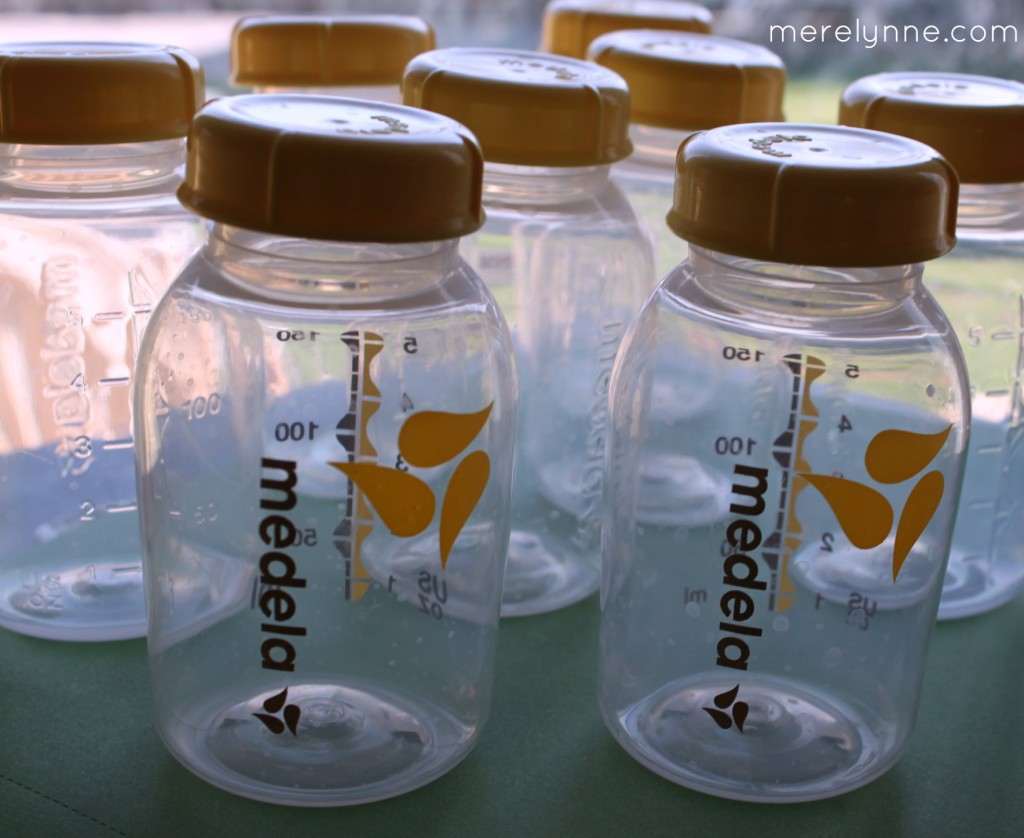
They even sent me a few free storage bottles, too!  So excited about that freebie!

score a free breastpump

Tip: I would do some research on the different pumps that are offered to you.  That way you can really know the benefits about each one before making a decision.  You may decide it’s worth upgrading to a different pump or doing a breast pump package.  

Tip: When you register for your baby shower, go ahead and add some accessories that fit your free breast pump. I added some medela freezer bags, breastmilk bottle, sterilizer and other goodies.

What’s in My Hospital Bag (Free Checklist)

This post contains affiliate links, which means that if you click on one of the product links and purchase an item, I may receive compensation.  You will not pay more when buying a product through my link.

What to Pack in Your Labor and Delivery Hospital Bag

It’s getting close.  The time for Baby Boy Rines to make his debut.  To say I’m excited would be an understatement.  I just can’t wait to meet this little one!  

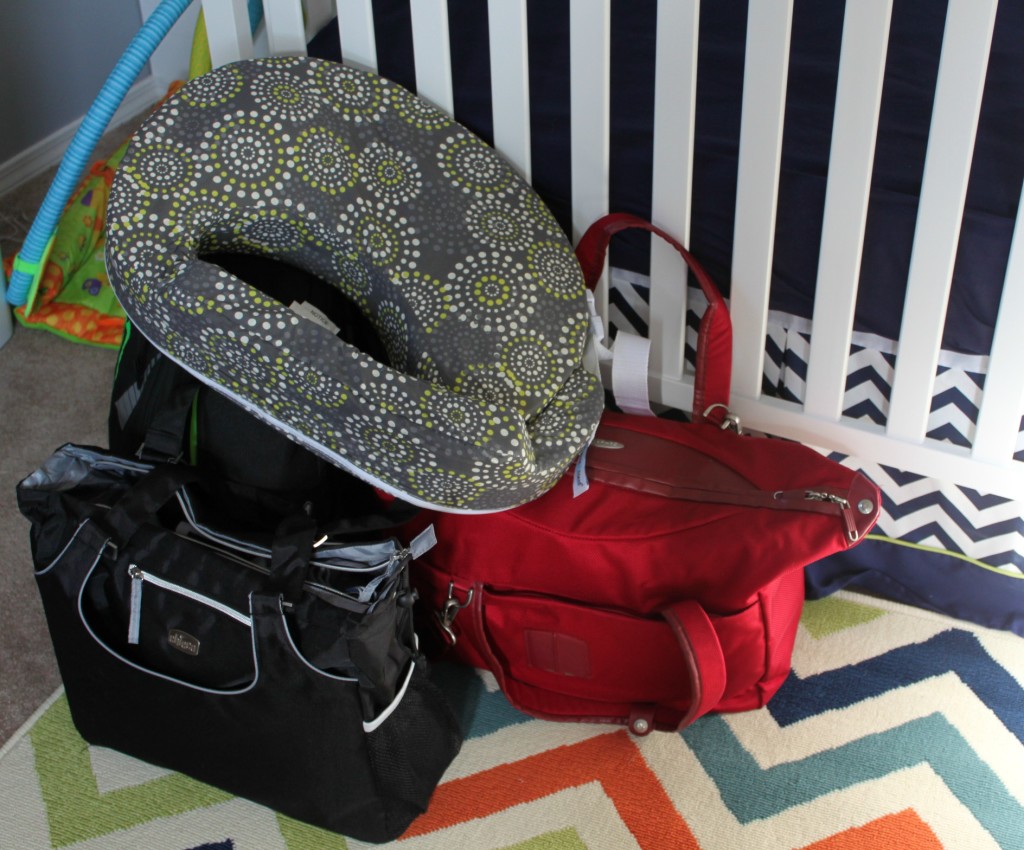
The closer and closer I get the more glad I am to be prepared.  I have my hospital bag packed and ready to go.  I actually have it in my car so that way it’s with me no matter where I am.  You never know when he’s going to be ready so I figured it would be smart just to go ahead and put it in there.  

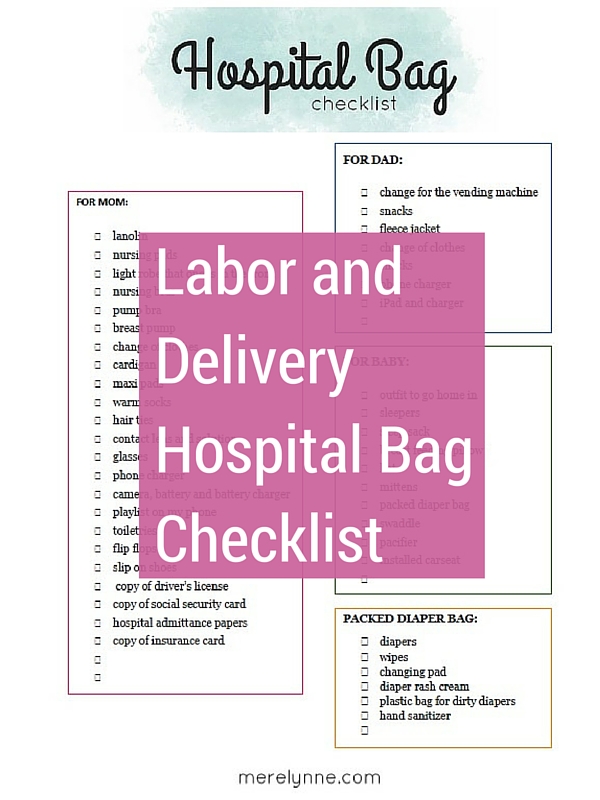
I’ve been talking with all of my mommy friends about what’s the best pieces to put in the hospital bag.  I’ve compiled a great checklist and would love to share it with you.  

labor and delivery hospital bag

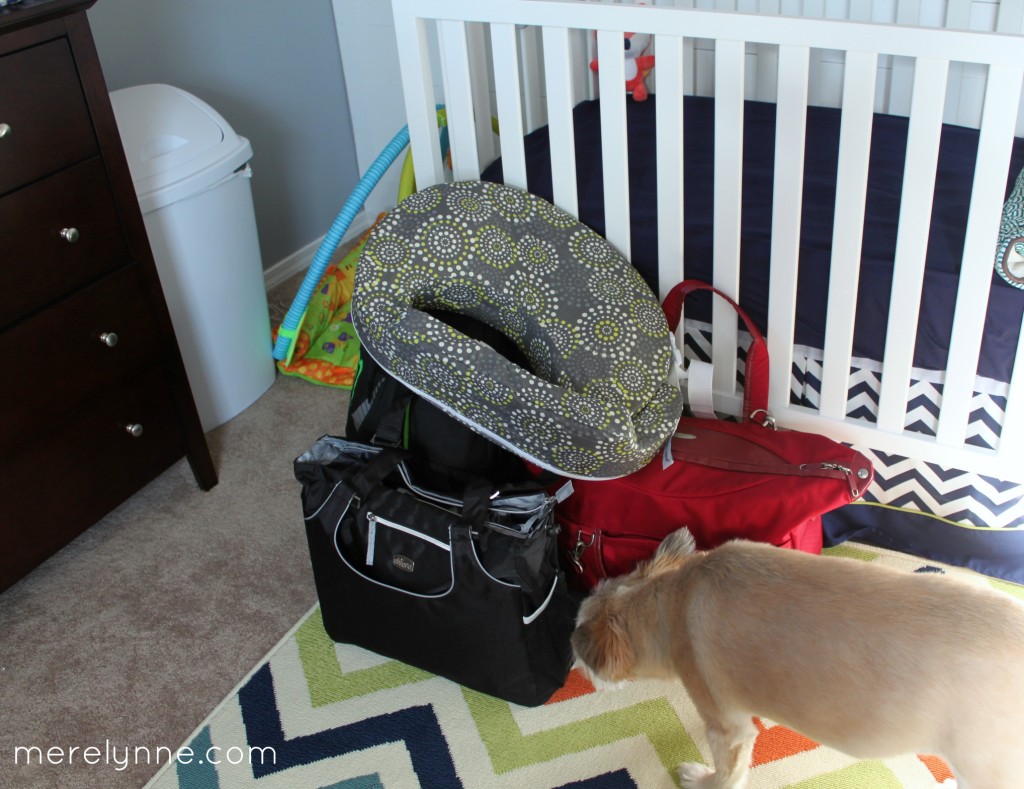
Even Maggie wanted to get in on the packing!

Here’s what I have in my hospital bag:

  • lanolin
  • nursing pads
  • light robe that opens in the front – I love this one from walmart!
  • nursing bras
  • pump bra
  • breast pump
  • change of clothes – I wanted to stay comfortable and I knew that I would not immediately fit back into my pre-pregnancy clothes.  So I packed a few yoga pants and comfortable t-shirts
  • cardigan
  • maxi pads
  • warm socks
  • hair ties
  • contact lens and solution
  • glasses
  • phone charger
  • camera, battery and battery charger
  • playlist on my phone
  • toiletries
  • flip flops
  • slip on shoes

I also packed a smaller bag for the baby and here’s what I have in there:

  • outfit to go home in
  • sleepers
  • sleep sack
  • breast feeding pillow
  • hat
  • mittens
  • packed diaper bag (see the checklist for what’s in our diaper bag)
  • swaddle
  • pacifier
  • Carseat (it’s actually already installed in our car)

hospital bag

Don’t forget about the man in your life!  I’ve heard those labor rooms can get pretty chilly.  Not to mention the amount of time labor can last, so I packed a few items for J in my hospital bag, too.  

Here’s what J has in the hospital bag:

  • change for the vending machine
  • snacks
  • fleece jacket
  • change of clothes (you never know if he’s going to be able to leave and if it lasts over 24 hours then he’s going to want clean clothes)
  • snacks
  • phone charger
  • iPad and charger

Labor and Delivery Hospital Bag Checklist

I created a FREE downloadable checklist for you to use while your packing your labor and delivery hospital bag.

How to Score Cheap Party Decorations

How to Score Cheap Party Decorations

Not too long ago I threw a nice little gathering at my work. You see, at the end of every tax season we like to celebrate with our clients and friends. Thanking them for another successful year.  I also throw an open house during Christmas time to wrap up the year. This past year, I switched out the Christmas theme for a surprise birthday party for my Dad (who happens to own the firm).

Outside of work, I just love throwing parties for friends.  Right now it seems like all of my close friends are having babies so I’ve been the queen of baby showers recently.  Not too mention, with me being pregnant – babies are on my mind!  A few years back I was really good at throwing wedding showers since my now pregnant or new-mom friends were getting married.  It seems like life goes in a cycle, doesn’t it?

Anyway, any excuse to throw a fun party is always welcomed around me.  I love a good theme, yummy food and a place to gather with friends and family.

Since I like to be pretty crafty, I have a tendency to make my own signs or invitations then have printed at a local print shop.  But for decorations, I like to make a splash.  Now, I try not to go overboard and I really don’t like spending a ton of money.  So I’ve found a good way to get a great impact on the cheap!

cheap party decorations

Here’s how I score cheap party decorations…

Dollar Tree.

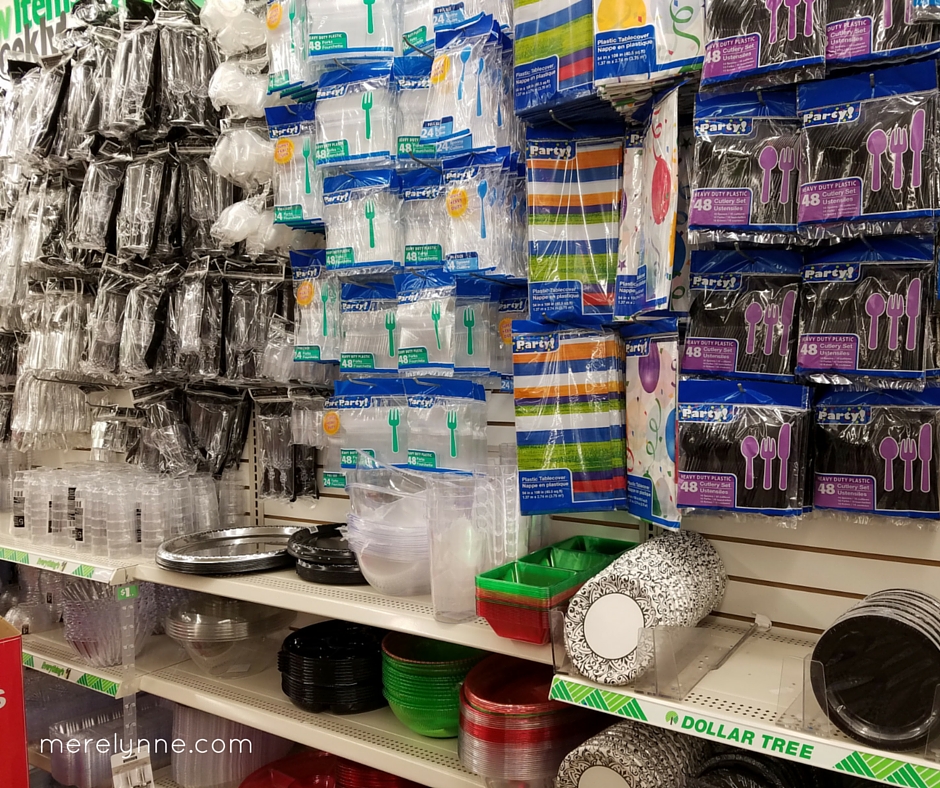
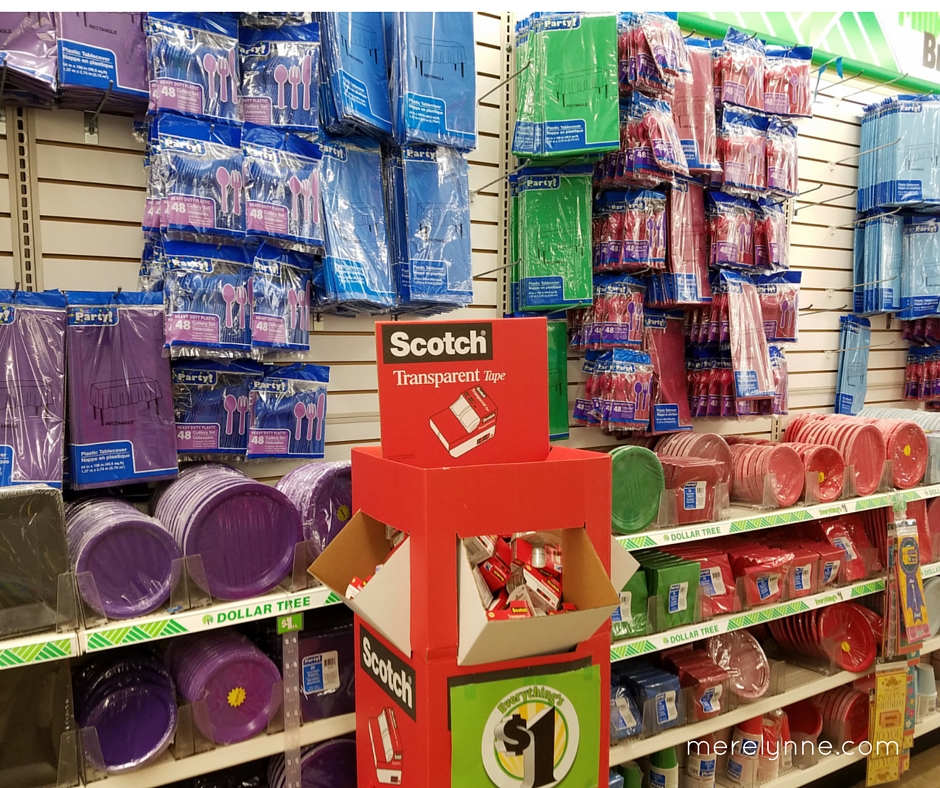
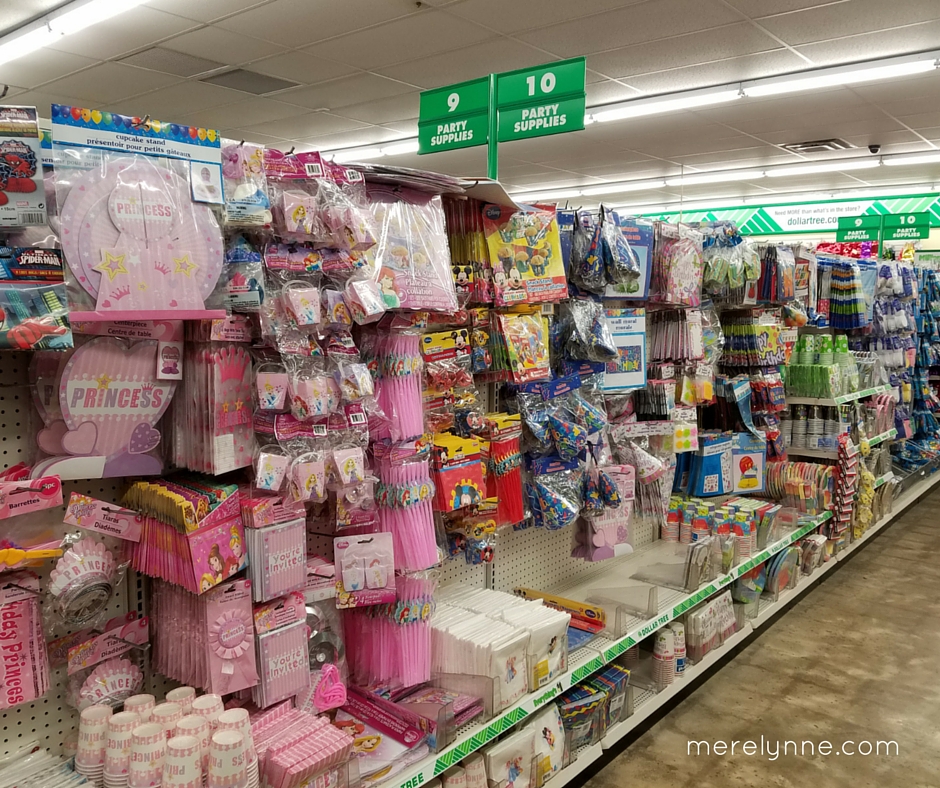
Yep, that’s right. I shop at the local Dollar Tree for all my party supplies – for any event.  Birthday parties, anniversary parties, new year’s parties, open houses, baby showers, wedding showers, and so much more.  If you can think of a party to throw, then you can probably get your decorations at Dollar Tree.

Balloons aren’t very expensive ($1), plus they are one of the only places in town that will do same-day balloons for me. I could call a local florists, but their prices are so much higher and typically, I need to have an order placed a few days in advance.  We only need balloons for a day, so as long as the last 24 hours, I’m good!  But these balloons always ended up lasting a few days or even close to a week before they start deflating.

I also like their streamers, which they have a bunch of different colors that come in 2 rolls per pack for only $1.  I bought several different colors when we were hosting my Dad’s birthday party.

They also have table centerpieces, confetti,and wall hangings. You guessed it… everything is only $1 each.

cheap party decorations, dollar tree cheap party decorations, dollar tree

cheap party decorations, dollar tree

I also am a huge fan of their plastic plates and silverware. You can buy colored plates, glasses, napkins, silverware and guess what? Each pack is only $1.

I typically by the plastic silverware from Wal-Mart because I can get a larger count for less money, but the plates and napkins are hard to beat.

Plus Dollar Tree has serving utensils and platters on the cheap, too! We’ve actually put ours in the dishwasher a few times and they are still holding up. But for only $1 it’s not a bad deal in case they get tossed after the party.

I’ve even used their gift bags as part of our favors.  I couldn’t find enough gift bags and the right sized bags anywhere in town for our last open house.  I was browsing Dollar Tree and there they were.  The perfect bags, the perfect amount and at the perfect price.  $1 for 12 bags was perfect.  I ended up grabbing a few packages to make all of the favors and ended up with some leftover.

I never break my party budget at the office or our personal budget when I’m hosting a party.

I am not being compensated from Dollar Tree for my opinions on their awesome party decorations.  I am just a huge fan of cheap party decorations that are easy for me to get.

30 Free Weekend Activities

30 free weekend activities

I love having free time on the weekends and with tax season winding down… I’m going to enjoy having both Saturday and Sunday back.

Don’t get me wrong, I’m super grateful to be busy during tax season and I really don’t mind working longer hours. But it will be nice not having to set an alarm on Saturday morning anymore.

I came up with 30 free weekend activities for us to do. I can’t wait to get started on my list.

30 free weekend activities

Free weekend activities to do at home

1) Movie Day at home – we have a ton of old movies that we haven’t watched in a long time. We can have a movie marathon, curl up on the couch and just enjoy some down time.
2) Try some new baking. This past summer, I got really into baking cookies and decorating with royal icing. I need more practice, but it was super fun to mess with during those long summer days. There are even some Youtube tutorials you can check out.
3) Catch up on your favorite Youtube stars. I have a few Youtube channels that I follow and I’m not the best on staying current with them. So it’s nice to just take some time to catch up on them all.
4) Read a good book. You can head to your local library to rent a classic or something that catches your eye.
5) Start a new DIY project or if you’re like me… finish a DIY project that’s been in limbo for awhile
6) Go for a long walk. I love this idea. There is a nice walking trail not too far from us. We usually only take 1 or maybe 2 dogs with us. It’s too hard with all three, especially since one doesn’t like to walk long distance, one wants to play with everyone, and the other one doesn’t like strangers. So we typically stick to where we each control one and we’re good to go.
7) Go for a picnic – no boat and don’t like fishing, then just have the picnic!
8) Go swimming at the community pool, neighborhood pool, or a friend’s house
9) Start a garden
10) Catch up on your favorite TV shows

30 free weekend activities

Free activities to do with others or out and about:

11) Geocaching – if you’ve never heard of it, then look it up. It’s awesome! It’s basically a scavenger hunt. You can do it with kids, without kids, with a group, or by yourself. You just need a GPS tracker (preferably not a cell phone in case you lose signal). We’ll take our old Garmin GPS with us. You type in your coordinates and then go hunting for a little token. You can keep track of everything through their website.
12) Have a game day with friends. Invite some friends over to play games. We have a few outdoor lawn games, bag toss, washers, etc. It’s nice to get together and just play.
13) Visit a free museum. Around here there are a few art or history museums that don’t charge admission.
14) Go camping. This one might not be entirely free depending on where you camp since some campsites charge a small fee. But it’s never very much and it’s fun to just get out for the weekend.
15) Go boating. I understand not everyone has a boat, but for J and I this is a favorite past time. I pack a picnic lunch and then we’re off for the day.
16) Go fishing. Last summer we found a few good spots that don’t require a boat. So we like to pack our lunch, grab some snacks and take off for the day. Make sure you have your fishing license though!
17) Volunteer at a local charity
18) Go sledding (if in the winter)
19) Have a bonfire with friends and neighbors
20) Go for a hike

30 free weekend activities

Here are some great free activities to do with kids, besides a few from up top:

21) Attend the free movie at the public library
22) Go to the park
23) Ride bikes
24) Work on a puzzle together
25) Create a play or story together
26) Organize a scavenger hunt
27) Read stories at the public library
28) Create science experiments
29) Make a giant slip in slide using a tarp in the backyard
30) Create a scavenger hunt around the house or park