Search Results for: job

Why I Chose To Go Back To Work After Baby

Why I Chose To Go Back to Work After Baby

Choosing to be a stay at home mom or returning to work after baby is a hot topic. I wanted to show why I chose to go back to work after baby.  It’s a emotional topic, but one I think is talked about enough.

I work for my family’s accounting and financial planning firm. The reason we moved to my hometown was for me to work with my Dad to learn the ropes. The thought of deciding to quit my job wasn’t possible. I am needed and I love what I do. 

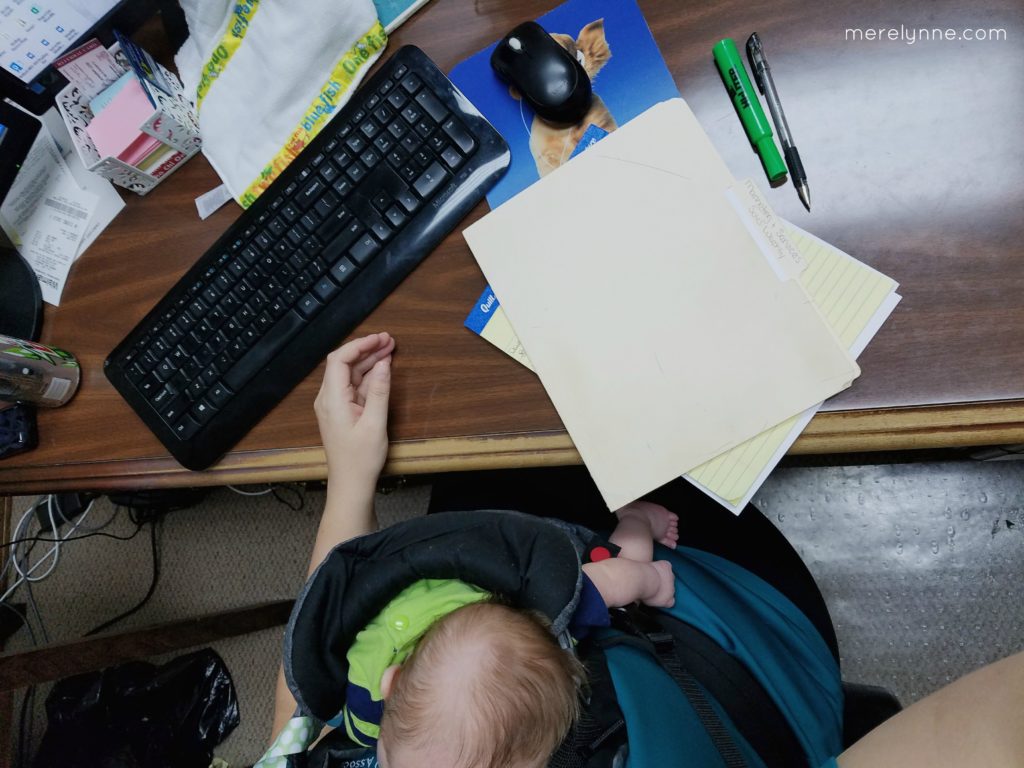
I actually only took a six week maternity leave from work. I probably could have taken longer, but I also knew that I had work to do. Because I work for my family, I was able to bring Baby with me. It was a nice transition for me. I was able to get the balance of getting work done, but was still able to see him across my desk.

Even if I didn’t work my family’s firm, I’m positive I would have returned to work. It’s more than a financial choice, too. Sure the double income is nice, but honestly money isn’t a primary factor.

After four weeks of being home with just Baby and dogs during the day, I found myself irritable with J. I needed that outlet of talking to someone, working on a bigger project and just feeling needed. Don’t get me wrong, every few hours when Baby woke up hungry I felt very much needed, but it’s different.

working mom


Why I Chose To Go Back to Work After Baby


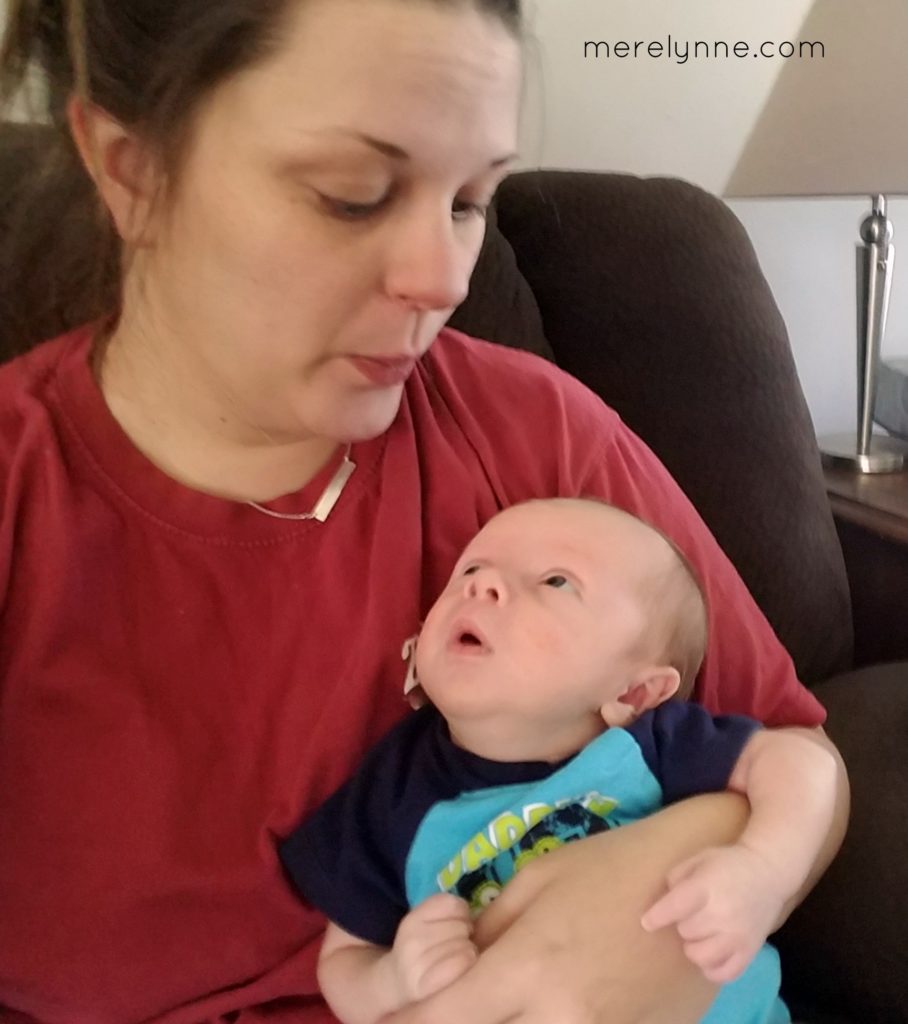
I loved my time at home and know when he goes into a daycare in a few weeks I will be a complete mess. I will miss being home with my little boy. It’s crazy – I never saw myself as a mother when I was younger, but the moment I heard his cries and saw him for the first time I knew this is why I was put on this Earth. To be his mom.

And one thing that goes along with being a good mom is providing for him. I want to give him the moon.

My parents wanted to give my sister and I more than they were given as kids, and I want to give our son more than I was given.  Which is a pretty tall order.  I know I want our son to travel (mainly because J and I want to travel!), to accomplish his goals, go to college and not have to worry about the expense of school, and have fun while he’s young.  To do all of these things, both J and I need to work.  

We need to be saving our money, paying down debt and dreaming of places to travel as a family.  With eliminating one of our incomes, we could still accomplish these goals, but we would have to sacrifice a lot right now and it would take longer to get there.

Another reason I went back to work was to save my marriage.

J and I were talking the other night and came to a conclusion. If I wanted to be a stay at home mom then that would probably be the end to our marriage. I know it’s crazy to say that and probably a little hard. But I don’t know how to do that successfully.

I found myself in my short maternity leave depending on J too much. He was my source for socializing, my relief when I needed a break from sleepless nights, and my punching bag when I got frustrated. Not a literal punching bag, but I just became very short with him over the weeks and I know that wasn’t good.

It wasn’t fair to him and deep down I knew that.  I like to think that I’m a pretty logical person so I could see myself acting crazy, knew it was too much, but couldn’t stop myself.  I realize I was a hormonal mess, but I feel like it was more than that.  I needed an outlet and I couldn’t depend on my husband to provide that.  I needed to find my own.

Work is my outlet.  I get up, get dressed, put on make up and head out the door.  I sit at desk and work on projects for our clients.  I like answering questions and helping our clients solve their problems.  Before having a baby, I really felt my career was what I was supposed to do with my life – crazy, I know!

Why I Chose To Go Back to Work After Baby

Now it’s all about finding a balance.  A balance between putting J first, providing for our son by giving him the foundation he needs and having a fulfilling career.  I will reach that balance at some point and I know I will struggle along the way, but I know I am setting a good example for our son and will be able to do so much with him as he gets older.  


How to Teach Your Kids About Money

How To Teach Your Kids About Money

How to teach your kids about money – the simple way!

Learning financial responsibility at a young age is crucial. Your child should know how money works and how hard work is how you earn money. It doesn’t grow on trees and we need to be teaching our children that from very early on.

I feel like my parents did an excellent job teaching my sister and I all about money.  It wasn’t handed to us, we didn’t earn it for making good grades (that was expected), and we learned how to budget out money.

I love my Baby and I’m sure he will be spoiled, but he will know how to work. I think teaching finances to children will help them know hard work is how you get ahead and that everything will not be handed to you in life.

Here’s my top tips for how to teach your kids about money:

Make them work for it.

Don’t just fork over an allowance each week.  Setup chores for your kids to do to earn their money. I  recommend having a standard set of chores to even qualify.  For instance, their bed has to be made and their clothes put away each day before they can do an extra chores to earn money.  

Don’t give them an option.

Chores shouldn’t be optional.  The money is an added bonus, but because they live in your house and you provide their meals then they should be expected to pitch in.  

How To Teach Your Kids About Money
source

Let them pick their chores.

Sit your kids down and ask what they want to help with.  My sister and I volunteered for our paying gigs so we felt like we wanted to do them.  It will help your kids take ownership in their tasks.  

I had a friend with young kids tell me this story once years ago and it has stuck with me.  His little girl started fighting with him on drinking her morning milk.  So instead of fighting back or getting frustrated he came up with a plan.  He set out 3 cups each morning and her job was to pick the cup she wanted her milk in.  She had taken ownership over making that decision and she would happily drink her milk from her cup of choice.

Let you kids decide what they want to do and they will take pride in getting it done.

Pay per chore.

Set a price for each task and that’s how they get paid.  It’s not a set amount each week, but they have a maximum amount they can earn.  Now I know each amount may differ between families.  25 cents per chore may work for some while others may give more, but no matter the amount you decide – you need to set a price and stick with it.

For instance, taking the trash to the street is worth 50 cents and bringing the empty cans back is another 50 cents.  Emptying the dishwasher is worth $1.00 and so on.  If they skip a day or a week then they do not get compensated for it.

Teach them how to budget.

I like the idea of having a set amount that goes into savings each week.  You can make it a specific dollar amount or percentage.  I prefer percentage because it also teaches them math each week.  You can set what you think is reasonable, but they know before they can spend any of their earnings a certain portion must be put aside.

10% is a good amount to start with in my opinion.  It’s a round number so doing the math can be easy.  You can have 10% for savings and 10% for tithing to teach your children about charity.

By treating the savings and tithing as a bill they are learning how to budget their money before spending which can really help them understand how expenses work.

Just a few simple steps can really help teach your kids about money.  It doesn’t have to take hours each week, just a few minutes every Sunday and your kids are getting a budgeting lesson.  I love the idea of passing on the work ethic my parents instilled in me to our son.    

How to Plan for Maternity Leave at Your Work

How to Plan for Maternity Leave at Work

Maternity leave is an important topic to talk about.

Your employer may offer something completely different than your friend’s employer.  Yet, what is the right way to prepare for it?  You want to make sure your job is being done correctly while you’re gone (no matter how long that might be) and your boss wants to make sure there is a chaotic mess left for when you’re gone.

In my job I wear many different hats. One moment I’m the Marketing Director, deciding on emails, facebook campaigns, letters, planning client appreciation events, calling prospective clients, and reaching out to new clients.  The next moment I’m the financial planning assistant, completing paperwork, handling maintenance on clients’ accounts, meeting with new clients, and answering questions. Then  my final hat for the day could be the Sales Director, managing contact with current clients, preparing client touches about any focus we are working on, and so on.

My day can be all over the place and it can be overwhelming at times. But I love it. I love not knowing where my day is going to take me and to know that I can be doing a variety of different tasks. However, it doesn’t make it so easy for when I’m going to be gone. It can be tricky trying to explain to a fellow co-worker how they can help me out. I decided my maternity leave will be easy to follow and nothing would get overlooked. Summers might seem slow in an accounting office, but it’s not for me. That’s when I work on all of my marketing pieces for the entire year, start sending out touches and kick start marketing campaigns. It’s a busy season for me.

One of the best decisions I was to plan for maternity leave at work. I can’t tell you how much of a stress reliever it is to know your work will be taken care of and you won’t have a huge pile when you return.

I wanted to share some helpful tips so you can be ready to leave your work to take care of you and baby. No matter how long your maternity leave is or how short, these tips will work for you.

It’s important to have a plan in place well before the baby is due. You never know if your little one will be making their debut early or not. It’s best to be prepared for the unexpected.

Know Who Will Be Wearing Your Hats.

The first thing you want to do is know who will be covering you. Is it one person or are multiple people going to be splitting your duties? Either way you need to know. I think it’s easier if one person covers because then all of your to-dos and instructions and thoughts are just passed to one individual. However, that may not be feasible. At most offices your cover will already have a full-time job with their own work that needs to get done.

If you have multiple people covering for you then you need to talk to your supervisor or office manager to determine who is going to take care of what. Which parts of your job is person A and person B going to cover.

For me I had two people covering for me. One covered all of my marketing duties while the other covered my financial planning and sales director tasks. I wasn’t too worried about the financial planning side, mainly because she’s been doing it for years and is the person who trained me. So I knew she had it! She could do that job in her sleep!

The marketing pieces were a bit more worrisome for me. I have created a few strategies, mailings, and so on over the past year that all need to be kicked off while I would be gone. So I wanted to make sure they went out without any problems.

Here’s what you do after you figure out how your job will be split:

Write down everything that will need to be done 2 weeks before and 2 weeks after your scheduled maternity leave (just to be safe, remember?). I used an Excel spreadsheet to write down all of my tasks so I could update it as things changed.

Write it all out.

Next, create any procedures that aren’t already made. For me, scheduling our company’s blog posts was something only I have ever done. So I had to create written procedures with clear directions so my replacement could handle. I had to be very, very specific. But that’s okay. You need to be with procedures.

Treat a procedure as if someone off the street was coming in to handle that specific task. You want them to be easy to follow, clear and to the point.

Be specific.

Give specific deadlines. If someone is trying to do their job and yours then you need to give them specific deadlines so they can get it done. Also, you need to give them an idea of how long the task will take them. Keep in mind they don’t do this every day so it may take them longer.

“Mail newsletters on May 27th.” That is a specific deadline.
“Mail newsletters by end of May.” That is not.

The reason you want to give a specific deadline and an idea of how long each task will take is so they can plan the appropriate amount of time to get it done. For me I have marketing letters, emails and touches going out constantly. If something is off a week then I can become annoying to clients and prospects because they are getting touched too often. So I’m very picky about the dates anything goes out. I want to make sure we don’t send anything too close together causing someone to opt-out because they think we send too much information.

Go over everything with your replacement. Schedule an hour or so to go over all of your tasks. Make sure they understand what is expected of them and how to get help if they need it.

Make a copy to give to their supervisor so they will help make sure things are running smoothly.

The next step is very optional, but I am a Type A person so it’s what worked best for me. I took all of the tasks, mailings, blog posts, appointments to be scheduled, etc. and put a note in my Google calendar. That way I could make sure things were getting done at the end of the week with a simple email.

Make it accessible.

Finally, make a folder of all the notes, procedures and daily to-do list that you will be given. That way if you need to add to it, it’s easily accessible. I also liked the idea of having it ready to go just in case I went into labor prematurely and wasn’t going to be there as late as I wanted or thought.

If it’s okay to call you or email you while you’re gone, then let them know. I don’t mind a text, call or email. If I’m busy with baby then I simply won’t answer. However, I would much rather be asked a question before something is done then to learn it wasn’t done the way I wanted.

What did you do to plan for maternity leave?

Why We Have Multiple Bank Accounts and Why You Should Too

multiple bank accounts

I shared awhile back how we had been using the cash envelope system for quite some time. We have been following Dave Ramsey after we took Financial Peace University before we were married. We loved the simplicity of it and how only spending cash really helped us stick to our budget. We were paying down debt, had built up our emergency fund and were no longer having to stress about any bills that came our way.

The Easier Cash Envelope System, Dave Ramsey

However, I hated. I mean hated having to get cash every few weeks and then having to carry it around with me. Not that we lived in an awful, crime-filled town, but I just didn’t like it. I came up with an easier cash envelope system not too long ago and it has been working beautifully. We switched our cash for debit cards and now have multiple bank accounts to work from.

I would highly recommend anyone wanting to tackle their budget to setup multiple accounts. It really has streamlined the way we run our household and has made everything so much easier.

In your budget you (should) have multiple categories for expense, right? So why not do that with your bank accounts? It makes sense to actually separate out your money just as you do on your budget.

You might be asking yourself….

How do you track multiple bank accounts?

Well, it’s really not that hard and not any different than tracking one. Actually, it makes seeing where your money goes a lot easier. On our budget we have a category for each group of expenses: food, misc. bill paying, emergency fund, tax, etc. Then we have a bank account for each category.

I found that when we had one checking and one savings account it was harder to track our spending. We would have to go back to add up how much we were spending on eating out, how much on gas, how much we were saving, and so on. Now, the charges are separated out.

We track our accounts online. One our banking website there is a master dashboard that we can access each account. So it’s nice to login and see what’s been spent out of each account. So much easier to track then having to dig through our budget and check register each month to add up the totals.

If your accounts are not with the same bank then I recommend using mint.com to track your spending. This free online platform will help track your spending and categorize expenses that are similar. It even has pie charts and graphs to help you visualize how much you’re spending in each category. You can input your debt to track how you are doing on paying off your bills. It’s pretty handy.

Does having multiple accounts hurt my credit?

No. Unless you don’t pay your bills and overdraft your account(s). That will hurt your credit. But if you’re careful with your spending and make sure you never draw out more than you have, then you will be fine.

Does it cost money to open multiple accounts?

If your bank charges you to open multiple checking and/or savings accounts then you need to switch banks. When we opened ours there was one rule – keep a minimum of $100 in your savings account to avoid any penalties. Other than that, we could open as many accounts as we needed. We just know that each savings account has to have a $100 balance at all times. So we deposited $100 and treat that has our new zero balance amount. It’s nice because we also have an extra few hundred dollars that we don’t use or try to tap into.

Here’s the Multiple Bank Accounts Your Family Needs:

multiple bank accounts

Emergency Fund:

Just as it sounds – this savings account is for emergencies only. Not weekend trips out of town or new shoes you saw online, but emergencies. I’ve shared how our emergency fund really helped us when we woke up to a broken fridge one day. If you follow Dave Ramsey, he suggest starting with $1,000 emergency fund. Which is a good number to start with. If your car breaks down then you will have some money to get you going again. If your heater goes out in the middle of winter then you will be able to have the repairman out to fix it and not have to cut into your house payment or grocery money.

J and I like to have enough to cover our deductibles in our emergency fund just in case anything should happen to us. That way if we’ve been in an accident then we will be able to get our insurance going while we figure out what to do.

Once you have most of your debt paid off (everything, but your house) Dave Ramsey suggest bumping your emergency fund up to 3-6 months worth of living expenses. That way if you or your spouse lose their job then you will not have to disrupt your family life while you try to find more work. I’m a firm believer in having 6-12 months of living expenses saved up. Anymore than that then I feel like you’re not having your money work for you. Any extra money should be placed in some sort of interest-bearing account (IRA, money market, retirement plan, etc.) and should be helping you reach your long-term goals.

Tips for building your emergency fund:

Have the money withdrawn automatically from your checking account into your savings account. I recommend having this setup the day your paycheck hits your account so you won’t even miss the money.

If you have a habit of withdrawing money from your emergency fund for non-emergencies then move the account to a separate bank. That way you can’t login to the online portal to transfer money. You have to actually make an effort to do so. There are online bank accounts that give a higher interest rate and when you need to withdraw money it takes a few business days to get to you. Online bank accounts are great if you’re passed the $1,000 emergency fund stage. But when you’re just starting out I would recommend keeping the funds within a car ride of your checking account.
Save at least 15% of each paycheck or more until you reach the $1,000 emergency fund level or your selected amount. Once you have reached the first phase amount then start putting extra money from your paychecks to paying off debt.

Tax Savings

Taxes are apart of life. You can’t really avoid it. This tax savings works for both income taxes that are due in April as well as personal and real property taxes that are due in December. Your state might be a little different on personal and real property taxes, but ours are due by December 31st of each year.

I take our previous year’s amount, add 3% for any increase that might happen then divide by 12 months. So if we pay $1,000 in personal and real property taxes in 2015 then I would add 3% (1000 * 1.03 = 1030) then I would take our new amount of $1,030 divided by 12 (1030 / 12 = 85.83). So each month I put back $85.83 so that by December 31st I will have enough to pay for our county taxes.

For income tax time, the goal is to not owe anything and to not get a refund. That’s the magic formula, but it’s hard to achieve every year. So I like to have a little put back just in case.

I also use this account for our home insurance that’s due in July. I take the amount and divide it by 12 then put that amount into this account to cover that cost, too.

Dave Ramsey envelope system

Family Checking

This account is our hub. All of our income comes into this account. Most of our bills are paid directly out of this account. I have our car payments, internet, utilities, car insurance, and any other bill setup to automatically draft out of this account.

This is where your money starts and then is allocated to other checking and savings accounts for the family to use. I make sure that we keep enough to pay all of our bills and then transfer our miscellaneous spending., food budget, savings, etc. to our individual accounts.

Family Checking Tips:

Setup auto-pay when possible to avoid any late payments and penalties.

Setup auto-transfers into your savings accounts to streamline those transactions.

I recommend spending your money on paper first in your budget then start moving money around in the actual accounts. Any money leftover should be kept in this account until the end of the month. Then the extra money should be allocated to savings or any other fund where it’s needed.
You need to keep enough in this account to cover your monthly expenses.

Make sure your bills are paid first before you allocate to any miscellaneous accounts.

Wife’s Checking Account

This is my account – I can spend my money however I want. I pay for any haircuts, girls’ trips, shopping, etc. from this account.

Once our monthly bills and savings are taken care of I allocate money from our family checking account to my checking account. I even have it titled with my name on our banking dashboard so it’s easy to follow. I get to spend this money however I see fit. I can spend it, I can save it, whatever I want. I don’t have to talk it over with J before I purchase something.

When the baby comes, we plan on using my account to cover any non-grocery item costs or daycare costs. Meaning when he gets older, I will cover his haircuts and so on.

This account should not include any family expenses – utility bills, car payments, etc. You can add extra responsibilities to this account, if it fits your family’s needs. Here are a few examples:

  • Groceries, if you do all of the grocery shopping then you can add that budgeted expense to the wife’s checking. In our family, I do most of the shopping but not all. So we have a separate account for groceries and eating out.
  • Gas for your car. You can add extra funds to cover gas for the month.

Husband’s Checking Account

This one is very similar to the wife’s checking account, but is for J. He can spend this money how he sees fit. As I shared in our easier cash envelope post, J likes to carry his cash with him. So that’s up to him to get. I transfer the amount on payday and then from there it’s on him. I no longer have to worry about it.

Tip for both Wife’s Checking and Husband’s Checking:

Add up any expenses you want to be covered from these accounts. For example, J bowls on a weekly league. So we make sure the amount for each week is going to be covered by his miscellaneous account. That way he is responsible for keeping at least how much he needs for bowling in his account. There is no double dipping in our Family Checking to cover the cost if he didn’t spend wisely.

Grocery Checking Account

This one is simple – it’s our grocery and eating out fund. You can add this amount to your Wife’s Checking account or the Husband’s Checking account, but we found that it didn’t work best for us. I do majority of the grocery shopping for our family, but sometimes J will go for me or will stop to pick up something. So by having a separate checking account then he doesn’t have to cover an expense not in his budget or vice versa.

For awhile I would just let him take my debit card for my checking account, but we found out quickly that it wasn’t going to work. He would spend more than I wanted to and I would be without money for other plans.

Now I transfer our grocery and eating out budget to this account twice a month. We can either spend the money on groceries or spend the money on eating out. Either way it has to last us and provide for our food.

Having a separate grocery checking account just made sense for us. It’s not for everyone and that’s okay.

Optional Accounts:

multiple bank accounts

Slush Fund

Once you have your debt mostly paid off, you have your emergency fund built up to cover 6-12 months of living expenses, and you’re putting money away for retirement then I would recommend a slush fund. This is where you put extra money from each month that your family can spend on whatever you want.

Right now whenever J and I want to take a trip or purchase something big we save for it. It may take us a few weeks or even a few months, but we work as a team to put money aside to get what we want. However, one day we will have a slush fund.

A slush fund could also be call the fun fund. Want to take a weekend trip on a moment’s notice – use the slush fund. Want to head to the water park on a hot day – use the slush fund. Once our little one is here, we might enact a slush fund a little early just so we can do fun stuff together as a family. But trust me, it won’t be costly. I feel that debt should be paid off, savings should be built and you should be putting away for retirement first.

Health Savings Account (HSA)

If you can setup an HSA then I would recommend it. J and I don’t have one and so far, haven’t had a need. My old employer offered a Health Savings Account so I took advantage of it then. But with Obamacare and Insurance changing on a daily basis it’s hard to know keep up with the rules. Make sure you do your research on HSAs before starting anything.

HSAs are great if you have a high-deductible insurance plan. HSAs cover any medical costs that are not covered by your insurance. HSA money is tax-free and can add up for larger families with high-deductible insurance.

DO YOUR RESEARCH ON HEALTH SAVINGS ACCOUNTS THOUGH.

Child Savings Accounts

We don’t have to do this yet, but we will soon enough. Most banks offer a child savings account – our bank calls it a Looney Toons Savings Club. Each bank is different so look on their website or ask a personal banker the details.

I propose opening an individual savings account for each child in your family. It will help teach them how money works and can help teach them to save for something they want. My parents did it for me and I just loved going to the bank with my mom to deposit my savings.

My parents had a weekly allowance that I could earn. I had to complete simple tasks to even qualify for any money – make my bed and straighten my room. Once those were done then I could do extras to earn cash. I could bring in the trash cans from the street, empty the dishwasher, dust, etc. I earned a certain amount for each chore. At the end of the week it was payday. We would add up how much we made, then we put 10% back into savings and 10% into tithing.

About once a month, mom would take us to the bank and let us put our savings into our very own account. I just loved seeing how much money I had and watching it grow – it might be why I work as a financial advisor these days. Money just fascinates me!

That’s the checking and savings accounts I have and would recommend to your family.

Getting your money in order can be super beneficial to you. It can really make budgeting and tracking your money easy. Your goal for your money should be to have it work for you!

Let me know how having multiple bank accounts works for you and if you’ve found anything easier. I love to know!

New Reader?

Welcome to merelynne.com.  I’m Meredith Rines and I share tips and ways to help make finances easier for you and your family.  No matter your income level, amount of debt or goals there is a simpler way to handle your money.  I’m a financial professional who loves helping families reach their goals.  Money can be your biggest tool to help you, but you have to know how to use it right.  My mission is simple – get out of debt and spend wisely so you can do more for your family.

What you can expect from merelynne.com – posts that help families break down their spending habits, learn new techniques to save money and to get out of debt, and have fun in the process.  I love being able to help others understand how money works and it’s my passion to share what I know with others.

There’s more than just this blog.  I also have a Youtube channel where I share quick videos on budgeting, ways to save money and some mommy blog topics.  I’d love for you to head over there too and check out what I’m sharing.  

Take a look at some of my most popular posts:

Finances

Budget Checklist download

One of my all-time reader favorite posts is how to create a budget in under 10 minutes.  This one trick can save you so much time on getting started.  Plus, I’m a huge fan of the cash envelope system to help you stay on track.  My husband and I are such big fans, that we created the easier cash envelope system that works for us and might work for you, too!

how to use the cash envelope system

Food

pizza inn chocolate chip dessert pizza recipe

As a true foodie, I live to eat.  But I don’t live to prepare recipes.  Easy-to-prepare dishes are my go-to.  Check out my cheesy chicken noodle casserole recipe for a treat your whole family will love.  I’m a huge fan of recreating leftovers to save money.  This pizza recipe takes the cake on finding creative ways to use leftovers.  Plus, the next time you head to a pot luck, try your hand at this copycat Pizza Inn Chocolate Chip Dessert.

Life Tips

how to rock your job like a boss

Sometimes I like to get to the root of everything.  What makes you a better boss or employee?  What can you do now to help you become more successful?  These ideas have led to countless posts to help you.  Check out how to rock your job like a boss on how to impress your employer.  I’m also a fanatic about time management and how to become more efficient with your time.

Free, exclusive email content.  Before you jump in feet first, take a minute to sign up for my free email, which has content you won’t find anywhere else.  Plus, as a bonus I will send you my go-to guide on how to cross stress off your to-do list.  

Subscribe to our mailing list

* indicates required


To read more about me, go here.  If you would love to work with me one-on-one to get your finances in order and to start getting out of debt, check out my work with me page.  I’d love to chat!

DIY Dryer Balls – How to Save Money on Laundry

DIY Dryer Foil Balls, diy dryer balls

To go along with our Focus on Finances this month, I’m sharing a tip on saving money with your laundry.  This one little tip can really add up the savings!  These are the easiest DIY dryer balls you will ever see! Hands down!

This past weekend I decided to really catch up on all of our laundry.  When I say really catch-up that means run close to 6 loads in one day.  For two people that’s a lot.  Now if you have several children and they all play sports or are just kids then you may feel 6 loads is an average.  But around our house, 6 is a lot.  

DIY Foil dryer balls, save money on laundry, diy laundry balls

What can 2 people dirty up in one week that requires 6 loads of laundry?  Well… let me tell you…

I did our clothes, J’s work uniforms, sheets and towels, blankets from our bed, blankets from the couch, and rugs.  I probably could have broken up our clothes into at least 2 loads, but our new washer is the best.  We just purchased a brand new washer from Sears.  It is the first new washer I’ve ever owned.  I’ve always had hand me downs, which was great!  They were free and did the job just fine.  But now that I’ve had the taste of what a new washer is like… boy! I can’t wait to get a new dryer to match!  This new washer really holds a lot, especially compared to the little guy I had beforehand that got me all the way through college.

By the end of the day, our clothes were full of static.  It didn’t help that I had been going non-stop and the fact it was barely 30 degrees outside all day.  Whenever the temperatures drop, the static goes up in our house.  I have been researching like crazy on a way to handle all of our static electricity without adding too much to our laundry costs each month…

how to save money on laundry

Let’s be honest, when it’s 30 degrees or even when it’s 90 degrees, I am not going to hang our clothes on a line to draw.  During the summer months, we have too many mosquitoes and the last thing I want is to give them a landing ground that will end up inside.  Plus, I’ve never hung clothes on a line.  Sure, we hang our nice clothes up to dry, but not t-shirts and towels.

I think I found it… I found the solution…

Foil dryer balls.

DIY Dryer Foil Balls

I’ve seen the wool, felt balls all over Pinterest and they look great.  But let’s be honest for a minute, I am not going to take the time to make them.  It’s just going to happen.  I need a quick-fix.  Plus, I don’t have the yarn I would need to make these amazing dryer balls and I’m frugal… so I like using what I have on hand.

Enter in…

Foil dryer balls.

What?!!?

You read that right!  I am now using foil dryer balls in my dryer.  They work great!  I did some research to make sure I wouldn’t be starting a fire by putting foil in my dryer.  After reading about it, I realized that it would be safe.*  The dryer hose is foil, right?  I gave it a try and I’m in love.  

Here’s what you need for foil dryer balls:

a few sheets of foil

tennis ball (optional – see below why you may want one)

make your own dryer foil balls

If you want to just use foil, then wad one piece of foil into a ball and then wrap the other sheets over it to make it a bit bigger.  The foil dryer ball will last quite awhile so there isn’t a need to replace after every cycle.  These will really, really help with static cling.  Especially right now with the weather getting colder and the air getting dryer, I’ve noticed most of our loads of laundry are full of static electricity.  

dryer balls

Ever since I started using the foil dryer balls, our static issues have vanished.  

Why is a tennis ball optional?  Well let me tell you…

A benefit of the felt dryer balls is the weight.  The weight of the balls causes them to bounce around while the dryer is going, which helps make your clothes softer and fluffier.  So, that’s where the tennis ball comes into play.  

You can wrap a tennis boil with the foil.  Do several layers of foil.  They will hold up in the dryer and provide the weight you need to get your clothes and towels extra fluffy.

Soft and fluffy cloths aren’t really a necessity in our house.  I hang-dry most of our nice clothes and I don’t really care if our bath towels are extra fluffy or not.  But it is a great option that’s still inexpensive.

I bet you will notice a difference when you start using foil dryer balls in your dryer.  I did!
*please do your own research to make sure.  Just because it worked for me, I don’t want anyone blaming me for any mistakes.

My Baby Boy

Dear My Baby Boy,

I can’t wait to meet you, but take your time.  I may be in a rush to see your face, hold you and count your toes; but I don’t want you in a rush to come any time soon.  You still have awhile to grow and develop, so take your time.  

I haven’t even met you yet, but you are my greatest accomplishment.

a letter to my baby boy

It’s no lie that pregnancy hasn’t been my thing.  I was sick, very sick for a long time.  I might be tired a lot and I may not always do the ‘perfect’ thing, but please make no mistake – you are the best thing that will ever happen to me.  You are worth every uncomfortable adventure I’ve faced these past few months.  

Your dad and I can’t wait to show you the world.  To teach you and to learn from you.  You may not realize what all you will teach us over the next period of our lives.  We may not do everything right or by the book, but you have to realize that we are learning and doing the best we can.

We promise to protect you, but give you wings to fly.  We will support you, but also keep you grounded.  You will be the apple of our eye, but you will not come between the love we have for one another.  Your dad and I are best friends, we chose each other out of everyone else in this world and we have promised to love one another and support one another for the rest of our lives – and we plan on doing this.  But please understand – we would do anything for you.  We would go without so you can have plenty.  

As your parents it’s our job to make sure you know just how special you are, but also how hard you have to work to get anywhere.  We plan on showing you the ropes, but allowing you to learn and make mistakes along the way.  We will guide you through the hard times, but we’ll give you the space you need to learn right from wrong.  

We know, because we’ve been there, that you can do anything you set your mind to.  We want you to feel accomplished in your life – not by the amount of money you make, but the happiness you feel in your heart.  

We will cherish every moment we can with you and promise that you’ll be our little boy for the rest of our days – even though you will hate being our baby at some point in the future.  When that day comes, we will respect the man you’re becoming but just know that it will be hard to not see you as our baby.  The one we prayed for, stayed up late holding, and answered thousands of ‘why’ questions for.  

I know you’re still inside me, growing and kicking (a lot), but I can’t wait for our life as a family of three (with three dogs, of course!) to begin.  Take your time, just because I’m anxious to meet you doesn’t mean you’re ready to come into this world just yet.  I will be patient.  I have a feeling you will be testing my patience a lot for the next portion of my life.  I’m okay with that.  I just want to be the mom that I know you deserve.  

Financially Preparing For Baby

How to financially prepare for your new baby.

The other day J and I were having our usual discussion of going out for dinner or staying in.  I know I’ve said this a hundred times…once I’m home then I hate getting back out, but I hate cooking even more!  

After some serious thought and way too much time, we decided to stay in.  Really the thought process went like this…

J: What’s for dinner?
Me: I don’t know.  What do you want?
Me: I don’t want to cook and clean, that’s for sure!
J: Well we could go out.
M: Yeah, but I want to eat for cheap – like less than $20.
J. Well I don’t want fast food.  So what do we have here?

There you go… I’m stuck on how much we spend and J doesn’t want crap food.  So we stayed in and cooked.  We cooked dinner together and then worked on the dishes together.  It was a win-win-win.  Win because we didn’t spend any money since we used what we had.  Win because he had a healthy dinner.  And win because I didn’t do it alone.  

These small thought processes have overtaken us lately.  As we’re preparing for the baby to arrive, we’ve been thinking more and more about money and teamwork.  We’ve been taking a few steps here and there to prepare.

As you probably can tell, the theme for February is Focus on Finances.  So today, we’re focused on financially being prepared for our soon-to-be baby boy.

I want to share how we’re financially preparing for baby with a small budget.  

I mentioned a few weeks ago how we were making small budget changes since the beginning of the year, but I wanted to dig deeper into a few areas that are going to make a huge difference.

habits for a better life,

When we put together our master budget back in January, we talked about how our lives were going to change with a little one around.  We knew that we would have late nights, long days and be overwhelmed at the beginning.  We really have no idea what to expect.  The one thing we did agree on is…

…we do not want to be thrown a financial curve ball when we’re lacking sleep.

So to overcome this fear, we started budgeting as if the baby was already here.  We had two reasons for this:

  1. we didn’t want to face a financial hardship from our lack of planning.
  2. we wanted a financial plan for our money since we are going to have another person to care for and provide for.

Here’s what our budget looked like back in January – I have changed some of the numbers because, well, that’s private.

You will see two categories that may not make sense for a couple who doesn’t have a baby yet.  Those are Groceries & Diapers and Daycare.  Both of us will be working full-time so it’s important we find a daycare for our little guy.  

We estimated the monthly increase to our grocery budget to cover diapers, wet wipes, and such.  That way we could have a more accurate budget to go off of.  Then after researching we discovered a daycare we liked and found out how much their weekly charge is.  We figured by adding these expenses in now then we can start to learn what are spending will look like.  

Honestly, I didn’t want to wake up one more out of diapers and not have the money in our account to go by them.  That was a huge fear for me.  

As a team, we decided to add these estimated expenses to our budget so we could be prepared.

Here’s what you need to do to add in your future expenses:

  1. Take an educated estimate of what the expense will be.  Call around to get an idea of what it’s going to cost you.  You may have to think outside of the box for any expenses you have coming up.  For us it was daycare and a dog sitter.  We knew when we traveled to visit family we probably wouldn’t be able to bring our 3 dogs with us the first few trips.  So we factored in the increase cost of boarding into our budget.  
  2. Figure this estimated cost into your monthly or weekly budget at least 6 months before the expense will start.  This way you can get a feel for how it’s going to effect your budget.  Now if you find out the cost is too much for what your income and other living expenses are then you can make any changes, find a less expensive option or see if it’s really worth doing.  At this point you can also weigh other expenses you’re paying for to make sure they are still worth it.  For instance, you’re budgeting for your newborn baby’s formula costs and learn it’s going to be a little too tight for comfort around the end of each month.  Well maybe at that point you decide to lower your cable package to free up some cash at the end of the month.  Small changes will make a huge difference.  In the end it’s all about educating yourself before the stress of a newborn comes.
  3. A great tip is to physically transfer the money from your checking account into a separate savings account.  This way your checking account will be accurate with your anticipated new expenses and you won’t feel tempted to spend money earmarked for a future bill.  We transfer ours into our emergency fund because we know the account is off limits except when there is a legitimate reason.  By placing the money into your savings account you will quickly build an emergency fund for those unexpected needs after your baby arrives.  

I also recommend building your emergency fund to $1,000 plus what your insurance deductible is going to cost.  A few weeks after your baby arrives you will start to receive your hospital bills.  Luckily insurance will cover majority of the cost, but you could still be liable for a hefty deductible.  Most deductibles range from $500 – $1,000 per person in your family (ours is $1,000 per person with a $5,000 family deductible).  You will feel a huge relief by having an emergency fund of $1,000 (for those unexpected emergencies) and with an extra $1,000 to cover your insurance deductible.

To be able to save this extra money before the baby arrives, you can use a Sinking Funds Spreadsheet. It’s an a simple tool that gives you a clear view of what categories you need to be saving for and how much you should be putting aside each month to reach your goals.

After we added in the necessities into our budget, we started to look at items that we knew we would need versus the items we just simply wanted.

Needs vs. Wants

  1. Crib – to me a crib is a need.  Sure you can make due with a less expensive bassinet, but for us a crib makes more sense.  We know we want our little guy to be in his own bed starting at a young age.  Plus our bedroom is small and there will not be room for a bassinet or a pack-and-play next to it.  We have seen talk about a Dockatot and are curious about those.  It might be something to invest in (or ask for as a gift), but we will cross that bridge later.  So we plan on investing in a crib that will eventually change into his toddler bed.  We have done research and our deciding on a crib from Walmart.  We asked for one from my parents and they are amazing, so we are getting one.  We chose from Walmart because it will be easy to exchange if something is missing from the box (since we live in a smaller town), plus they have the best price.
  2. Car Seat – again, this is a no brainer.  We must have a car seat and I want one that is rated high.  We found this car seat from Chicco and fell in love.  It is rated very high on Consumer Reports for crash protection, which was vital to us.  It’s important to research safety items for crash protection, ease of use and just overall satisfaction.  That way you know you’re getting a quality piece that will last for a long time.
  3. Breast Pump – I do plan on breastfeeding so I know a breast pump will come in very handy for when I go back to work.  By doing some research I discovered how to get my breast pump for free and I highly encourage you to do the same.
  4. Swing – I go back and forth on whether this is a need or want.  Deep down I know it’s a want, but I realize just how much easier a swing will make things around the house.  So I plan on asking for a swing for one of my baby showers and hopefully we will get one.
  5. Changing Table – We have a dresser in his room that is packed full of all his goodies.  So in my mind I will be using this dresser as his changing table.  I do not see the value of investing in another piece of furniture as a changing table.  Sure they may have compartments and drawers specifically for diapers, wipes, and creams; however, this is one area that we can cut our costs.
  6. Special Bottles – Unless our little guy has bad gas, I don’t plan on purchasing expensive bottles.  I have heard good things about Dr. Brown’s and their price is comparable to other bottles I found at the store.  I think these can be good transition bottles from a newborn to older since they have interchangeable nipples for older babies.

Breastfeeding vs. Formula Feeding

We plan to breastfeeding and am hoping that it works out for us (my take on breastfeeding vs. formula feeeding).  I think breastfeeding will be a huge money saver.  Not only is breast milk like liquid gold, but it’s also free.  If you have a small budget then breastfeeding is the way to go!  However, if you decide not to breastfeed or can’t then DO NOT feel bad about it.  The end goal is to have a healthy baby, so either way you get nutrients into their system is fine.  If you decide not to breastfeed or find out you can’t, you just need to take the steps from above to add the expense into your budget.

Cloth Diapers vs. Disposable Diapers

For us we understand the added expense of disposable diapers, but this is the route we are still going to take.  If you want to keep your budget with a little room then cloth diapers may be the way to go.  However, we feel like we can make it work with disposable diapers.  A lot of moms feel that cloth diapering is great and they love how it saves money, but that’s a personal preference.  I like the ease of disposable and that draws me to them.  My mother-in-law did tell me how when her twin boys (my brother-in-laws) were younger she received a subscription for a cloth diapering service.  I think it was for the first year.  This service would take away old diapers and bring new ones each week or so.  I can imagine a service like that being invaluable and it might be worth it to add to your budget if it’s an interest.

Baby Clothes

One of the easiest ways to save money is on baby clothes.  If this is your first baby then chances are you will be receiving lots of clothes from your baby showers.  It seems clothes are one of the most gifted items to expectant mothers.  If you need to fill in any gaps then buy USED.  Consignment stores and yard sales are a great place to buy quality pieces at a huge discount.  You may even be able to negotiate a lower price at a yard sales, which means even more savings.

Also, another way to save on clothes is if you have any good friends or family members who have recently had a little one.  You can borrow the clothes their baby has outgrown.  Hopefully the seasons will line out so it makes it easier on you, but even then you can probably make most of the outfits work even if the season is wrong.  Because I don’t think it matters if you’re little one is wearing a Valentine shirt in March.  If it fits then don’t worry about it.

Finally, you will want to reevaluate your budget once your baby has come.  This is a great tool to get your new budget categories added, but reality could be much different.  I created a recap of how this preparation really helped us after our little guy was here.  We did a lot of things really well, but we didn’t fully capture everything we should have.


Just remember this technique can work for just about any big life change you have.

That’s what’s so great about it!

Getting ready to move?  Take a look at what changes in income, if any, you’ll be facing.  Have you looked at what the living expenses are going to be?  There is so much to consider when planning a move…

rent increase (or mortgage)
insurance increase
grocery increase
gas for your (will you be driving further to get to work?)
and many, many more

Maybe you’ll be lucky and there won’t be any increases.  Maybe the clouds will open up and you will actually have a decrease…

What about thinking of quitting your job to become self-employed.  You need to really think about what your realistic income will be and try to start living off of it.  There are some great articles out there on preparing to become self-employed.  I really liked the one “How Much to Save Before Quitting My Job” by GoGirlFinance.  

The biggest thing you have to do is plan it out, think it through and then commit.

Buffalo Chicken Manicotti Recipe

stuffed chicken manicotti recipe

O.M.G. This Buffalo Chicken Manicotti has to be one of J and mine favorite meal.

It’s sooo good.  I mean, seriously, it’s that good.  I love pasta and J doesn’t so for me to get my pasta fix I usually have to find a way to add some kick to it.  Then he’ll be happy.

I made a buffalo chicken lasagna roll-up not too long ago and it’s a very similar recipe, just different noodle.  I have to get creative to get pasta!  I’ll have to share that one with you at some point.  I used Simply Gloria’s recipe as a starting point and made my own tweaks to it.  I am not a big fan of having to purchase a ton of ingredients or having to spend too much time in the kitchen.  I actually made the recipe just as Gloria does and it’s delicious.  But this time around, I took a few shortcuts.  It was still just as good and J couldn’t tell the difference.

I am not a big fan of anything spicy, so I usually start out making a normal dish then divide it in 2.  I add buffalo sauce to J’s portion and keep mine as is.  They are both delicious – well J thinks the buffalo chicken manicotti is amazing and I think my regular chicken manicotti is to die for.  So at the end we’re both happy – he gets a kick and I get my carbs!

The other night I went to make some buffalo chicken lasagna, but I of course did not have the right pasta noodles.  I did, however, have some manicotti shells leftover from another dish.  So I had my bright light bulb moment and this recipe was born.

buffalo chicken manicotti

I start by poaching chicken and then shredding it using my KitchenAid mixer with the paddle attachment.  It’s so much easier and faster then trying to shred by hand using two forks.  I usually end up giving up after a few seconds and burn my hands to use my fingers.  So this way, I don’t burn myself and don’t have to have a lot of patience to get the job done.

I purchased jar Alfredo sauce (gasp! I know).  It was a lot easier and quicker to use then having to mess with making my own cream sauce.  I just heated the sauce on the stove and added in a bit more of pepper to taste.

Combine the shredded chicken, cream cheese, and mozzarella.  Once it’s mixed well divide the mixture into two.

buffalo chicken manicotti

In the second bowl add the buffalo sauce and stir well.  If you want the whole recipe to have buffalo sauce then go ahead and keep it all in one bowl.

Cook the manicotti noodles for about 5 minutes because it will finish cooking in the oven.  Drain and set on paper towels to remove any excess water.
buffalo chicken manicotti

This is the fun part!  A little messy, but so fun!  You want to take a spoonful of the chicken mixture and start stuffing into the manicotti shells.  You want to make sure they are stuffed to the brim.  Any excess pasta showing on the inside will just harden in the oven.  Do this with both the regular chicken mixture and the buffalo chicken mixture.
buffalo chicken stuffed manicotti, pan

Take a little of the Alfredo sauce and cover the baking pan.  Lay the stuffed noodles in the pan.  Once they are all placed, take the remaining Alfredo sauce and cover the pasta noodles.  You want to make sure everything is nice and covered to prevent them from hardening in the oven.  Plus the liquid will help the noodles finish cooking while it’s baking.

buffalo chicken manicotti

For the buffalo stuffed ones, I drizzle a little extra buffalo sauce on top before baking.  Bake for about 25-30 minutes at 350 degrees.

buffalo chicken manicotti

Ingredients for stuffed buffalo chicken manicotti:

12 manicotti noodles, cooked and drained
2 chicken breasts, poached and shredded
1/4 cup buffalo sauce (can add more or less to your taste)
1 jar of Alfredo Sauce
1/2 package (4 oz.) package cream cheese, divided
2 cups shredded mozzarella

Directions:

  1. Add manicotti pasta to large pot of boiling water, let cook for 5 minutes and then drain.  Place noodles on paper towels to remove any excess water.
  2. Heat Alfredo sauce on stove on medium heat.
  3. In large mixing bowl, add shredded chicken, cream cheese and mozzarella cheese.  Mix well
  4. Divide chicken mixture in half and place second half in another bowl.  Add buffalo sauce and mix well to combine.
  5. Put a spoonful of Alfredo sauce on bottom of baking pan and spread to cover.
  6. Stuff manicotti noodles with chicken mixture – half with buffalo chicken mixture and the other half with the regular chicken mixture.
  7. Spread remaining Alfredo sauce on top.
  8. Bake for 25-30 minutes at 350 degrees.

My Fiverr Experiment

fiverr experiment

Fiverr. Here we go!

Ever wonder how those blogs make so much income every month?  Well I do.  I am trying hard to figure how they make affiliate income, how they are able to get guest posts opportunity and so much more!  So I am going to work really hard this year to make this blog profitable.  Now I don’t want to sell my soul and I don’t want to create so much work for myself that I end up hating blogging, but I am curious how it all works.  I’ve been spending the last month researching and reading so I can learn how it’s done.  I know I need to take baby steps and that’s my plan.

The first experiment I am going to try to start making a little more income is with Fiverr.com.  I have setup my first gig and have started promoting it across my social media.  I also have been reading other blogs about their Fiverr experience and think I am ready to see what I can get from it.

Here is what I plan to do on Fiverr:

Here’s what I can’t do (at least right now):

  • I don’t have a fancy, high-dollar budget to actually spend on promoting my gig either on Fiverr or Facebook, so I will have to wait until some income comes in before that’s a possibility
  • Be too cheesy.  I know a lot of bloggers recommend reaching out to people in your network or social media that could benefit from this, but I just can’t get myself to do that yet.

What ways are you making extra income on the side? I’d love to know!  Write a comment and share!